Description
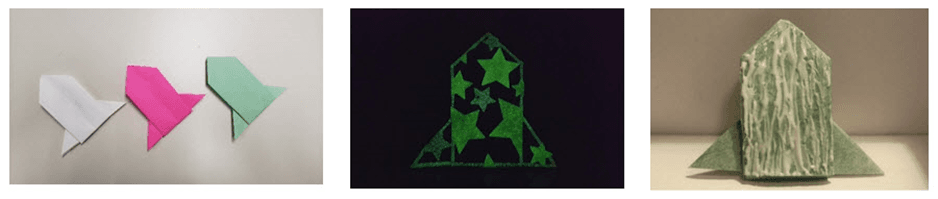
Participants will create their own origami rocket and decorate it
Number of Participants
For any number of participants
Space Considerations
An indoor space where participants can be seated to do a craft
Competencies
- Creative expression
- Eye-hand coordination
- Following directions
- Logic and sequencing
- Spatial relationships
Materials
- 8.5” x 11” paper
- Crayons, markers or pencil crayons
- Pencils and erasers
- Liquid glue or glue sticks (optional)
- Projector and screen (optional)
- Microphone (optional)
- Tactile elements (optional)
- Foam shapes
- Foam stickers
- Googly eyes
- String, twine, yarn or ribbons
- Stickers
Preparation
- Print origami rocket instructions with images for participants to take away
- We recommend making this available after you instruct, as some participants will finish quicker or get confused if the instructions are handed out ahead of time
- Set up screen and projector (optional)
- Set up a microphone (optional)
Implementation
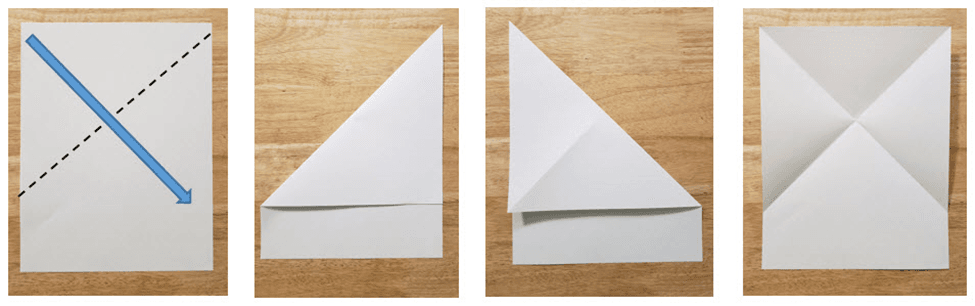
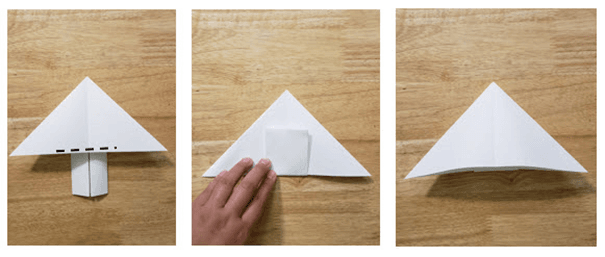
1. Fold top left corner diagonally to create a triangle, then unfold. Do the opposite side and then unfold. You should end up with an X crease (fold line) on the top of your page.
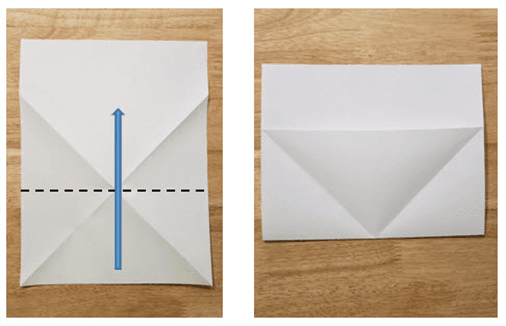
2. Flip the page over and turn it upside down. Fold the bottom of the page up, folding the X in half, and then unfold. Flip the page over and turn it so that the X is near the top again
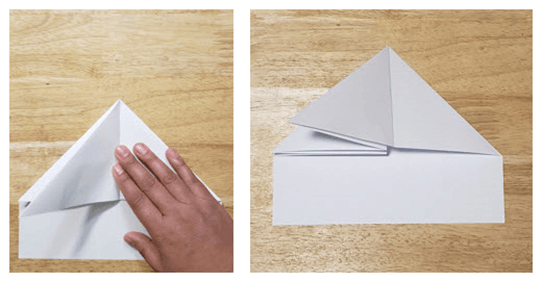
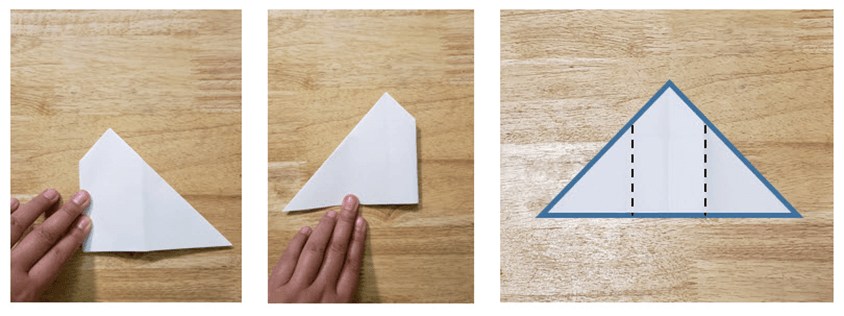
3. Press your finger into the X so the paper pops forward. Notice how the horizontal line crosses the two side triangles
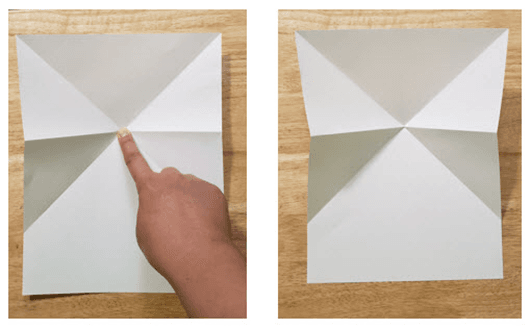
4. Use the horizontal crease line to fold the side triangles inward and the top triangle will automatically fold down. Your figure should look like a house with a triangle roof
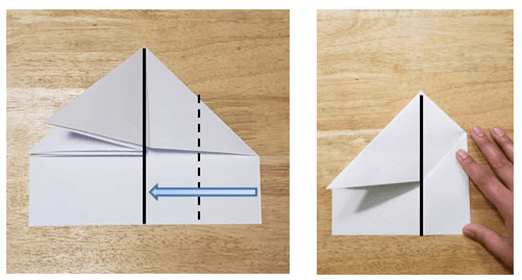
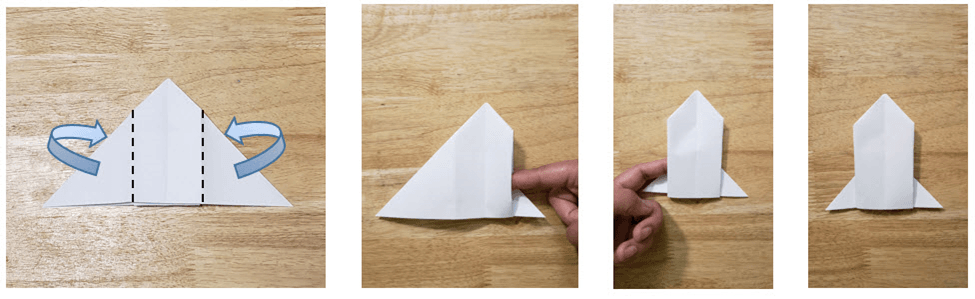
5. Take the top triangle on the right and fold it over to the left side
6. Fold the right-hand section vertically in half towards the centre so that the edge of the section aligns with the centre of the figure
7. Fold the right-hand section vertically again towards the centre, aligning the edge again
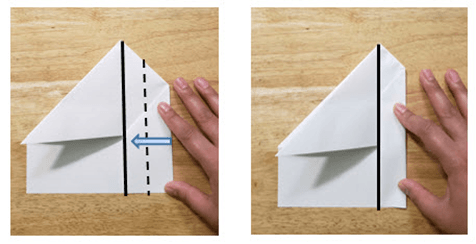
8. Fold the top two left triangle layers to the right side
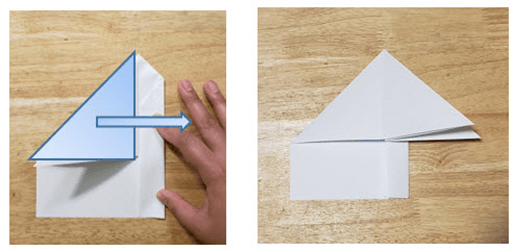
9. Repeat steps 6 and 7 on the left side

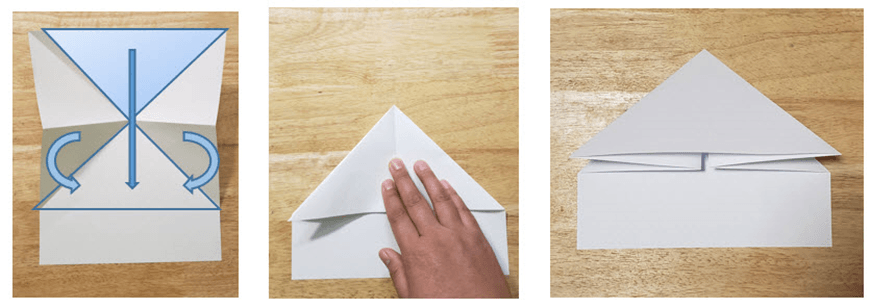
10. Take the top right triangle layer and fold it over to the left. Your figure should look like an UP arrow
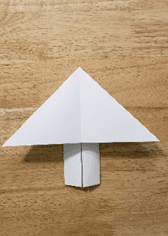
11. Fold the base of the arrow over the bottom of the triangle, then tuck it into the triangle pocket
12. Fold the left triangle behind the figure, using the base of the arrow to create a crease line, then unfold. Do the same to the right side
13. Use your pointer figure to tuck the right triangle into the side (pocket) of the rocket. Make sure that it is tucked all the way in so that the bottom edge of the triangle aligns with the bottom edge of the rocket. Do the same to the left side
14. Decorate your rocket as you like with colouring tools, stickers, glue or other tactile elements.
Accessibility Considerations
- Use 8.5” x 11” paper
- Go over steps one at a time
- Have an additional staff member on hand to assist
- Add tactile elements to the rocket
- Provide origami rocket instructions with images to take away
- Use a projector and screen (optional)
Book Suggestions
Grace Needs Space! by Benjamin A. Wilgus and Rii Abrego
Packing for Mars for Kids by Mary Roach
Where Are the Aliens?: The Search for Life Beyond Earth by Stacy McAnulty and Nicole Miles
Arcade World #4: Earth to Aliens by Nate Bitt and Glass House Graphics
Download Links
Origami Rockets Instructions PDF
Images