Description
Participants will create a (non-functional) pair of binoculars and make observations of objects and images in the space around them, using measurement skills and shape classification.
Number of participants
For any number of participants
Space considerations
An indoor space where participants can be seated to do an activity with an option to move to an outdoor space or a larger indoor area afterwards.
Competencies
- Fine motor skills
- Shape and pattern recognition
- Measurement and spatial awareness
- Critical thinking
- Observation and recording
- Scientific inquiry
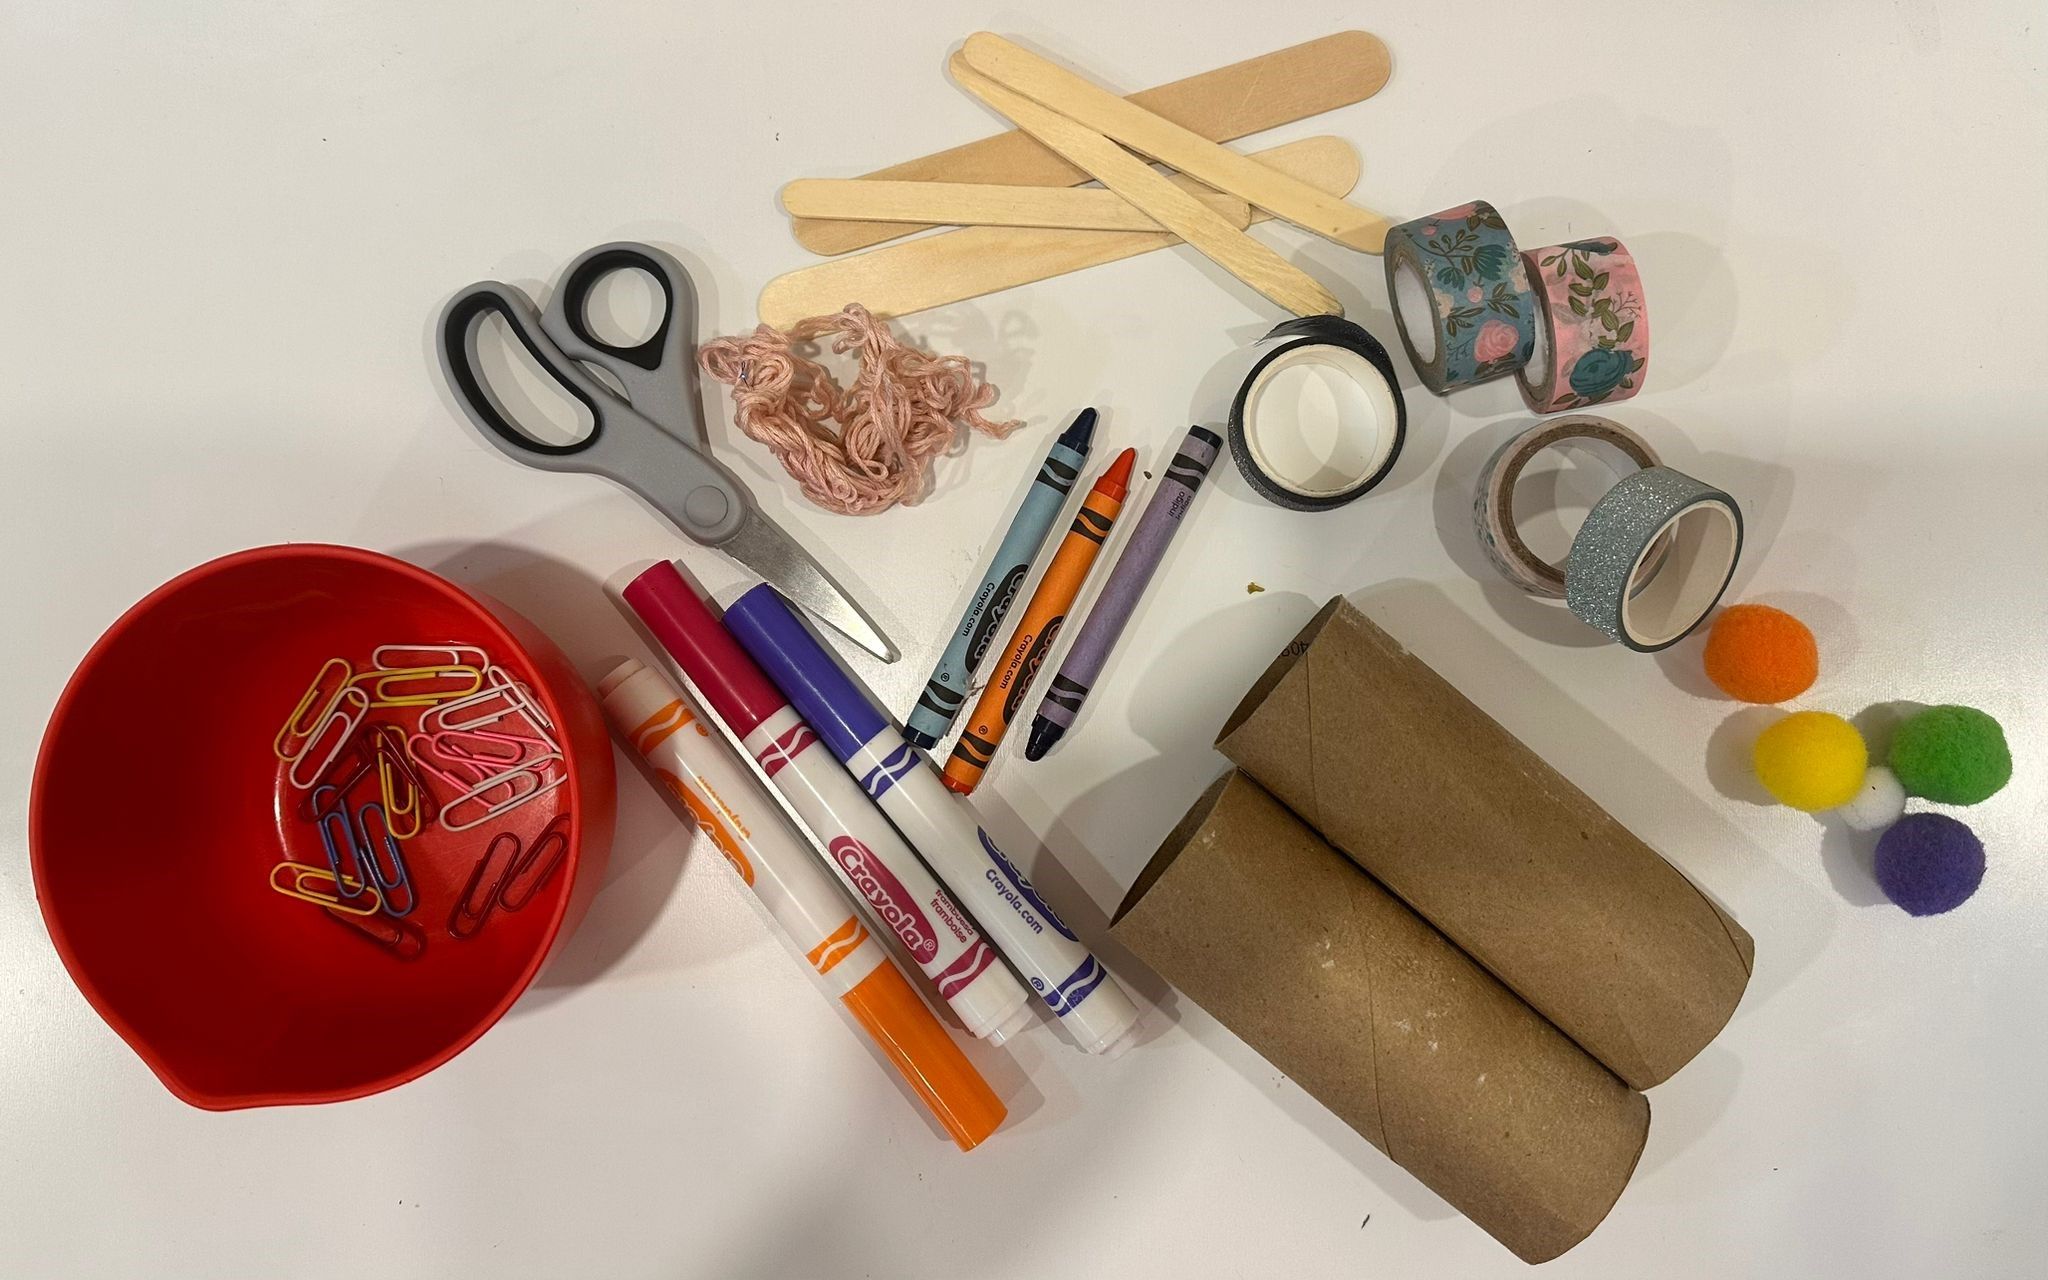
Materials
- Printout of templates and worksheets
To do the activity
- Small rulers or popsicle sticks as measuring sticks
- Bowl of paperclips (all sized the same)
- Pencils
- Clipboards (optional)
- Functional binoculars (optional)
To create the binoculars
- Cardboard or cardstock tubes
- Note: if collecting toilet paper rolls or paper towel rolls, please check with your library’s policies regarding using these items in a program.
- Colouring supplies:
- Crayons, markers, coloured pencils, paint (optional)
- Stickers, washi tape, coloured/construction paper, tactile decorations (foam stickers, pompoms, buttons, craft feathers, etc.)
- Tape (masking or clear/packing) or stapler
- One-hole punch
- Pencils
- String, twine, yarn or ribbons
Preparation
- Print and prepare all templates as needed:
- Polaroid observation worksheet
- Shapes worksheet
- High-contrast shapes and patterns
- High-contrast animals
- Cut and tape several high-contrast images around your designated space. Make sure they are not too far away from participants! Use low spots on walls, tabletops or other flat surfaces within reach.
- Prepare participants’ workspaces with cardboard/cardstock tubes and colouring and decorating supplies.
- Optional: pre-punch holes in the tubes to allow for stringing. Otherwise, participants can hole punch their own tubes or bring them to the facilitator as needed. Alternatively, string can be taped to the interior of the tubes.
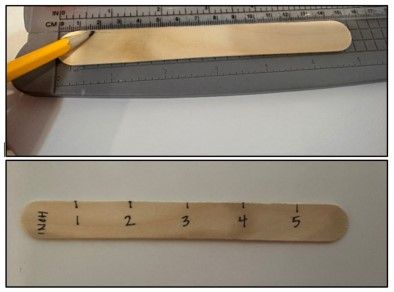
- Have rulers or popsicle sticks ready to hand out to participants or leave them near each high-contrast image for participants to use at that location.
- If using popsicle sticks as measurement tools, use a ruler to mark them with accurate inch or centimetre markings.
Implementation
- Explain what we use binoculars for: they are instruments that help faraway items appear closer. Ask participants for examples of situations where they might use binoculars.
- If available, have participants look through a functional pair of binoculars. This works best if you can use an outdoor space!
- Introduce the craft component: participants will use tubes and string to make their own “binoculars” and explore their space.
To make the binoculars:
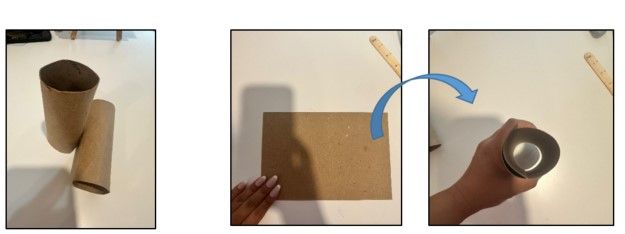
- Collect tubes (or roll them) so each participant has a pair.
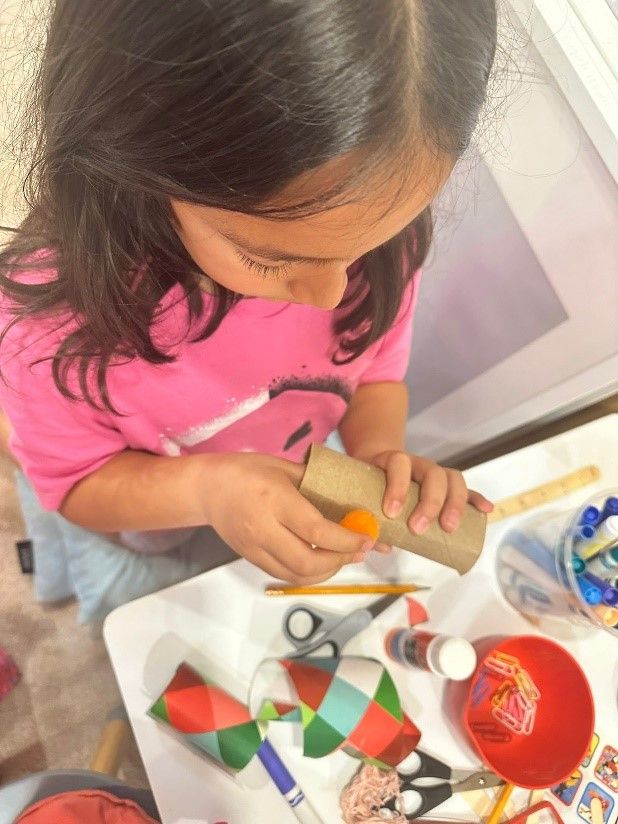
- Have participants decorate each tube individually before attaching them together. Use crayons, markers, stickers, tactile decorative elements, washi tape, paint, etc.
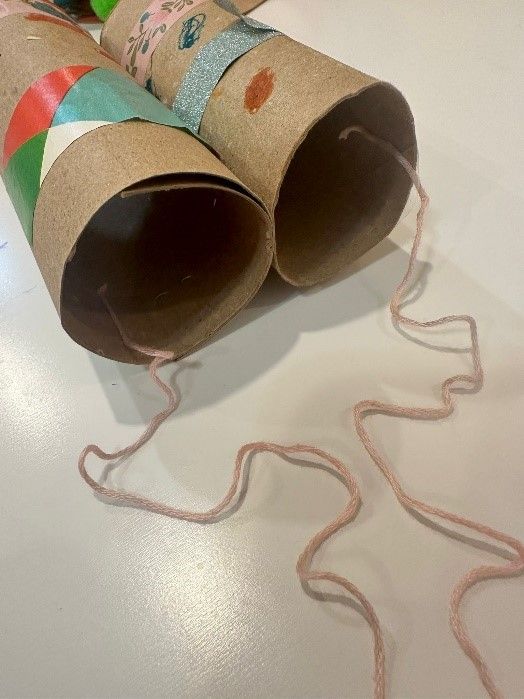
- Tape or staple two tubes together.
- Punch a hole in each tube on the side facing out.
- Tie one end of a length of string or ribbon through one hole. Repeat with the other side. You can also tape string to the insides. You should have enough string to loop around the participant’s neck comfortably.
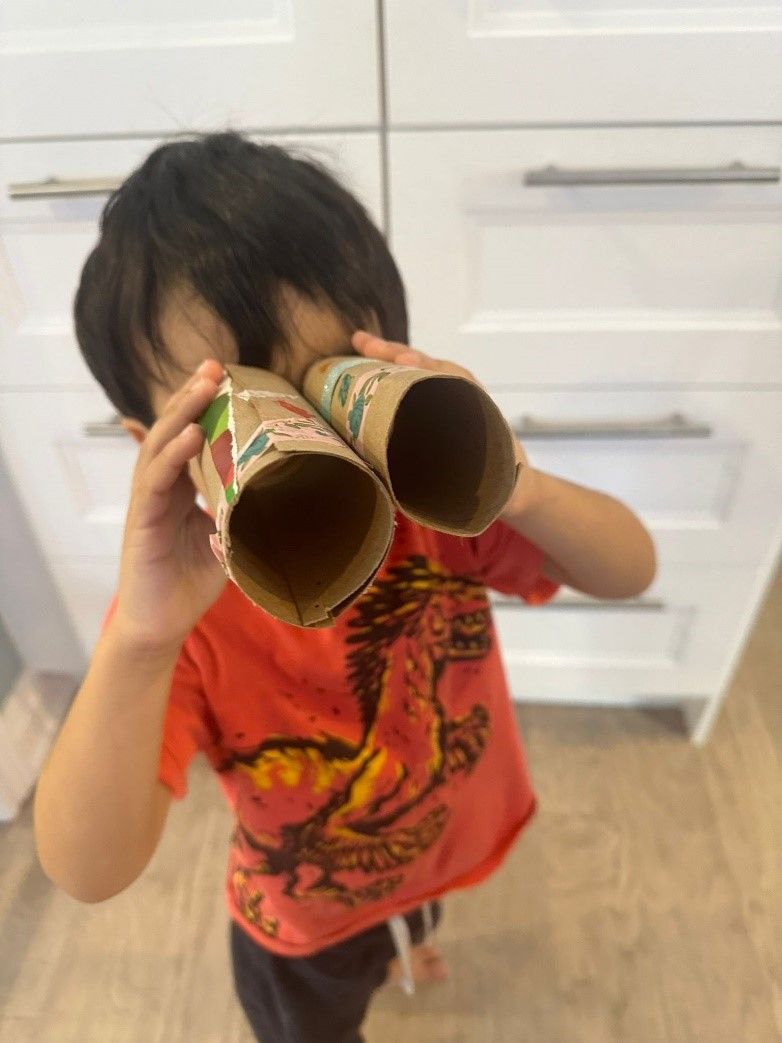
- Take a peek through your new binoculars!
To do the activity:
- Welcome participants to look around their space through their binoculars and look for items that facilitators have posted (e.g., high-contrast images) as well as other items and record their observations on their Polaroid Observation worksheet or Shape Finder worksheet.
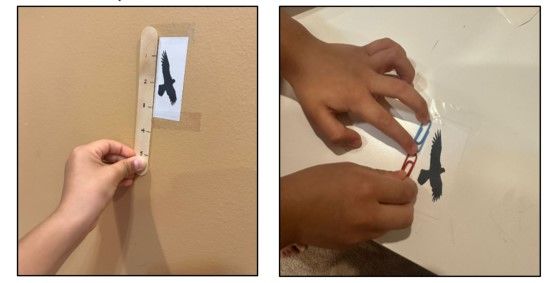
- Encourage them to use the popsicle sticks or paperclips to measure the dimensions of their observed image or item:
- How tall is the owl? (standard unit of measurement such as a ruler)
- How many paperclips wide is the octopus? (non-standard unit of measurement)
- If using the shape worksheet, encourage participants to observe what shapes they can see. These can be shapes from the images provided or simply shapes found throughout the space—a spherical light fixture, a square book, etc. Use the sheet to record what items include the shapes listed.
- For added value, consider conducting the activity outside if weather permits. Have participants look at plants, tree trunks, street signs, etc.
Accessibility considerations
- Scale up high-contrast images prior to printing. Note that there are two sizes provided for the animal images. Pattern images are offered in a larger option.
- Instead of taping images and shape/patterns to a wall or table, consider taping them to popsicle sticks and having them available for participants to pick up and bring closer to them.
- Use a microphone when speaking and describe the images that participants will be observing.
- Add tactile elements to the images—e.g., pompoms glued to the square checkerboard pattern or glitter/sand glued for texture onto the sea turtle.
- Simplify your search. Use only a few image options or use the same image in multiple sizes.
Book suggestions
- Everyday STEM Engineering: Civil Engineering by Jenny Jacoby and Luna Valentine
- I Can Do That! 1000 ways to become independent by DK Publishing
- Baby Sees Things That Go by Janna Steagall