Description
Participants will create a functional compass and learn wayfinding skills with simple challenges.
Number of participants
For two or more participants
Space considerations
An indoor space where participants can be seated at tables to create the compasses, with a larger indoor or outdoor space to complete the activities afterward.
Note that water is a component of this activity. Please prepare the space to account for possible spills!
Competencies
- Fine motor skills
- Abstract reasoning
- Problem solving
- Observation and recording
- Navigational sense
Materials
- Templates
- An actual compass (or a smartphone compass app) to test against
To create the compass:
- Masking tape
- Paper towels or cloth to clean up spills
- Tablecloths or protective coverings for tables
- Metal paper clips or needles
- Scissors
- Bowls or large cups (can be plastic/paper/glass)
- Water
- Small magnet (flat refrigerator magnet or stronger magnet)
- Cork or small foam piece (or something else that will float, like a leaf)
- Permanent marker (Sharpie or similar)
- Jug or bottle of water to pour from (optional)
For the challenges:
- Small items to hide (a book, a water bottle, etc.)
- Pencils
Preparation
- Protect table surfaces with tablecloths or coverings.
- If not using needles: use scissors to cut paper clips to create your own. Ensure the cut pieces are not jagged at the edges and are short enough that they do not touch the edges of the bowls or cups of water.
Prepare each participant station: - Place a Directional Placemat for each participant with a cup or bowl in the centre. The orientation of the placemat may change depending on where north is, so don’t tape the placemat down yet.
- Have materials at each participant station:
- needle (or paper clip piece)
- magnet
- cork or foam piece (e.g., a foam craft sticker)
- scissors
- marker
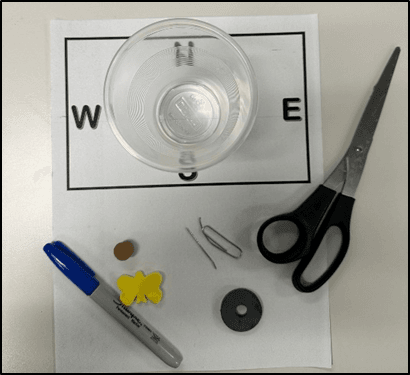
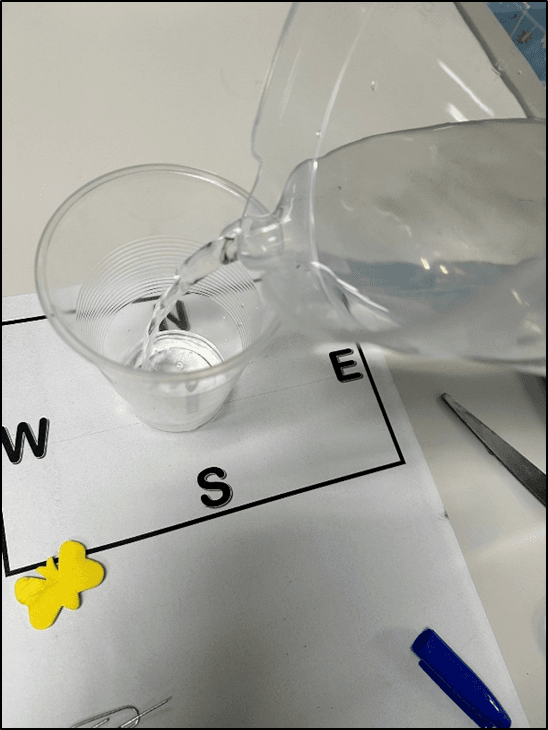
- Pour a few inches of water into bowls or cups. A lot of water is not necessary, but bringing it closer to the top of the bowl or cup will make it easier to gently place the floating foam/cork and needle in.
- To extend or increase the challenge of this activity, consider reducing the facilitator preparation and having participants cut their own paper clips, pour their own water, etc.
Implementation
To create the compass:
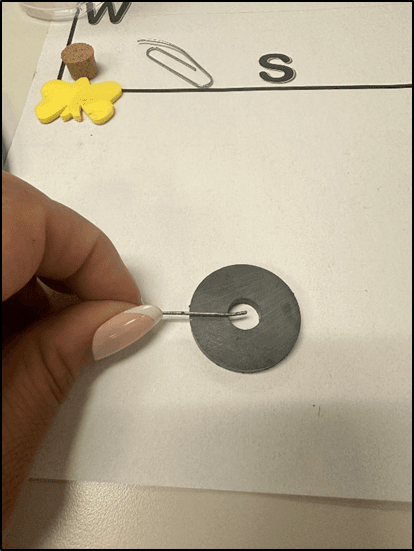
- Take the needle or paper clip piece and magnetize one end by rubbing it against the magnet several times, always in the same direction. A stronger magnet will work best, but if using a standard flat magnet, rubbing it 15–20 times should work.
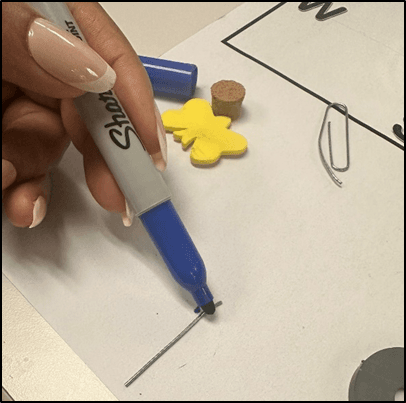
- Mark the magnetized tip of the needle or paper clip with the marker (this will be the “north” end)
- Place needle or paper clip gently on the foam piece or cork.
- Place the foam piece or cork in the cup or bowl of water so it floats and the needle or paper clip does not touch the edge of the container.
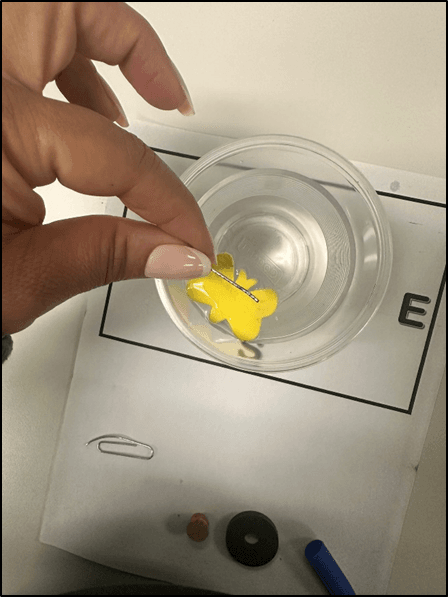
- It will start to spin slightly so the magnetized end will point north. If it starts to bump into the edge of your cup or bowl, gently push it to the centre and let it realign itself until it consistently points in the same direction.
- For added value: have participants try different sized bowls/cups as well as different floating components (e.g., a square of paper, a leaf, something else they discover will float) to see what works best.
- Adjust the directional placemat so the “N” aligns with the end of the paper clip or needle. Tape down the placemat if desired.
Optional: facilitator may want to use an actual compass to confirm the directions on all participants’ compasses. Below, you can see it hasn’t quite pointed north yet.
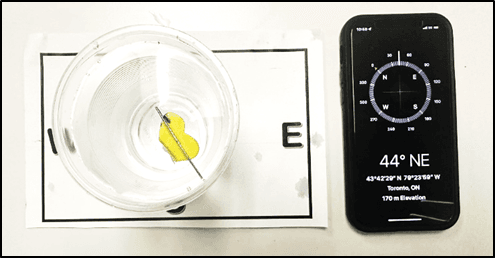
- It may take some time for it consistently point in the same direction, so some re-magnetization may be necessary, but your compass will soon be functional.
- Once participants’ compasses are functional, do some or all of the challenges in the Compass Challenge document.
Accessibility considerations
- Have participants work in small groups or pairs
- Work in the same space as participants and create a compass step-by-step, using a microphone to explain each step
- Scale up your compass materials for easier handling: longer sewing needles or similar metal item and a wider bowl will also work.
- Instead of walking backwards in Challenge 1, participants can simply move facing forward.
- Instructions in the challenges can be adjusted for wheelchair users: e.g., three spins EAST indicates three wheel rotations.
Book suggestions
- Everyday STEM Engineering: Civil Engineering by Jenny Jacoby and Luna Valentine
- Rumie Goes Rafting by Meghan Marentette
- No Boundaries: 25 Women Explorers and Scientists Share Adventures, Inspiration, and Advice by Gabby Salazar and Clare Fieseler
Download links
- True North: Compass Challenge—Full Activity PDF
- True North: Compass Challenge—Directional Placemat
- True North: Compass Challenge—Facts & Challenges