Activities
Here are some fun games, activities and crafts to offer at your library. All fit with this summer’s theme.
The full instructions for each activity provide all the details you need to run them, including space considerations, materials lists, preparation steps, and tips to make activities inclusive for kids with varying abilities. It can be helpful to ask if participants have any accessibility accommodations and to include written and visual instructions to make it easier for families to participate. For more tips, visit the Plan for Accessibility page.
There are also passive programming options with ready-to-print templates, as well as programs that can be adapted for outdoor settings.
Visit the Canadian Space Agency website for more activities and free resources in English and French.
3D Virtual Sculpting
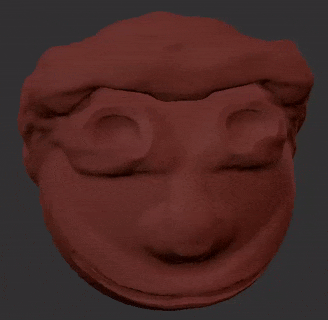
Ages 9-12
45-60 minutes
3D Virtual Sculpting
Description
Virtually sculpt clay to create a 3D creature from your imagination, using a computer and the SculptFab website.
Competencies
- Creative and imaginative thinking
- Eye-hand coordination
- Creative expression
- Computer literacy
- Development of fine motor skills
Materials
- An internet enabled laptop or desktop with a up-to-date web browser
Preparation
- Watch the tutorial videos on the SculptFab website
- Spend 30-60 minutes before the activity to feel comfortable and confident with the 3D design tool
Implementation
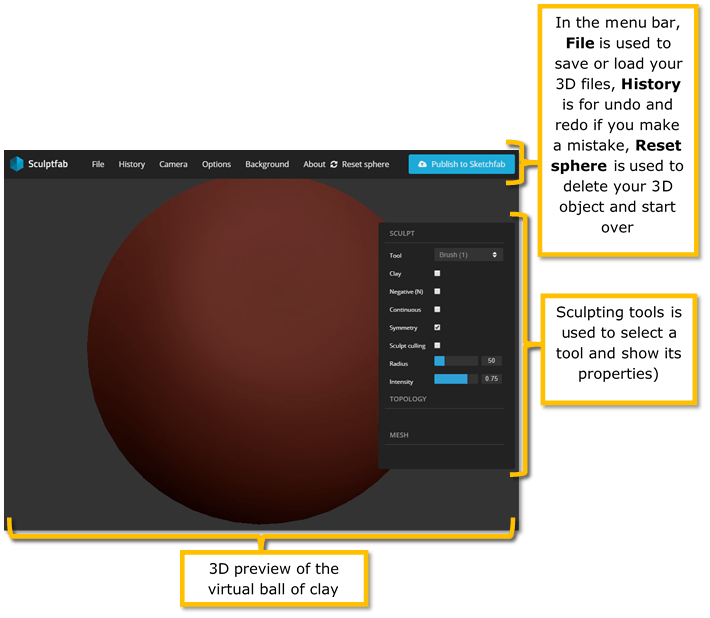
2. Introduce SculptFab and the concept that it is similar to a virtual ball of clay that you can carve and manipulate
3. Introduce and practice the basic mouse controls for viewing your 3D model at the start of the activity:
b. Use the left click mouse button to activate the tool selected on your virtual ball of clay
c. Talk about the symmetry option and how it can be used to mirror anything you do automatically on the sphere
d. Explore the menu bar and the essential options (File, History, Reset sphere)
e. Review how to use the tool menu on the right of the screen
4. Let the participants explore on their own and see what they can create
5. Talk about how they can save their work as a .STL or an .OBJ file to edit or view later on
6. Tell them that Windows 10 has a built-in 3D preview program called Print 3D to open these file formats to view on their home PCs
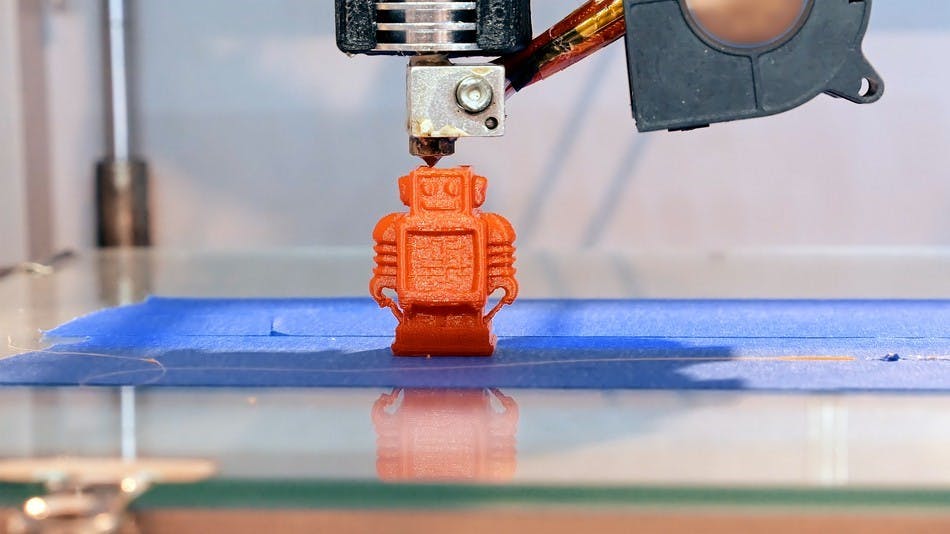
If you feel confident, you can tell the participants that they could get their creatures 3D printed. Using software like this one, we can design and then print 3D objects in the real world. That means we could see what we made in our hands and touch it if we ever wanted to!
Book Suggestions
Drawn from Nature by Helen Ahpornsiri
Life by Cynthia Rylant
Download Link
Images
Here are some of the basic controls to get you started below:
Recommended Resources
If you enjoyed using SculptFab for your program or class, there are other online resources you can try just for fun to see if anything interests you as an instructor.
Tinkercad (3D design / programming and electronics)
- Design 3D objects using primitive shapes that can be joined together or used to deduct from each other
- Create virtual Arduino microcontrollers and components using a feature called Circuits—a way to practice and learn electronics, microcontrollers, breadboards and components
Blockly Games (programming logic game)
- Introduces the logic of programming
- Uses drag and drop puzzle pieces to solve brainteasers
BlocksCAD (programming via puzzle pieces)
- Uses drag and drop puzzle pieces to create accurate 3D designed parts
Scratch (programming via puzzle pieces)
- Uses drag and drop puzzle pieces to program
- Creates animations or interactive games using Scratch
MIT App Inventor (Android app development)
- Develop an Android application using only a web browser
- Create and download your application and run it on an Android phone
Canva (graphic design)
- Create graphics easily with an online editor using pre-made templates
Pixlr (graphic design)
- Create graphics with a web-based design tool, which is very similar to Photoshop
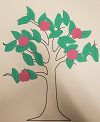
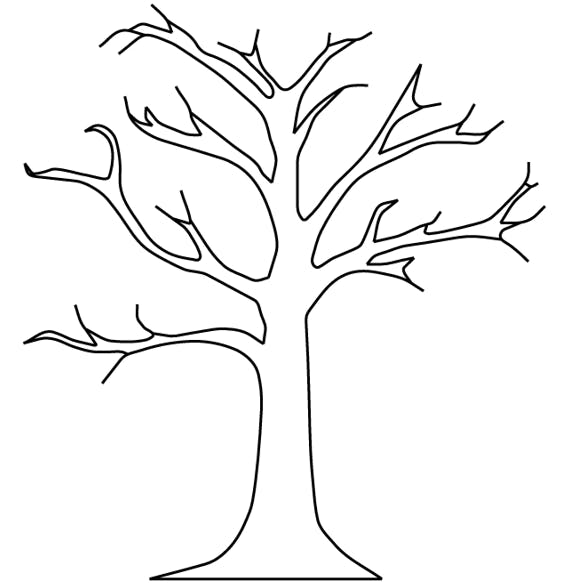
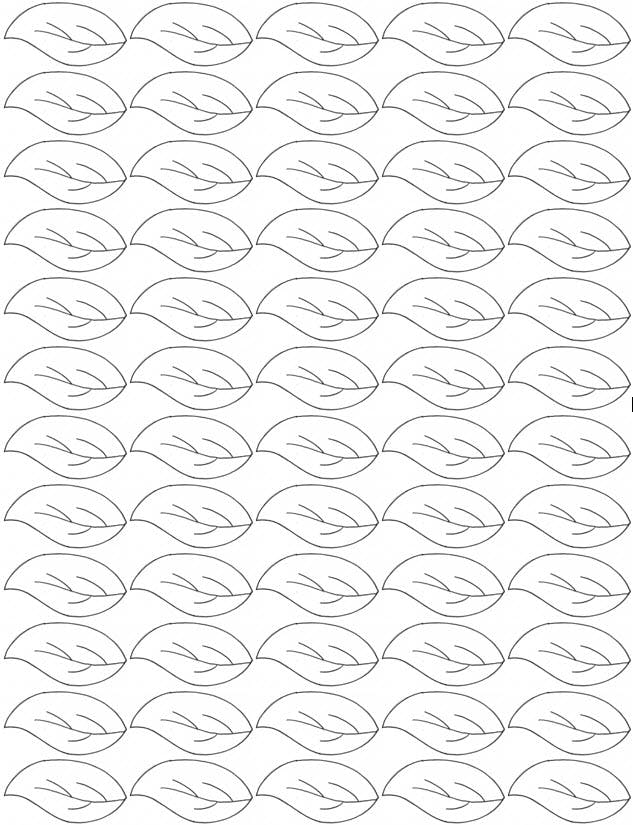
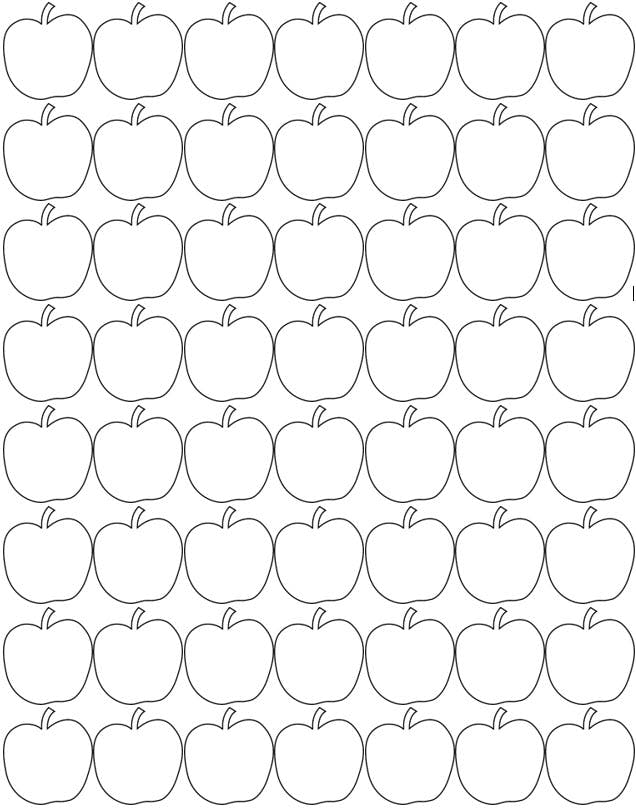
Apple Tree
Ages 0-3
15 minutes
Apple Tree
Description
Add leaves and apples to the branches of a tree.
Competencies
- Development of fine motor skills
- Organization and planning
Materials
- Downloadable Templates: tree, leaves, and apples
- White or coloured paper (red and green)
- Glue
- Scissors (adult use only)
- Optional: Crayons
Preparation
- Print out the various templates using green paper for the leaves and red paper for the apples
- Alternatively, print the templates on white paper and allow participants to colour the objects
- Cut out the leaves and apples before the program or allow caregivers to cut out the shapes for participants
- Prepare the room for a program that uses glue
Implementation
- Provide each participant with a tree template, leaves (at least 20 is recommended), apples (at least 5 is recommended), and glue
- Participants add the leaves and apples to the tree template
- Optional: provide crayons for participants to add more colour to their craft
Book Suggestions
I Love You Like… by Lori Joy Smith
Picture the Sky by Barbara Reid
Summer Color! by Diana Murray
Wild One by Jane Whittingham
You Are Never Alone by Elin Kelsey
Download Link
Images

Bird Feeder
Ages 9-12
20 minutes
Bird Feeder
Description
Make your very own bird feeder and study the birds that come for a snack.
Competencies
- Development of fine motor skills
- Bird recognition
Materials
- Birdseed (pre-packaged or a mixture of seeds such as sunflower or pumpkin)
- Plates
- Nut-free spread (e.g. sunflower seed butter)
- Spoons or craft sticks
- String or ribbon
- Scissors
- Toilet paper rolls or a similar alternative
Preparation
- Purchase birdseed or a mixture of seeds and nut-free spread
- Collect toilet paper rolls
- Prepare the room for a program that may get messy
Implementation
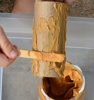
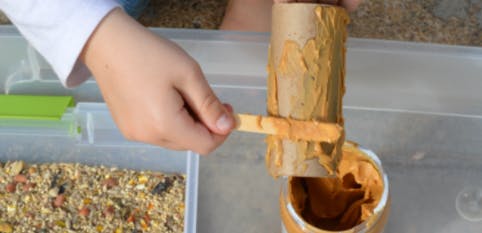
- Place the birdseed on plates
- Using the back of a spoon or a craft stick, coat the toilet paper roll with the nut-free spread
- Roll the sticky tube in the birdseed to cover it entirely
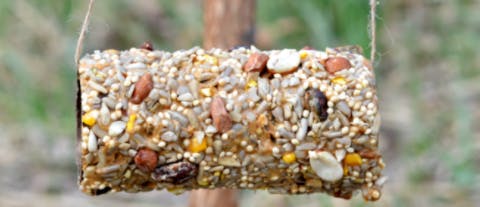
- Cut a piece of string approximately 30 cm long, thread it through the tube and tie the ends together
- Hang the bird feeders outside after the activity has ended, either as individuals or together as a group
- If desired, encourage kids to keep a record of all the birds that come to eat at the feeder
Book Suggestions
Drawn from Nature by Helen Ahpornsiri
Going Wild: Helping Nature Thrive in Cities by Michelle Mulder
My First Book of Canadian Birds by Andrea Miller
Sukaq and the Raven by Roy Goose and Kerry McCluskey
Download Link
Images
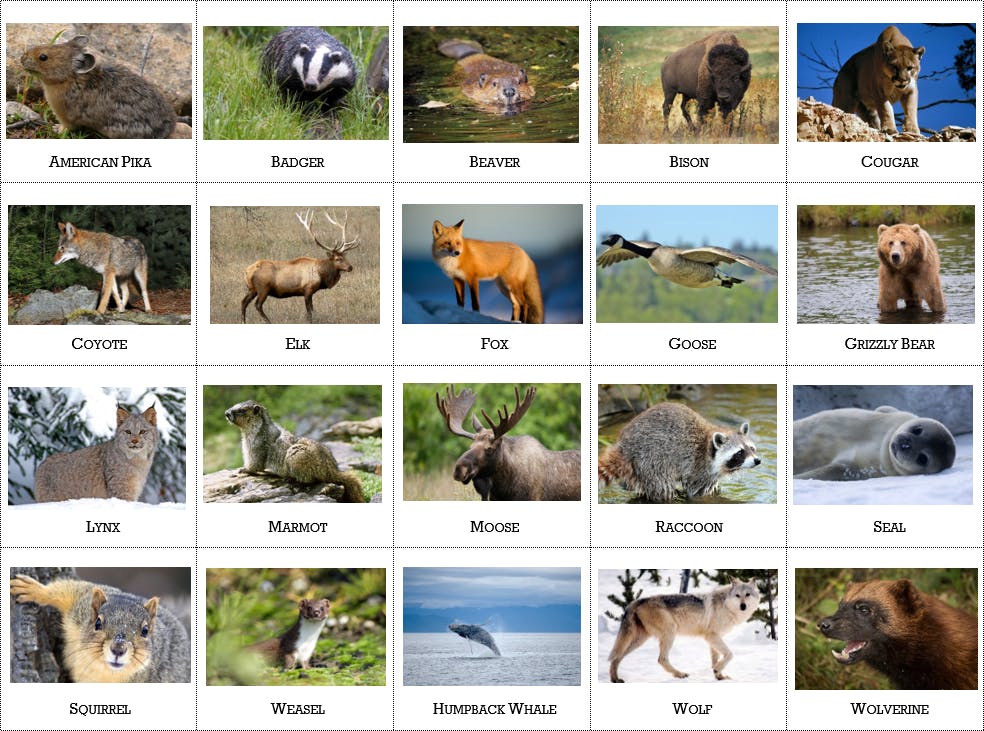
Canadian Wildlife Sounds
Ages 6-8
30 minutes
Canadian Wildlife Sounds
Description
Use our PowerPoint trivia presentation for kids to guess animal sounds.
Competencies
- Working collaboratively
- Social interaction
- Understanding and appreciation of animals
Materials
- Downloadable Presentation: Canadian Wildlife Trivia presentation
- Downloadable Presentation: Canadian Wildlife Trivia presentation (PowerPoint 1997-2003 compatible)
- Downloadable Template: Animal cards
- Laptop
- Projector (for large groups)
- Speakers
Preparation
- Download the PowerPoint presentation
- Print out copies of the animal card templates, one for each team
- If desired, cut out the animal cards
Implementation
- Divide the kids into teams of 2-5 participants
- Provide each team with the animal card template or a set of the 20 animal cards cut out
- Open the PowerPoint trivia presentation, click on the Slide Show tab, and click “From Beginning” to play the presentation
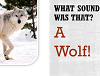
- Click the speaker icon to play the first animal sound
- Give each team 30 seconds to 1 minute to come to a consensus answer
- Each team identifies which animal they believe made the sound (either verbally or by showing the card)
- Click to the next slide, which builds a bit of drama by showing the answer after a 10 second countdown
- Advise the teams that each animal will only come up once in the presentation, so once the animal has appeared, they can turn over that card or cross it out on the sheet
- If desired, keep score in any way that you find suitable
Note: If you are running an older version of PowerPoint on your computer (1997-2010), please download appropriate compatible presentation above.
Book Suggestions
Be a City Nature Detective by Peggy Kochanoff
Do Frogs Drink Hot Chocolate? by Etta Kaner
Rewilding: Giving Nature a Second Chance by Jane Drake
Splish, Splash, Foxes Dash! by Geraldo Valério
The Wild Beast by Eric Walters
Download Links
Images
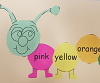
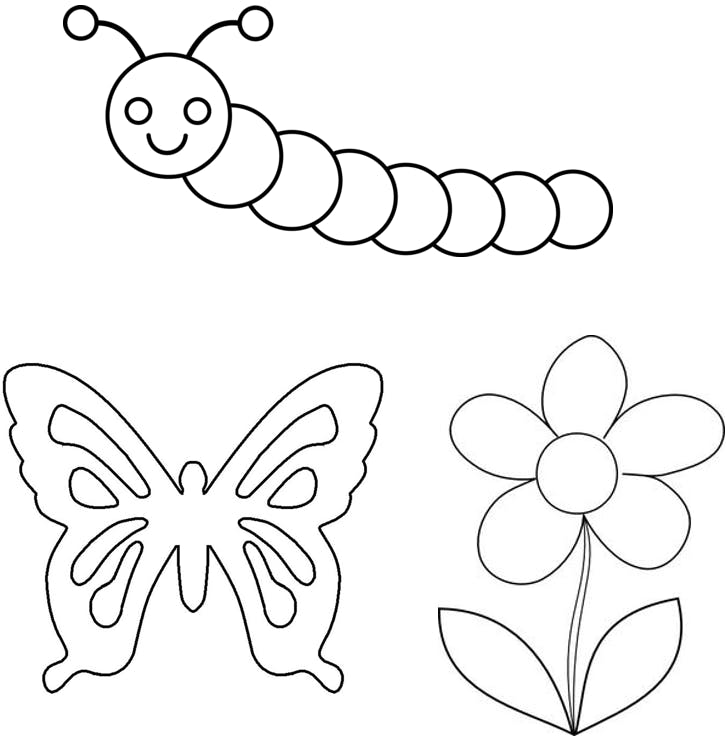
Coloured Caterpillar
Ages 0-3
15 minutes
Coloured Caterpillar
Description
Piece together the parts of a paper caterpillar.
Competencies
- Development of fine motor skills
- Planning skills
Materials
- Paper in various colours
- Glue
- Scissors (adult use only)
- Crayons
Preparation
- Downloadable Templates: Print out the various template shapes on the appropriate coloured paper, as indicated on the template
- Alternatively, print the templates on white paper so participants can colour them with crayons
- Cut out the shapes before the program or allow caregivers to cut out the shapes for participants
- Prepare the room for a program that uses glue
Implementation
- Provide each participant with a caterpillar head, several pieces of the body (4-6 is recommended), a sheet of paper to glue the pieces onto, and glue
- Combine this craft with the book suggestions below or any book about caterpillars for a story time program
Book Suggestions
City Bugs by Antonia Banyard
Forest Baby by Laurie Elmquist
Mi'kmaw Animals by Alan Syliboy
Download Links
Images
Colouring Pages and Bookmarks
Ages 3-5
20 minutes
Colouring Pages and Bookmarks
Description
Colour the illustrations by Clayton Hanmer.
Competencies
- Creative expression
- Development of fine motor skills
Materials
- Colouring pages
- Crayons, pencil crayons, or markers
- Optional: scissors, if cutting out the bookmarks
Implementation
- Distribute the colouring pages and crayons to participants
Book Suggestions
Splish, Splash, Foxes Dash! by Geraldo Valério
Summer Color! by Diana Murray
Download Links
Images
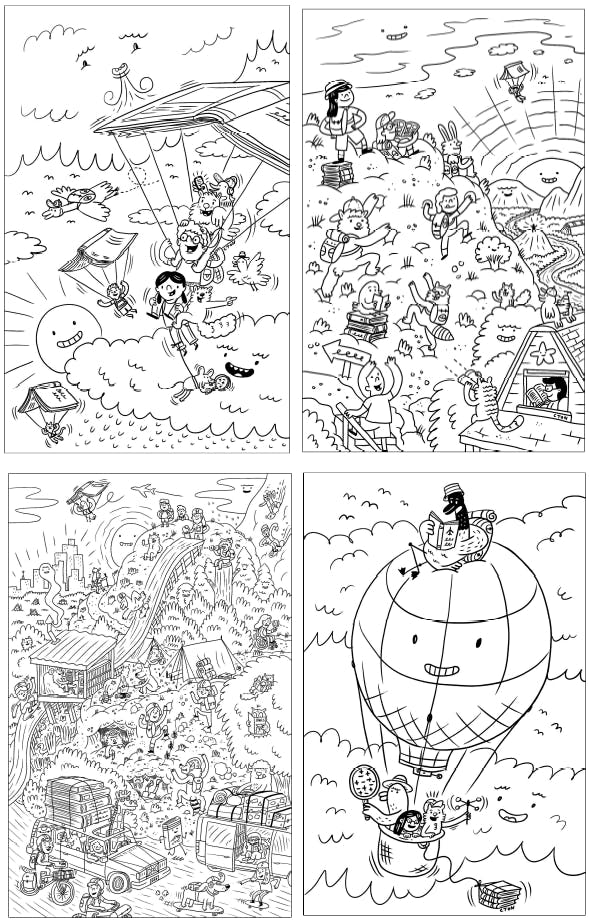
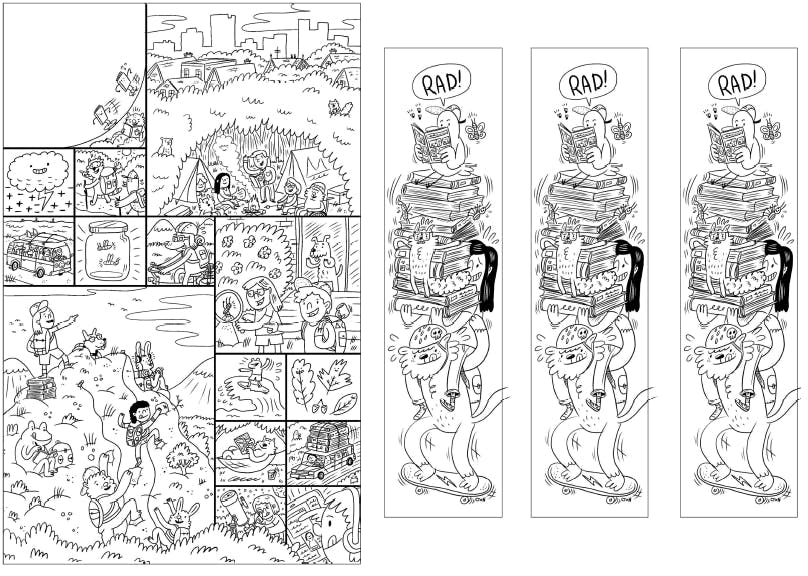
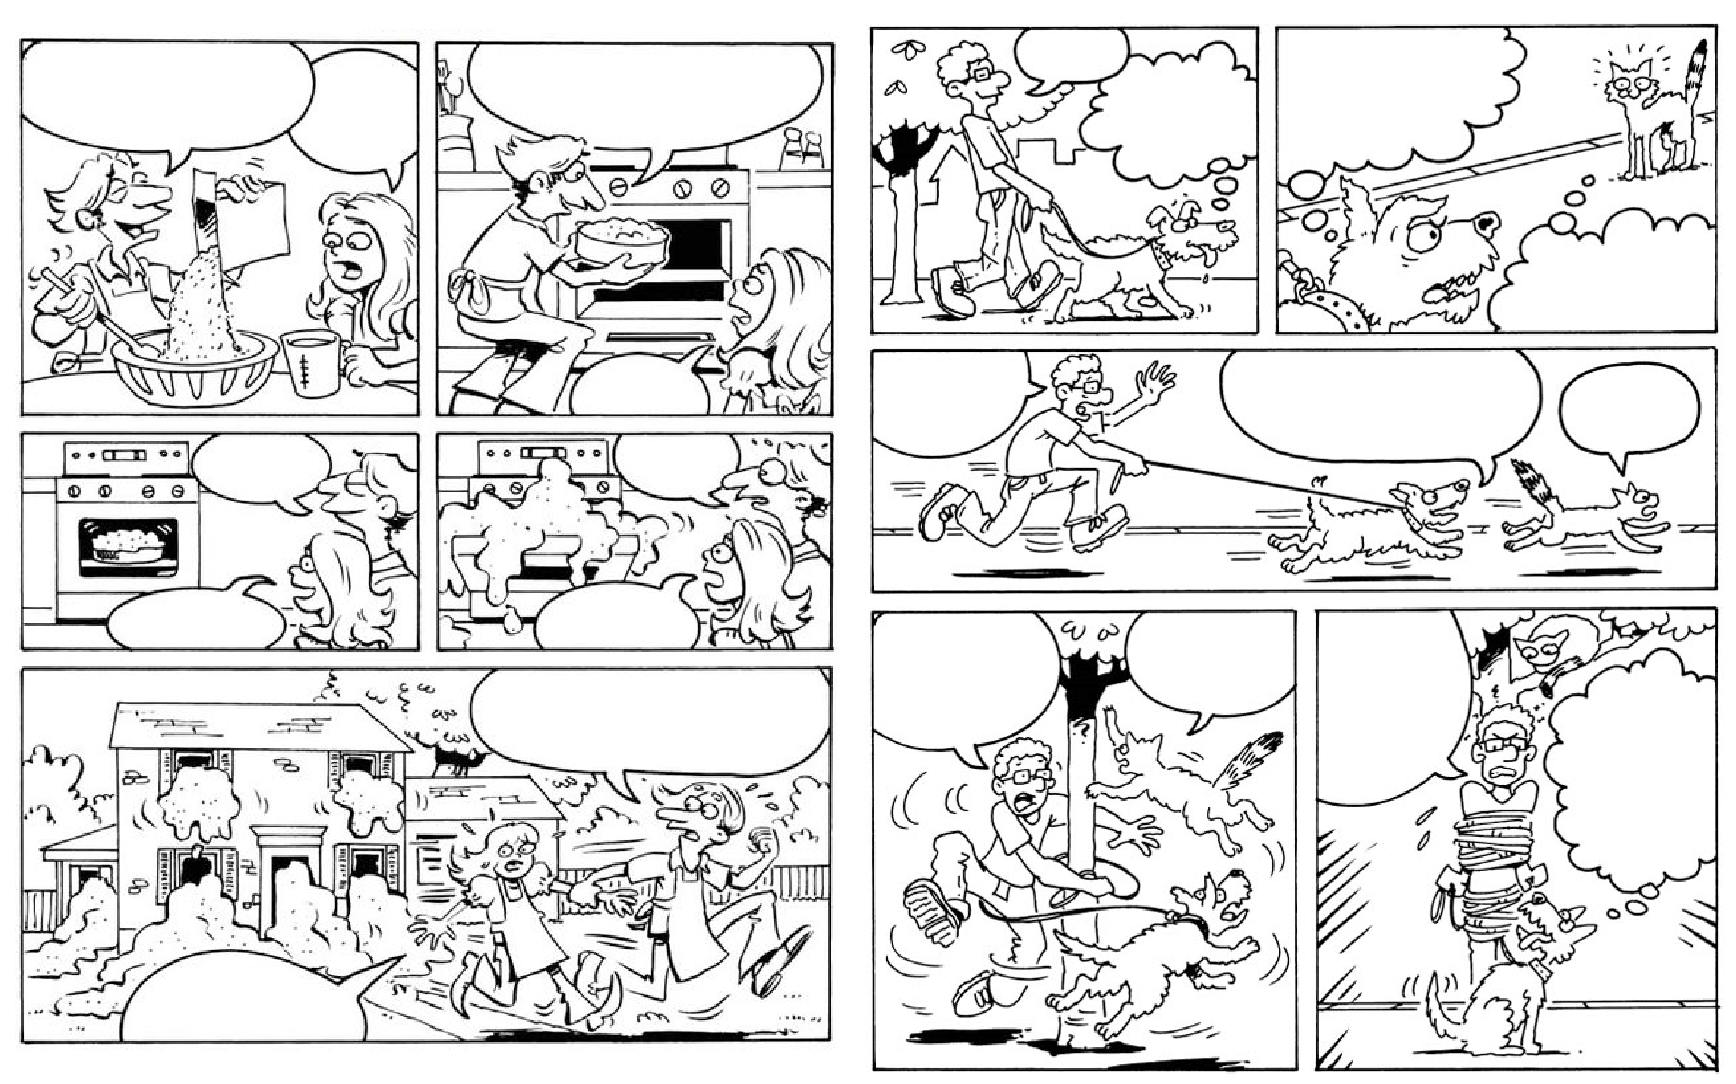
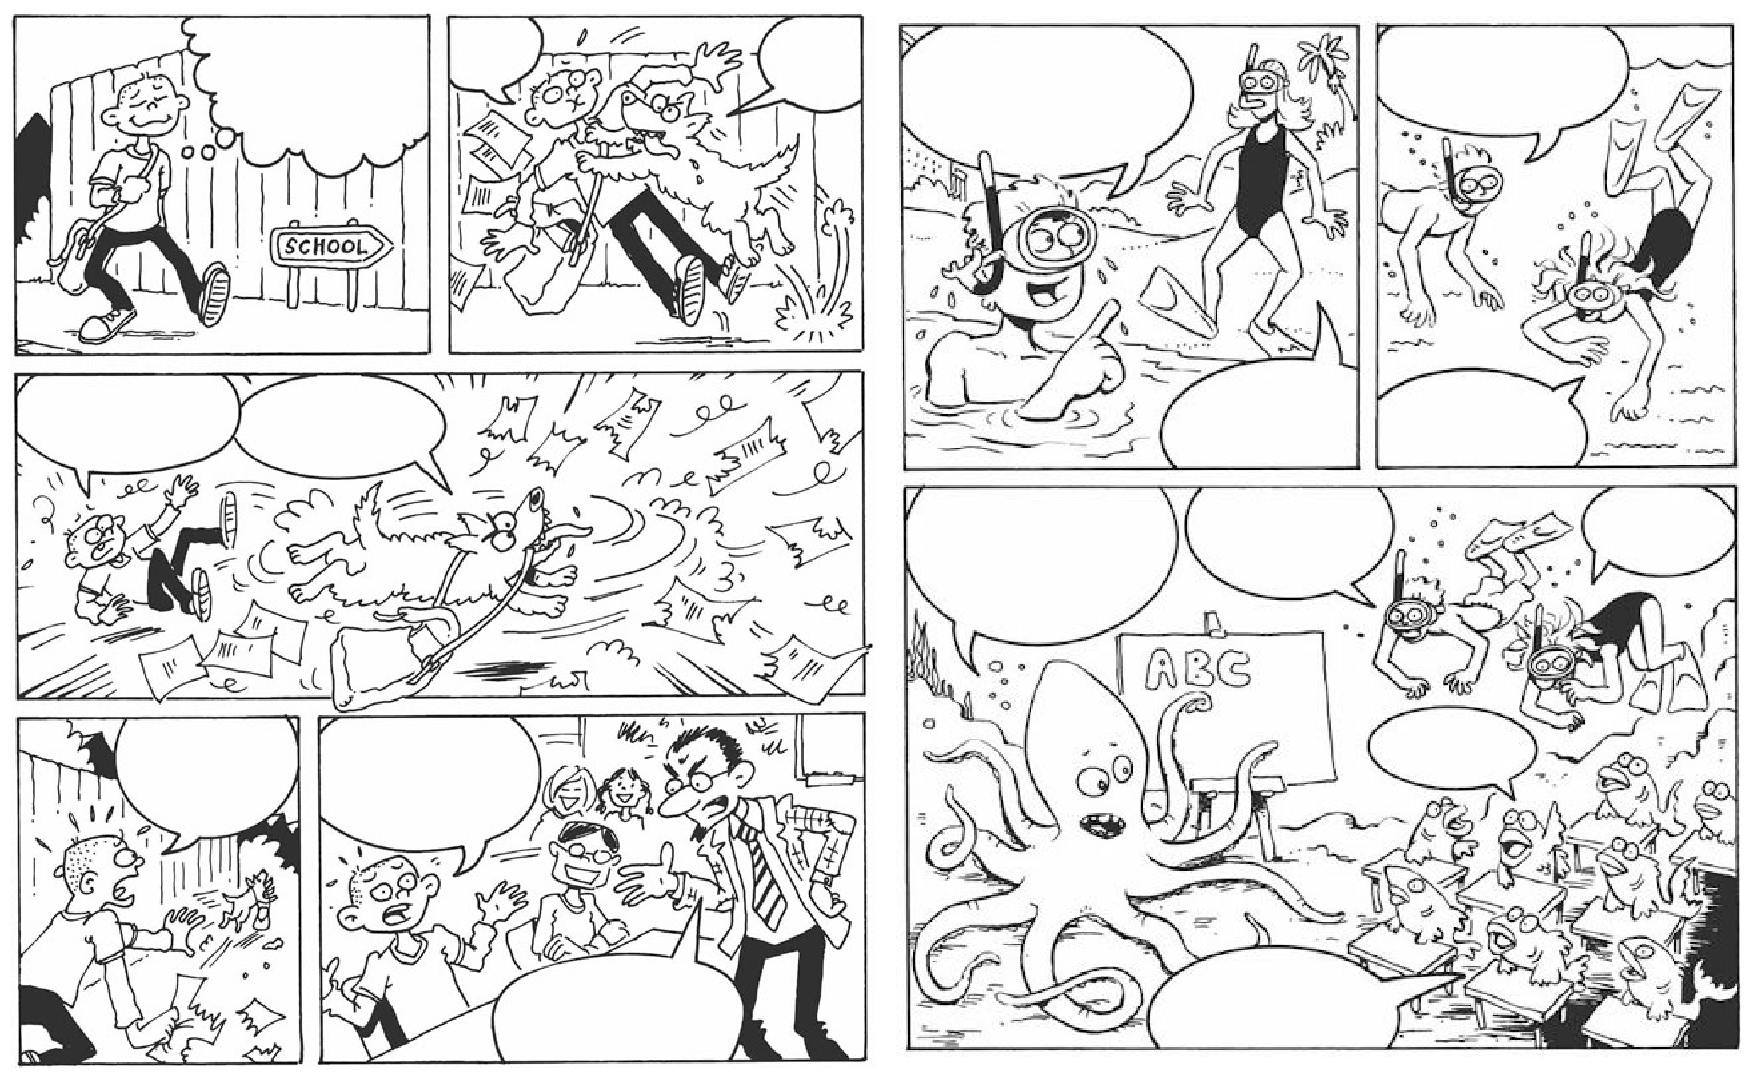
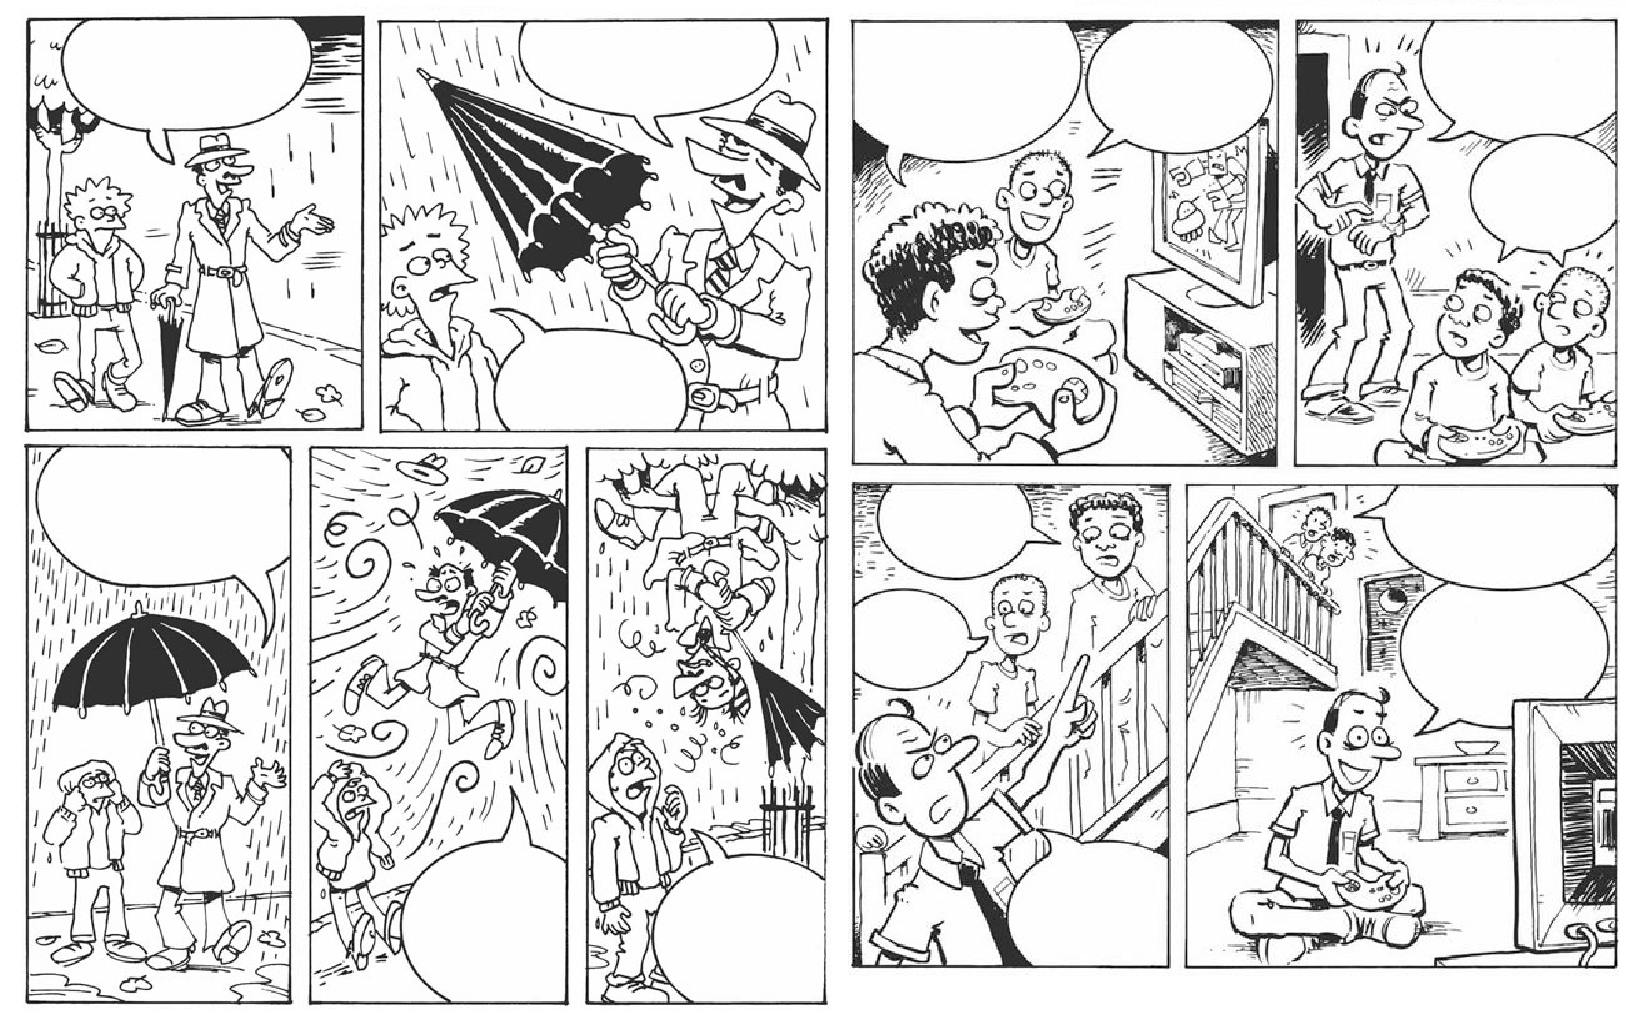
Comic Templates
Ages 9-12
20 minutes
Comic Templates
Description
Use your creativity to fill in text into comic book templates.
Competencies
- Creative and imaginative thinking
- Planning skills
- Written communication skills
- Creative expression
Materials
- Pencils
- Erasers
- Downloadable Template: comic book
- Optional: pencil crayons (if participants want to colour the templates)
- Optional: correction tape or fluid (if creating your own templates)
Preparation
- Print out the comic book templates
- Optional: prepare your own template by photocopying a page from a comic book, covering the text in all the speech bubbles with correction tape or fluid, and photocopying again
Implementation
- Distribute comic book templates to participants to complete
- Optional: as a group, read the TD Summer Reading Club feature comic available on the website starting in June 2019; alternatively, encourage children to read the comic on their own
Book Suggestions
Dinosaur Empire! by Abby Howard
The Good Egg by Mariko Tamaki
Hug a Tree, Geronimo by Geronimo Stilton
Download Links
Images
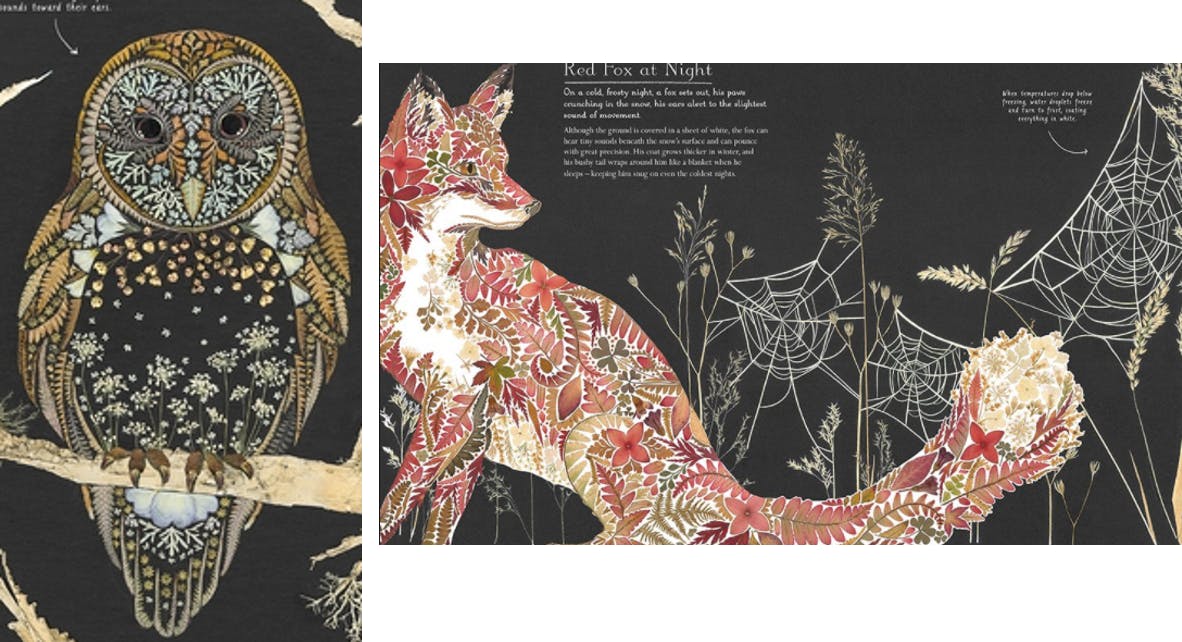
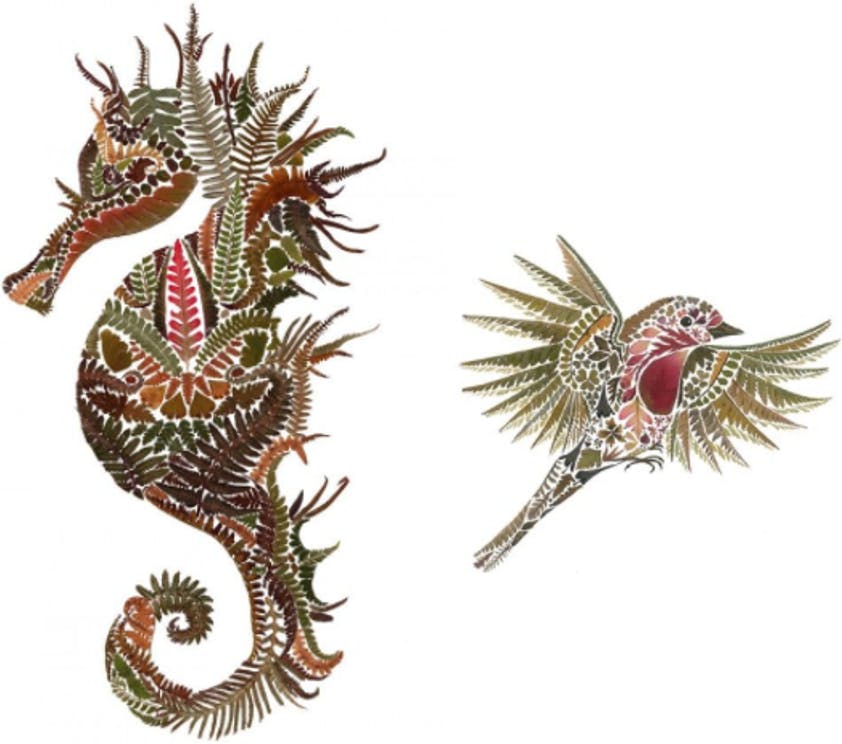
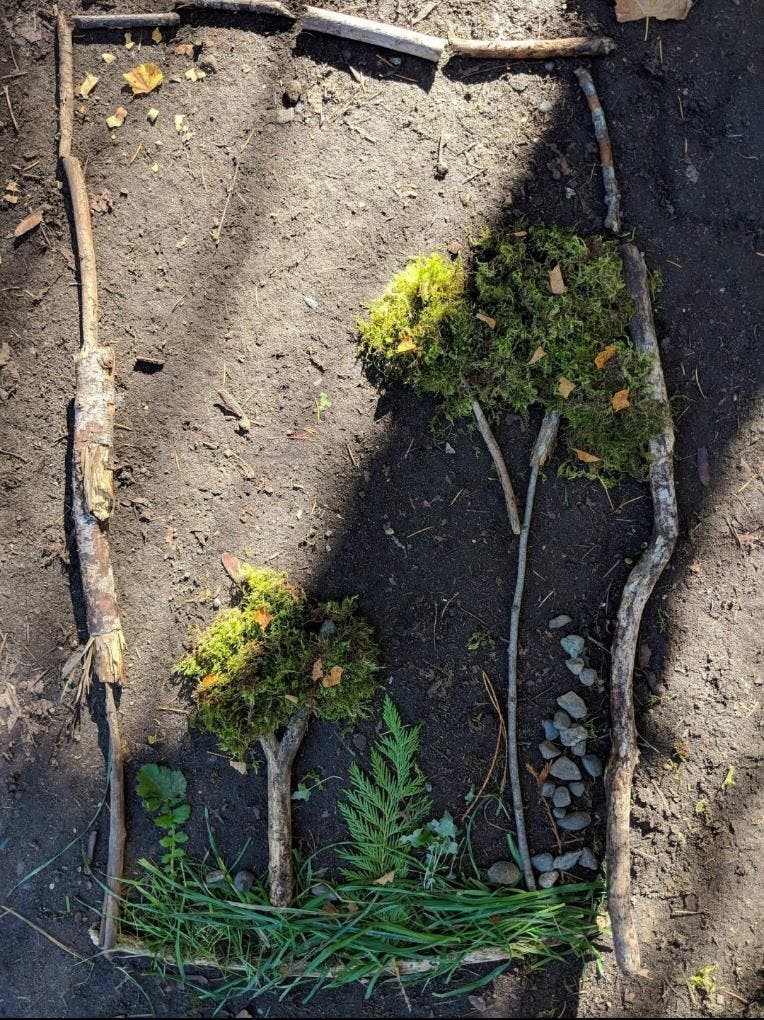
Drawn from Nature
Ages 9-12
30 minutes
Drawn from Nature
Description
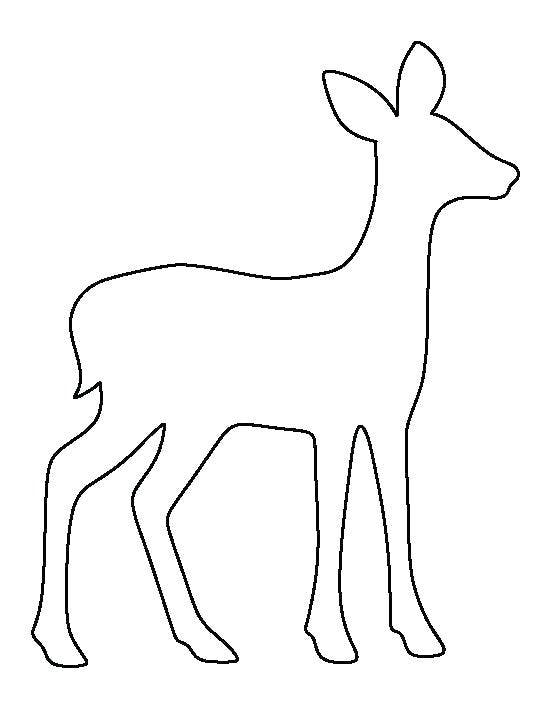
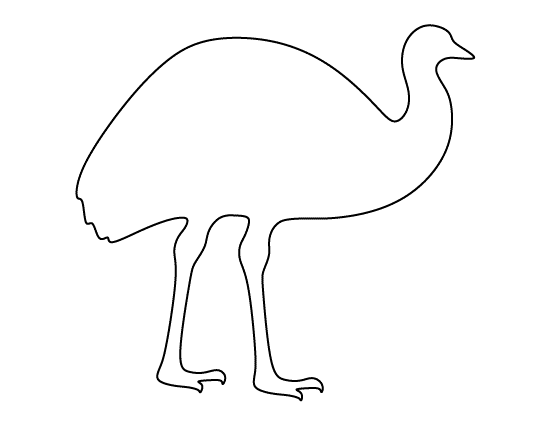
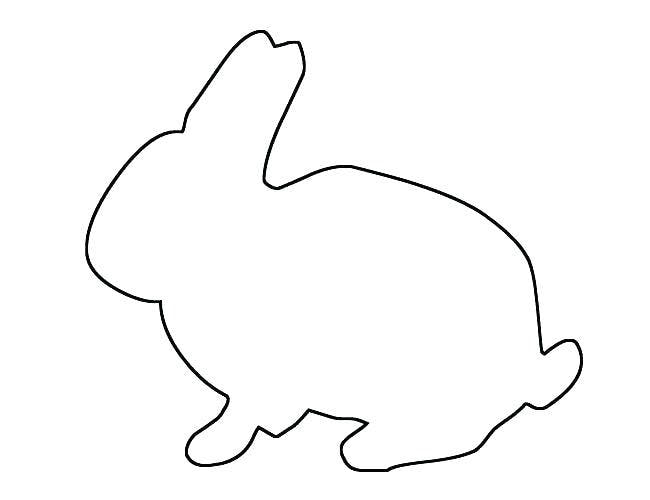
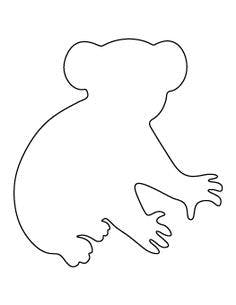
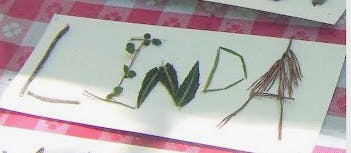
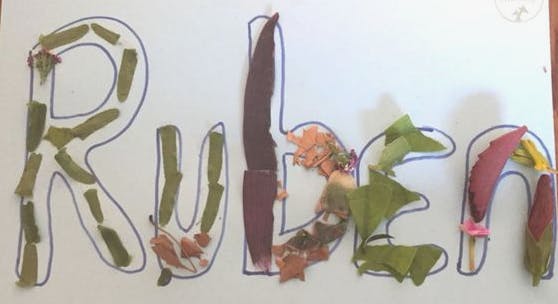
Inspired by the book Drawn from Nature, create animals using materials from the natural world.
Competencies
- Creative and imaginative thinking
- Spatial relationships
- Organization and planning
Materials
- Paper
- Scissors
- Glue
- Material from the natural world (grass, leaves, stems, twigs, flowers, etc.)
- Optional Downloadable Template: animal templates on white paper
- Optional Downloadable Template: shape templates (printed on a variety of coloured paper if not using material from the natural world)
- Optional: container or plastic bag for participants to collect natural world material
Preparation
- If not going on a nature walk with participants, collect material from the natural world before the program
- Alternatively, if you don’t want to use natural world material, print the shape template on different coloured papers
- Print out the animal templates, modifying sizes as needed
- Prepare the room for a program that uses glue
Implementation
- Optional: read parts of the book Drawn from Nature by Helen Ahpornsiri for inspiration, especially the note from the artist on page 59
- Optional: as a group, watch the YouTube Video of the author creating the illustrations for her book
- Participants use the natural world material (or the shape templates) in creative ways to create one or more animals; participants can fill in the animal templates or sketch their own outlines prior to starting, or work without an outline
- Participants can use scissors to trim material as desired
Book Suggestions
Drawn from Nature by Helen Ahpornsiri
A Season of Flowers by Michael Garland
The Wild Beast by Eric Walters
Wildflowers by Libby Romero
Download Links
Images
Images from Drawn from Nature.


Fill It In with Playdough
Ages 0-3
20 minutes
Fill It In with Playdough
Description
Fill in the natural world templates using playdough.
Competencies
- Development of fine motor skills
- Spatial relationships
Materials
- Playdough in various colours
- Optional: crayons for colouring if playdough is not available
- Optional: cardstock
Preparation
- Print the templates using cardstock if available
- If desired, cut out the various images and provide participants with a set number of images to work on
- Prepare the room for a program that uses playdough
Implementation
- Distribute the template to participants and their caregivers
- Participants can be encouraged to use the playdough colours that best represent the image
Book Suggestions
City Critters by Antonia Banyard
Discovering Animals: English, French, Cree by Neepin Auger
Mi’kmaw Animals by Alan Syliboy
My First Book of Canadian Birds by Andrea Miller
Picture the Sky by Barbara Reid
Plant the Tiny Seed by Christie Matheson
Splish, Splash, Foxes Dash! by Geraldo Valério
Summer Color! by Diana Murray
Thank You, Earth by April Pulley Sayre
Download Links
Images

Geometry Scavenger Hunt
Ages 3-5
15 minutes
Geometry Scavenger Hunt
Description
Categorize various shapes in the natural world.
Competencies
- Study of nature
- Classification skills
- Understanding shapes
Materials
- Natural objects with geometric shapes
- Printouts of photographs of geometric shapes in nature
- Optional: containers for sorting
- Optional: scavenger hunt template
Preparation
- Collect natural world materials
- Circular or spherical objects can include a sand dollar, a beach stone, the moon, the sun, or an orange
- Objects that are oval or ovoid include certain seeds, leaves, and bird eggs
- Objects that are triangular include a fern, a pinecone, and a feather
- If using containers, label them with the geometric shapes (circles and spheres, ovals and ovoids, triangles and pyramids)
- If using the scavenger hunt template, print out a template for each participant
Implementation
There are several different ways to run this activity:
- Option 1: As a group, participants and their caregivers take a walk outside looking at objects in nature and categorizing them based on their shapes using the scavenger hunt template
- Option 2: If conducting this program indoors with a small group, provide the nature items, printouts, and containers, allowing the kids to sort the objects into the containers
- Option 3: If conducting this program with a large group indoors (e.g. as part of a story time program), present the nature items or pictures one by one and ask the children to guess the object’s shape, then place the items in the appropriate container
- Option 4: Allow participants and caregivers to brainstorm items that fit into the various categories in the scavenger hunt template without the objects or pictures
Book Suggestions
Explorers of the Wild by Cale Atkinson
The Golden Glow by Benjamin Flouw
Stego-cumulus by Hilary Leung
Wild Ideas by Elin Kelsey
Download Link
Images
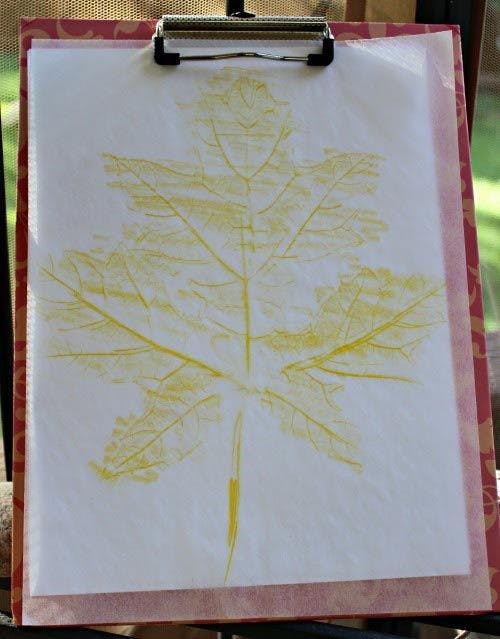
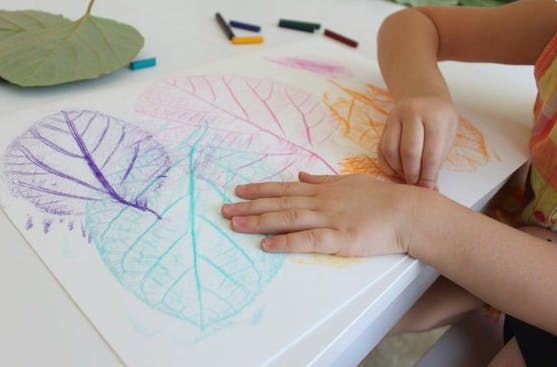
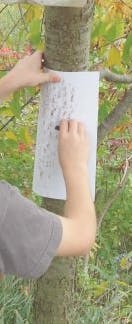
Leaf and Tree Bark Rubbings

Ages 6-8
20 minutes
Leaf and Tree Bark Rubbings
Description
Rub along natural, textured surfaces to create art.
Competencies
- Creative and imaginative thinking
- Development of fine motor skills
- Study of nature
Materials
- Crayons
- Paper
- Leaves of different shapes and sizes
- Optional: folder or scrapbook
Preparation
- If running this program indoors only, collect leaves of different shapes and sizes
Implementation
b. Participants choose a tree and put a piece of paper against the tree trunk, holding it firmly so it doesn’t move
c. Gently rub the paper all over with a crayon
d. The texture of the tree trunk will make the crayon marks appear darker in some places than others
e. Repeat as desired with other tree trunks and new pieces of paper
2. For a leaf rubbing:
b. Put a leaf on a smooth surface and cover it with a piece of paper, holding it down firmly
c. Gently rub over the leaf back and forth with a crayon
d. The leaf’s edges, veins, and texture will make the crayon marks appear darker in some places than others
e. Repeat as desired with more leaves
3. Option: Store your finished rubbings in a folder or scrapbook
4. Option: Switch crayon colours while working on a rubbing for a rainbow effect
Book Suggestions
Explorers of the Wild by Cale Atkinson
Summer Color! by Diana Murray
A Walk in the Forest by Maria Dek
Wild Ideas by Elin Kelsey
Download Link
Images
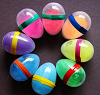
Music Shakers
Ages 0-3
30 minutes
Music Shakers
Description
Create music shakers to use for singing and dancing programs.
Competencies
- Sensory motor skills
- Social interaction
- Body awareness
- Rhythm and music appreciation
Materials
- For the shaker: containers with a secure lid, including small jars, tins, bottles, and plastic Easter eggs; small shakers work best for little hands
- For inside the shaker: pebbles, stones, corn kernels, beans, rice, beads, or other small objects
- Optional: markers, paint, or stickers to decorate the outside of the shaker
- Optional: colourful string, ribbon, feathers, or other decorative material
- Glue or tape
Preparation
- Collect all the items needed to make the shaker
Implementation
- Distribute one container per participant
- Optional: As part of the program, you can walk with the caregivers/participants outside to collect pebbles and stones for the shakers
- Fill the shaker about one-quarter to half-full with pebbles or stones, etc.
- Tape or glue along on the closure of the shaker for extra security to ensure the small material does not spill out
- Optional: participants can use the markers, paint, or stickers to decorate the outside of the shaker
- Optional: use colourful string, ribbon, feathers, or other decorative material and attach it to the shaker using glue, tape, or by cinching it into the lid prior to sealing it
- Use the shakers to sing along to any type of music, using recorded music and speakers if desired (song recommendation: "Shake it Baby, Shake It" by Rainbow Songs)
- Provide different instructions for shaking along to the music, including fast vs. slow, loud vs. soft, above your head vs. down at your toes, and in front of your body vs. behind your body
Book Suggestions
Forest Baby by Laurie Elmquist
I Love You Like… by Lori Joy Smith
A Walk in the Forest by Maria Dek
Wild One by Jane Whittingham
Download Link
Images

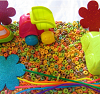
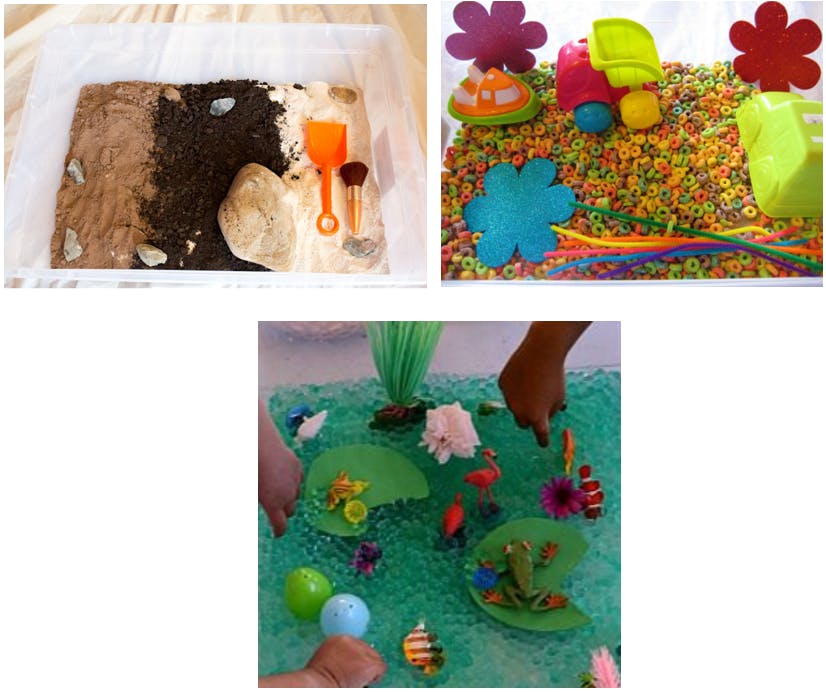
Mystery Container
Ages 3-5
15 Minutes
Mystery Container
Description
Stimulate your senses with a container filled with a variety of objects.
Competencies
- Body awareness
- Sensory motor skills
- Creative and imaginative thinking
- Development of fine motor skills
Materials
- A container (box, bag, etc.)
- Filler material (water beads, kinetic sand, colour rice, pasta, shredded paper, cotton balls, oats, beans, etc.)
- Larger objects to manipulate that are different shapes and textures (toys, buttons, spoons, tongs, wire cleaners, foam shapes, etc.)
Preparation
- Load the container with the chosen filler material
- Distribute the larger objects inside the container
- Optional: cover or seal the mystery container
Implementation
- Have participants insert their hand into the mystery container, either as a small group or individually
- Encourage them to explore and feel inside the container
- Ask the participant if anything seems familiar about the objects inside
- Optional:
- If the container is closed, ask them to guess what they think is inside
- Track the participants’ guesses and see who can correctly identify the most items
Book Suggestions
Explorers of the Wild by Cale Atkinson
The Night the Forest Came to Town by Charles Ghigna
Download Link
Images
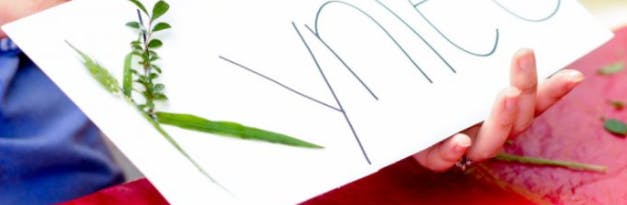
Nature Name
Ages 6-8
25 Minutes
Nature Name
Description
Use natural world materials to spell your name in a creative way.
Competencies
- Creative and imaginative thinking
- Planning skills
Materials
- Paper
- Pens, pencils, or markers
- Scissors
- Materials from the natural world (e.g. grass, leaves, stems, and twigs)
- Containers or plastic bags to collect natural world materials
Preparation
- If desired, participants can take a walk and collect small natural world materials in a plastic bag or small container as part of the program
- Alternatively, collect enough materials for all the program participants
- Prepare the room for a program that uses glue
Implementation
- Provide participants with a piece of paper large enough for their name (recommended: half of an 8.5 x 11 in. sheet)
- Participants write their name in large or bubble letters on the paper
- Participants glue the natural world material over or inside the letters
- If desired, provide participants with scissors to trim the natural world material to their liking
Book Suggestions
The Golden Glow by Benjamin Flouw
Nothing at All by Marie-Hélène Jarry
Poetree by Caroline Pignat
Wild Ideas by Elin Kelsey
You Are Never Alone by Elin Kelsey
Download Link
Images
Nature Rhymes
Ages 0-3
10 Minutes
Nature Rhymes
Description
Rhymes, finger plays, and songs with a nature theme to include during a story time program.
Competencies
- Sensory motor skills
- Development of fine motor skills
- Oral communication
- Social interaction
- Rhythm and music appreciation
- Following directions
- Eye-hand coordination
Materials
- Optional: printout of nature rhymes
Preparation
- Learn the lyrics and the associated actions for each of the rhymes, finger plays, and songs
- Optional: print out the nature rhymes for caregivers, which can be used during and after the program
Implementation
- Use the list of nature rhymes to select various nature-themed finger plays
- Consider combining them with some of the book suggestions for a story time program with babies or toddlers
Book Suggestions
City Critters by Antonia Banyard
Forest Baby by Laurie Elmquist
I Give You the World by Stacey McCleary
I Love You Like… by Lori Joy Smith
Life by Cynthia Rylant
Picture the Sky by Barbara Reid
Plant the Tiny Seed by Christie Matheson
Splish, Splash, Foxes Dash! by Geraldo Valério
Summer Color! by Diana Murray
Thank You, Earth by April Pulley Sayre
Wild One by Jane Whittingham
Download Link
List of Nature Rhymes
Itsy Bitsy Spider
The itsy bitsy spider climbed up the waterspout.
Down came the rain
and washed the spider out.
Out came the sun
and dried up all the rain,
and the itsy bitsy spider climbed up the spout again.
Itsy Bitsy Caterpillar
Sing to the same tune as “Itsy Bitsy Spider.”
The itsy bitsy caterpillar crawled up the garden wall.
Down came the rain,
and he hoped he wouldn’t fall.
Out came the sun
and dried up all the rain.
Then the itsy bitsy caterpillar went on his way again.
Dig a Little Hole
Dig a little hole,
Plant a little seed.
Pour a little water,
Pull a little weed.
Chase a little bug,
Heigh-ho there he goes!
Give a little sunshine,
Grow a little rose.
Round and Round the Garden
Round and round the garden
Like a teddy bear.
One step, two step
tickle under there.
Recommended actions: Caregivers can start by tracing slow circles in child’s upturned palm. With each “step,” caregivers move their index and middle fingers up the arm, past the elbow towards the shoulder. Finally, after a short pause, tickle under the arm or under the chin.
Here We Go Round the Mulberry Bush
Here we go round the mulberry bush,
The mulberry bush,
The mulberry bush.
Here we go round the mulberry bush
So early in the morning.
This is the way we wash our face,
Wash our face,
Wash our face.
This is the way we wash our face
So early in the morning.
This is the way we comb our hair,
Comb our hair,
Comb our hair.
This is the way we comb our hair
So early in the morning.
This is the way we brush our teeth,
Brush our teeth,
Brush our teeth.
This is the way we brush our teeth
So early in the morning.
This is the way we put on our clothes,
Put on our clothes,
Put on our clothes.
This is the way we put on our clothes
So early in the morning.
Here we go round the mulberry bush,
The mulberry bush,
The mulberry bush.
Here we go round the mulberry bush
So early in the morning.
Oats, Peas, Beans and Barley Grow
Oats, peas, beans and barley grow,
Oats, peas, beans and barley grow.
Can you or I or anyone know,
How oats, peas, beans and barley grow?
It’s Raining, It’s Pouring
It's raining; it's pouring.
The old man is snoring.
He went to bed and bumped his head.
And couldn't get up in the morning.
Twinkle, Twinkle, Little Star
Twinkle, twinkle, little star,
How I wonder what you are!
Up above the world so high,
Like a diamond in the sky.
Row, Row, Row Your Boat
Row, row, row your boat,
Gently down the stream.
Merrily, merrily, merrily, merrily,
Life is but a dream.
Row, row, row your boat,
Gently down the stream.
If you see a crocodile,
Don't forget to scream.
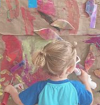
Outdoor Art
Ages 6-8
40 minutes
Outdoor Art
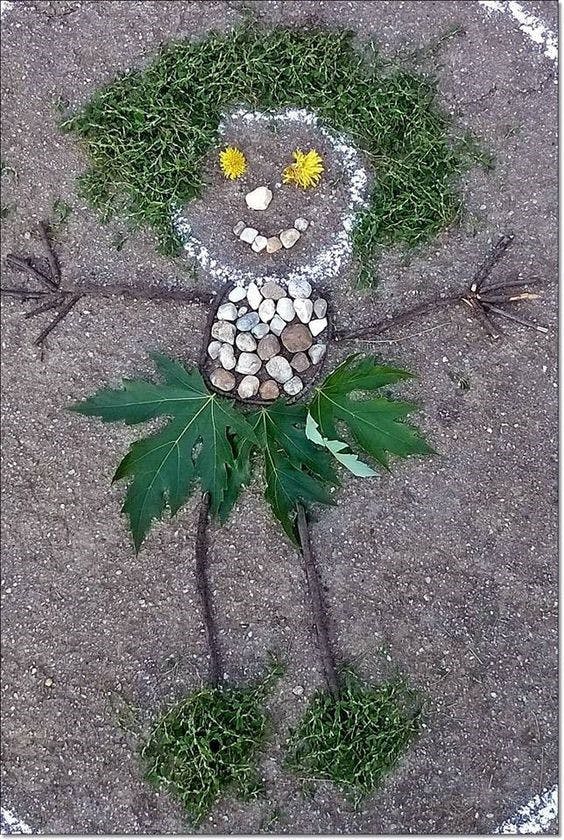
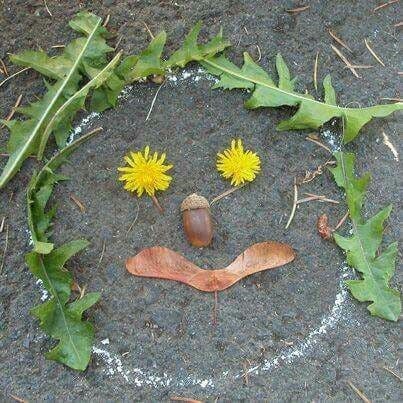
Description
Use materials that you find outside to make an image on the ground.
Competencies
- Creative and imaginative thinking
- Appreciation of nature
- Planning skills
- Creative expression
- Spatial relationships
Materials
- Twigs, sticks, leaves, rocks, grass, and other natural world material that you can collect outside
- Optional: small baskets for collecting material
Implementation
- Go for a walk outside where participants can safely gather twigs, sticks, leaves, rocks, grass, etc.
- Working individually or in small groups, participants work to create an outdoor art picture on the ground
Book Suggestions
A Walk in the Forest by Maria Dek
Explorers of the Wild by Cale Atkinson
The Golden Glow by Benjamin Flouw
I Give You the World by Stacey McCleary
The Mushroom Fan Club by Elise Gravel
Nothing at All by Marie-Hélène Jarry
Unplugged by Steve Antony
Download Link
Images
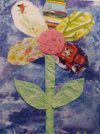
Painted Garden Flowers

Ages 3-5
30 minutes
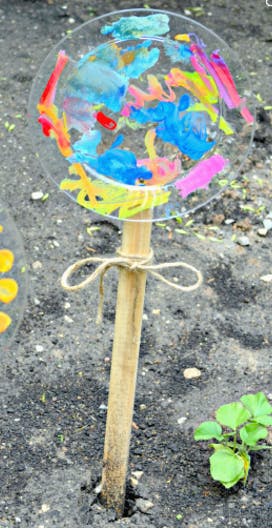
Painted Garden Flowers
Description
Decorate your very own flower that you hang on your window or put in a garden.
Competencies
- Creative and imaginative thinking
- Eye-hand coordination
- Creative expression
- Emotional expression
Materials
- Paper or clear acrylic plate
- Paint
- Paintbrush
- Green pipe cleaners
- String
- Hot glue gun (staff use only)
Preparation
- Prepare the plate:
o Glue a loop of string to the opposite side from where the pipe cleaners are attached
o Alternatively, attach a piece of wood using a screw to an acrylic plate, as pictured below
- Prepare the room for a program that uses paint
- Distribute the plates and paintbrushes to each station
Implementation
- Participants paint their flower as desired to hang up or put in the ground
Book Suggestions
The Digger and the Flower by Joseph Kuefler
The Honeybee by Kirsten Hall
I Love You Like…by Lori Joy Smith
Plant the Tiny Seed by Christie Matheson
A Season of Flowers by Michael Garland
Seed School: Growing Up Amazing by Joan Holub
Summer Color! by Diana Murray
Wildflowers by Libby Romero
Download Link
Images
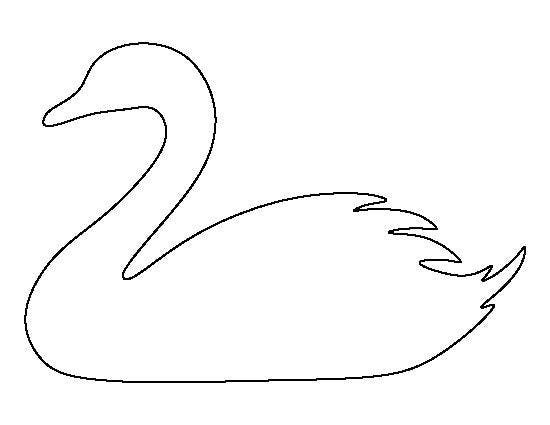
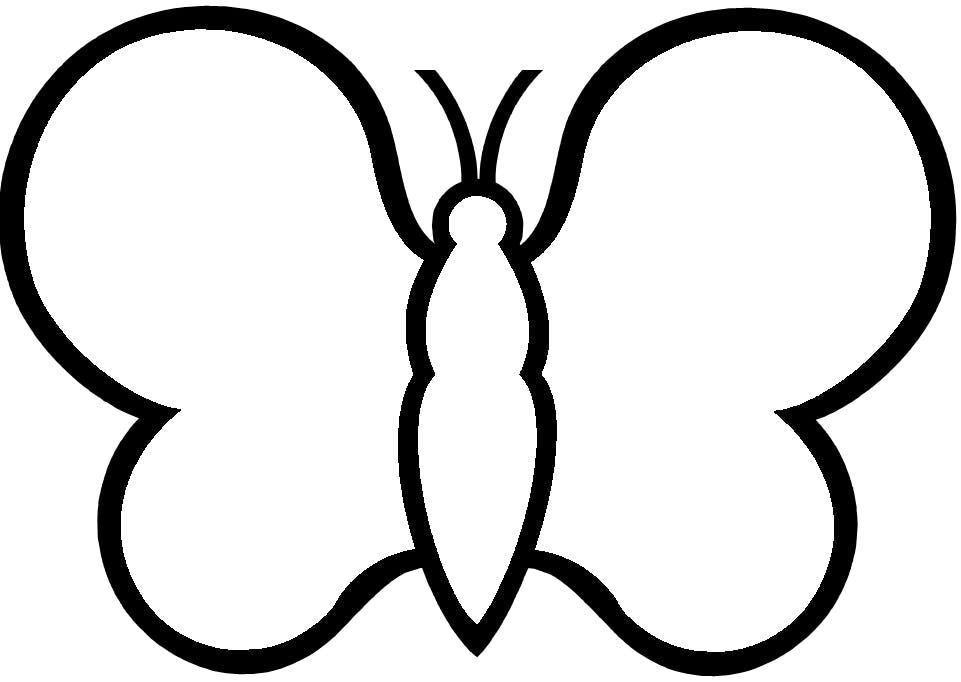
Paper Butterfly

Ages 3-5
10 minutes
Paper Butterfly
Description
Create a colourful paper butterfly.
Competencies
- Development of fine motor skills
- Organization and planning
Materials
- Downloadable Templates: Print template on paper in various colours
- Glue
- Scissors (adult use only)
- Optional: Crayons
- Optional: Stickers
Preparation
- Print the shapes template on various coloured paper
- Cut out the shapes before the program or allow caregivers to cut out the shapes for participants
- Print out the butterfly template
- Prepare the room for a program that uses glue
Implementation
- Provide each participant with a butterfly template
- Provide participants with the shapes and glue
- If desired, provide participants with crayons or stickers to decorate their butterfly
Book Suggestions
City Bugs by Antonia Banyard
I Give You the World by Stacey McCleary
Stego-cumulus by Hilary Leung
Download Links
Images

Pixel Art
Ages 6-8
20-30 minutes
Pixel Art
Description
Learn about binary numbers to create your own pixel art.
Competencies
- Computer literacy
- Logic and sequencing
- Following directions
- Eye-hand coordination
Materials
- Printer
- Computer
- Paper
- Highlighters or markers
- Downloadable Templates: Pixel Art Handouts
- Optional Downloadable: Pixel Art Creator (Excel File)
Preparation
- Download and print all pixel art handouts for each participant
- Optional: Download the Excel Pixel Art Creator file for the instructor to create pixel art for participants or have participants use the tool to produce original art
Implementation
- Start with an introduction to the concept of binary, such as the following:
- Binary means things are related to, composed of, or involving two things—in our case, using only the numbers 0’s and 1’s
- Other examples of binary is having two states, like a light switch because it can only be in two positions, on or off; talk as a group about examples of things that are binary, like a button (pushed or not pushed), yes or no, true or false, on or off
- Did you know that computers think only in binary? Computers have microchips that have millions of tiny switches called transistors, that can be either off (0) or on (1); all of these switches work together to do more complex behaviour like math, display pictures, and play video games or movies
- For our Pixel Art, any box with a 1 inside can be filled with marker or highlighter, and any box with 0’s can be ignored
- See what images are hidden once you are done
- Optional: Download the Excel Pixel Art Creator file and have school age participants make their own pixel art
Book Suggestions
The Manic Panic by Richa Jha
Unplugged by Steve Antony
Download Links
Download Pixel Art Handout Templates (Book, Cat, Dog, Panda, Star)
Images
![]()
Fill in each grid cell that has a 1 with a marker or crayon to reveal the images!
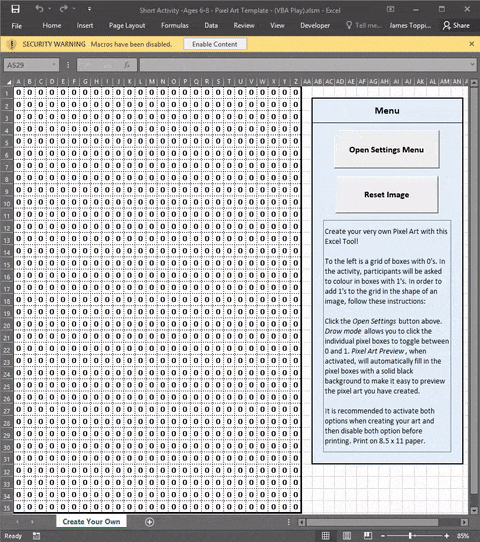
The included excel file has a pixel art creator. Feel free to attempt and make your own pixel art. Print your pixel art on 8.5 x 11 paper.
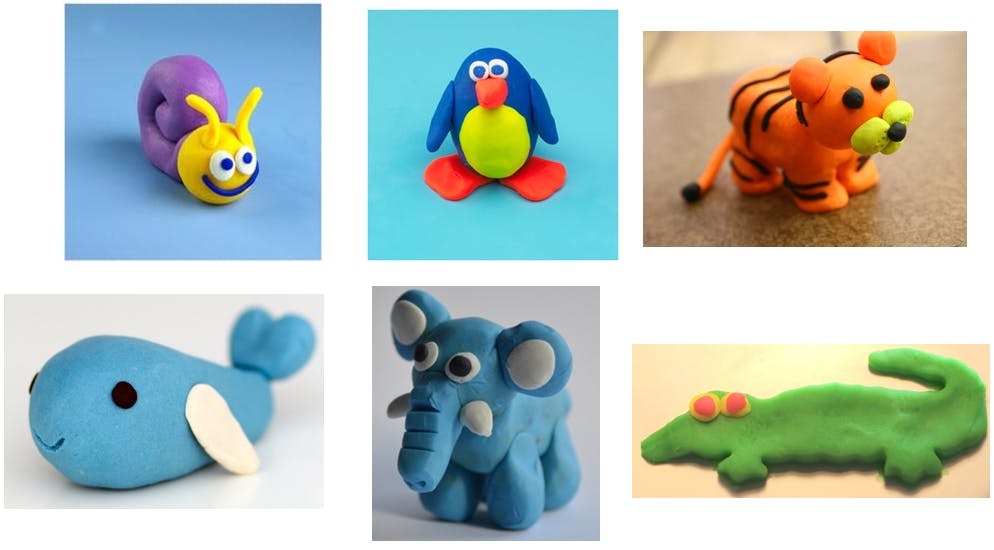
Playdough Animals
Ages 3-5
40 minutes
Playdough Animals
Description
Create animal replicas using playdough.
Competencies
- Creative and imaginative thinking
- Development of fine motor skills
- Planning skills
- Creative expression
- Spatial relationships
- Understanding and appreciation of animals
Materials
- Playdough (various colours)
- Pencils
- Paper
Preparation
- Prepare the room for a program that uses playdough
- Print out photographs of various animals or cut them out of discarded magazines
Implementation
- Participants attempt to recreate one or more of the animals they see in the pictures using playdough (e.g. construct the animal in 2D on a sheet of paper or construct the animal in 3D)
- For an added STEAM (Science, Technology, Engineering, Art, and Math) component, instruct participants to find the geometric shapes in the animal, like circles, ovals, triangles, rectangles, and squares; use a pencil to draw the same shapes on a sheet of paper and then fill in the shapes with playdough
- Optional: Experiment with shaping the playdough in way that represents a different position of the animal other than the one pictured:
b. What would it look like if it were hunting?
c. What would it look like if it were eating?
Book Suggestions
At the Pond by Werner Zimmerman
City Critters by Antonia Banyard
Discovering Animals: English, French, Cree by Neepin Auger
Do Frogs Drink Hot Chocolate? By Etta Kaner
Drawn from Nature by Helen Ahpornsiri
Mi’Kmaw Animals by Alan Syliboy
My First Book of Canadian Birds by Andrea Miller
Picture the Sky by Barbara Reid
Splish, Splash, Foxes Dash! by Geraldo Valério
Download Link
Images
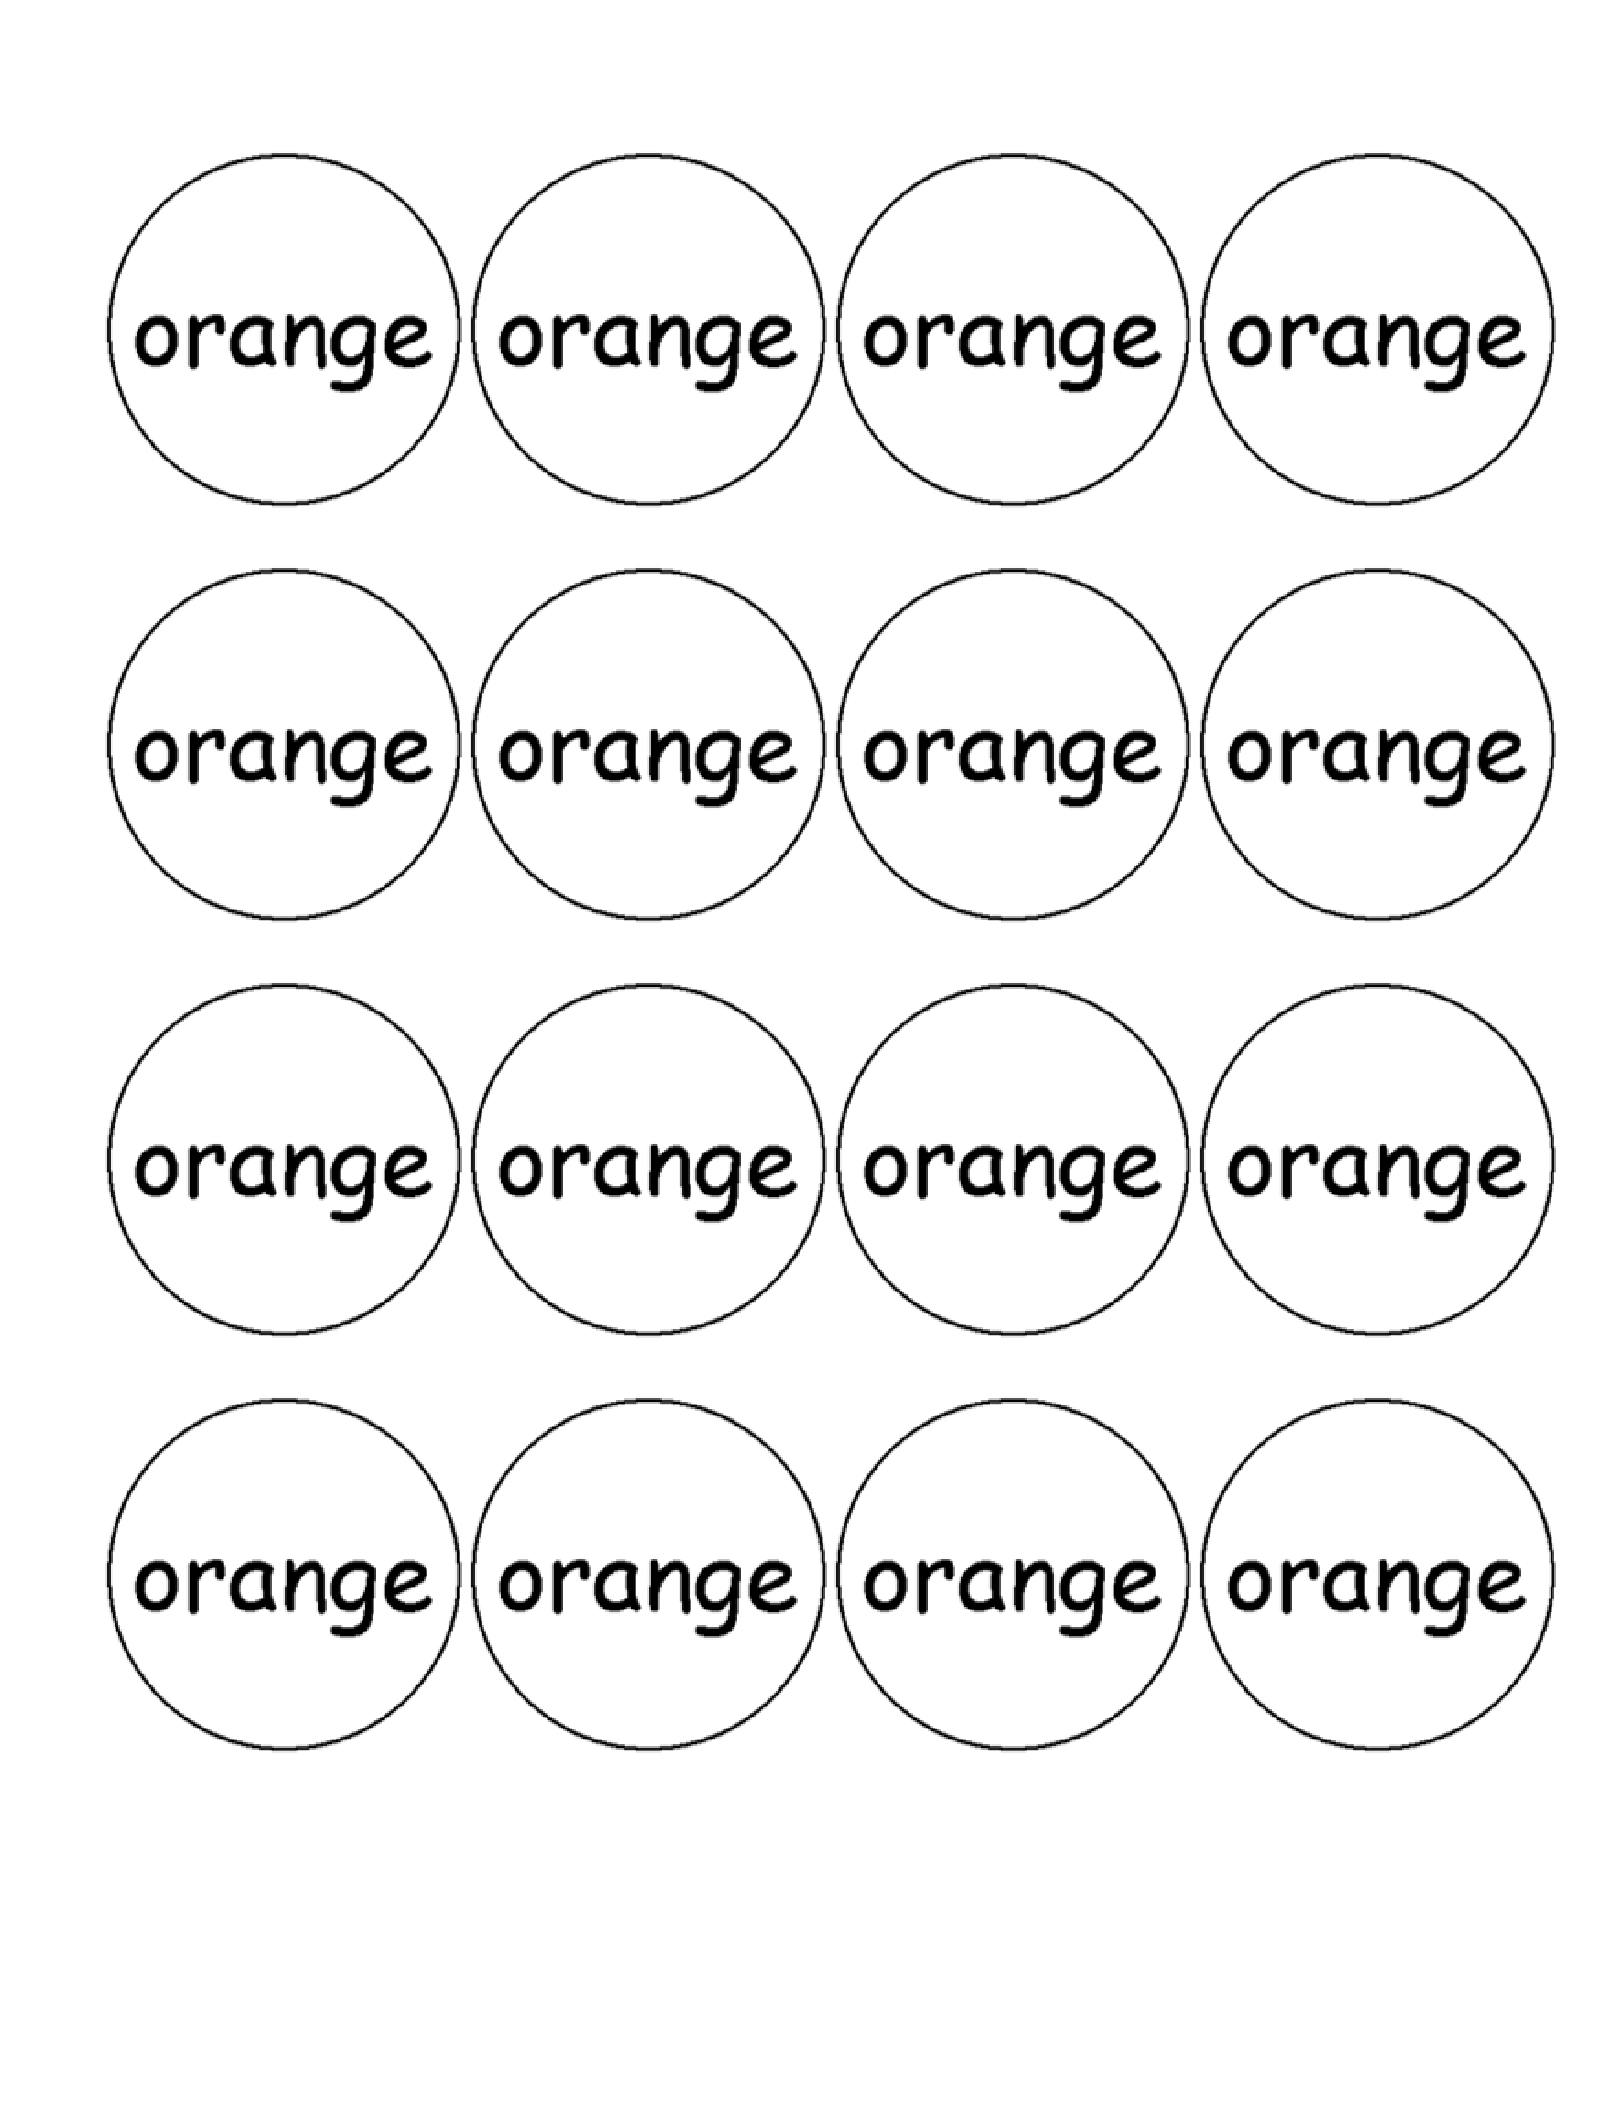
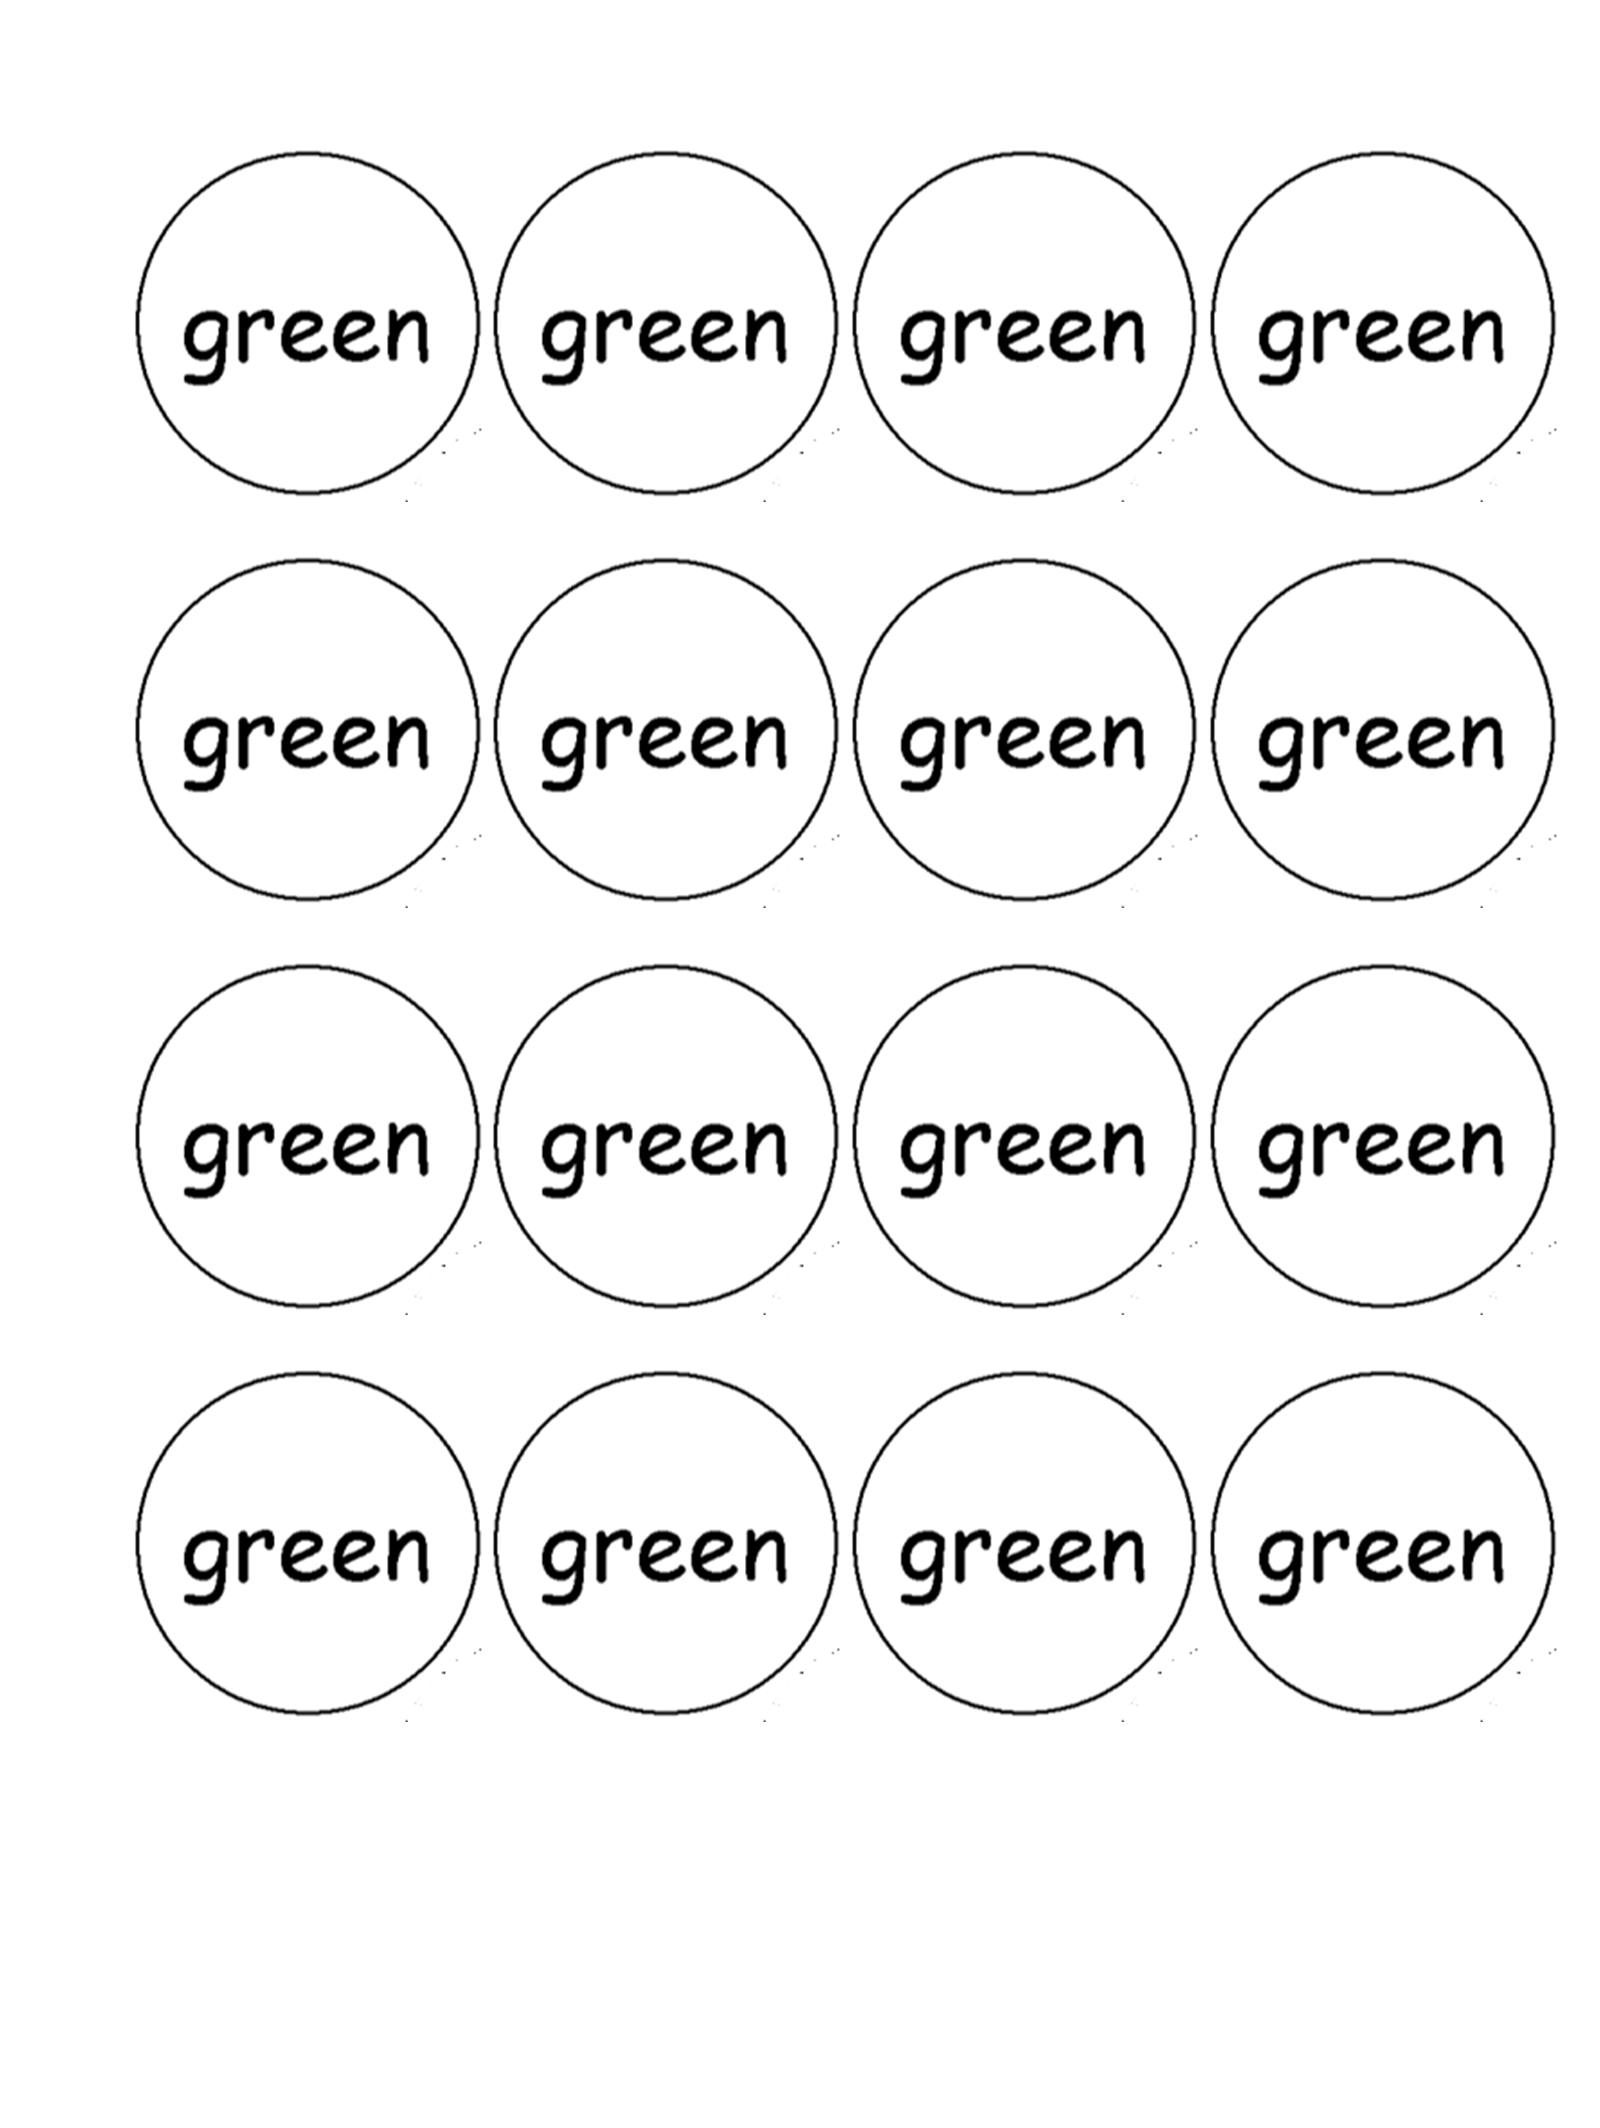
Playdough Earth
Ages 6-8
30 minutes
Playdough Earth
Description
Learn about the different layers of our Earth with playdough.
Competencies
- Sensory motor skills
- Study of nature
- Following directions
- Eye-hand coordination
Materials
- Playdough in the following colors:
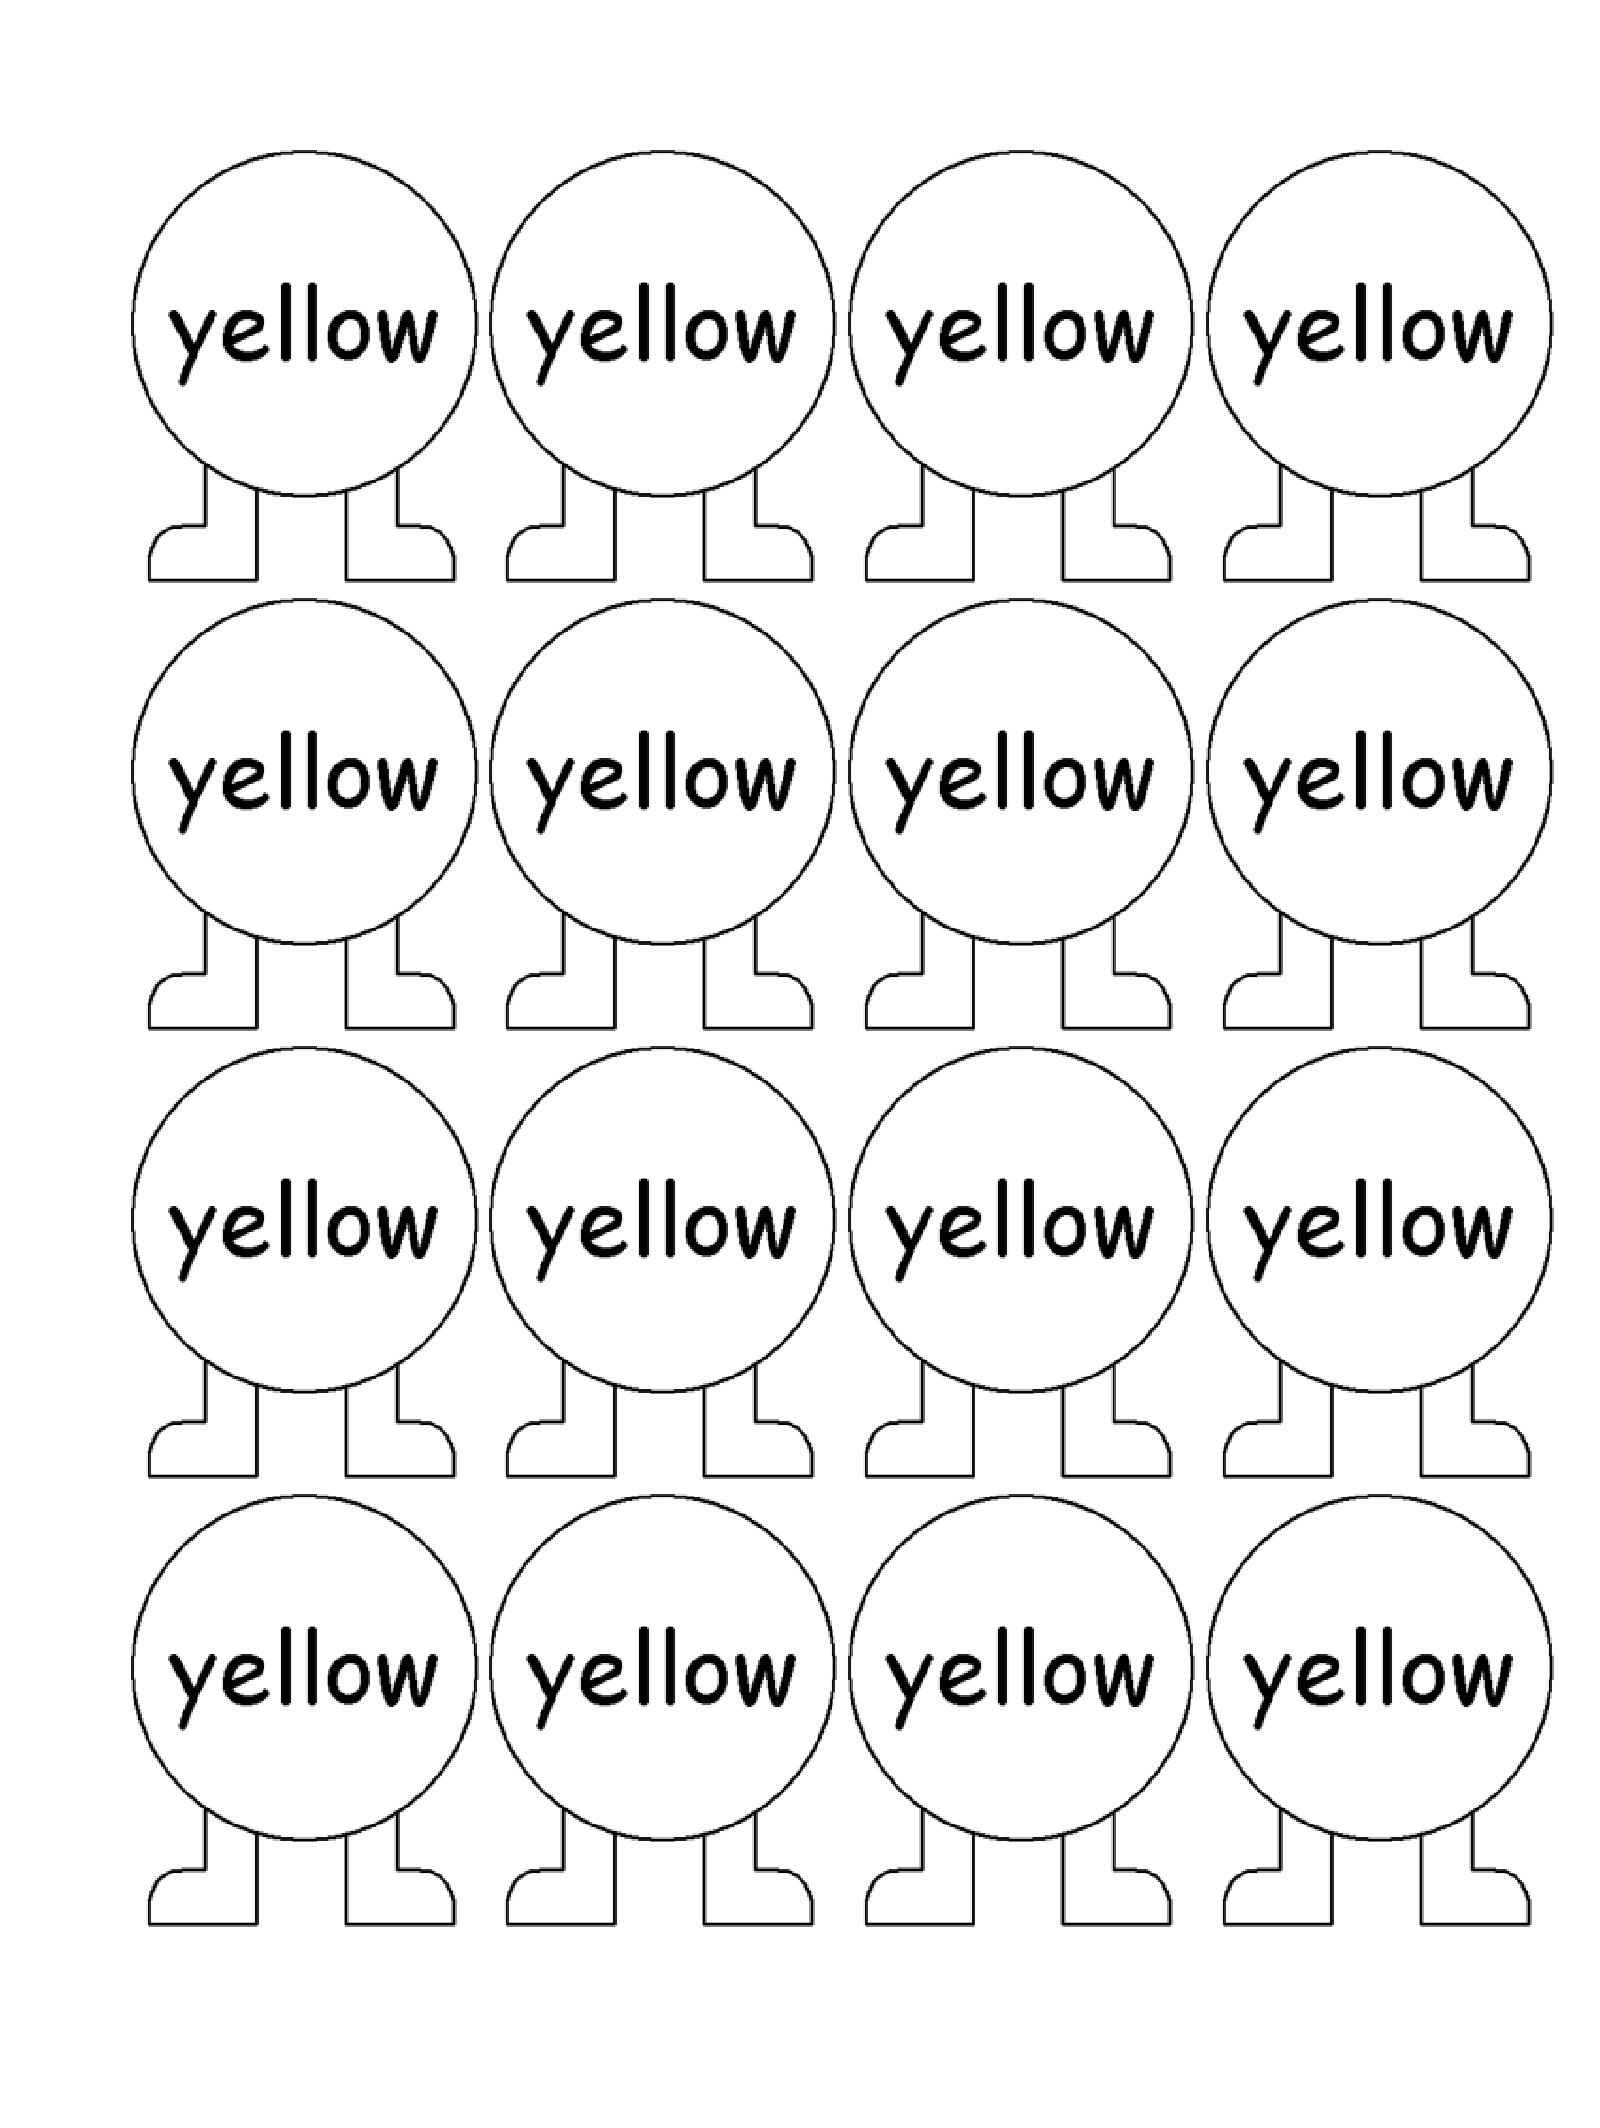
o Yellow (used for Earth’s outer core)
o Orange (used for Earth’s mantle layer)
o Green (used for Earth’s land)
o Brown (used for Earth’s crust layer)
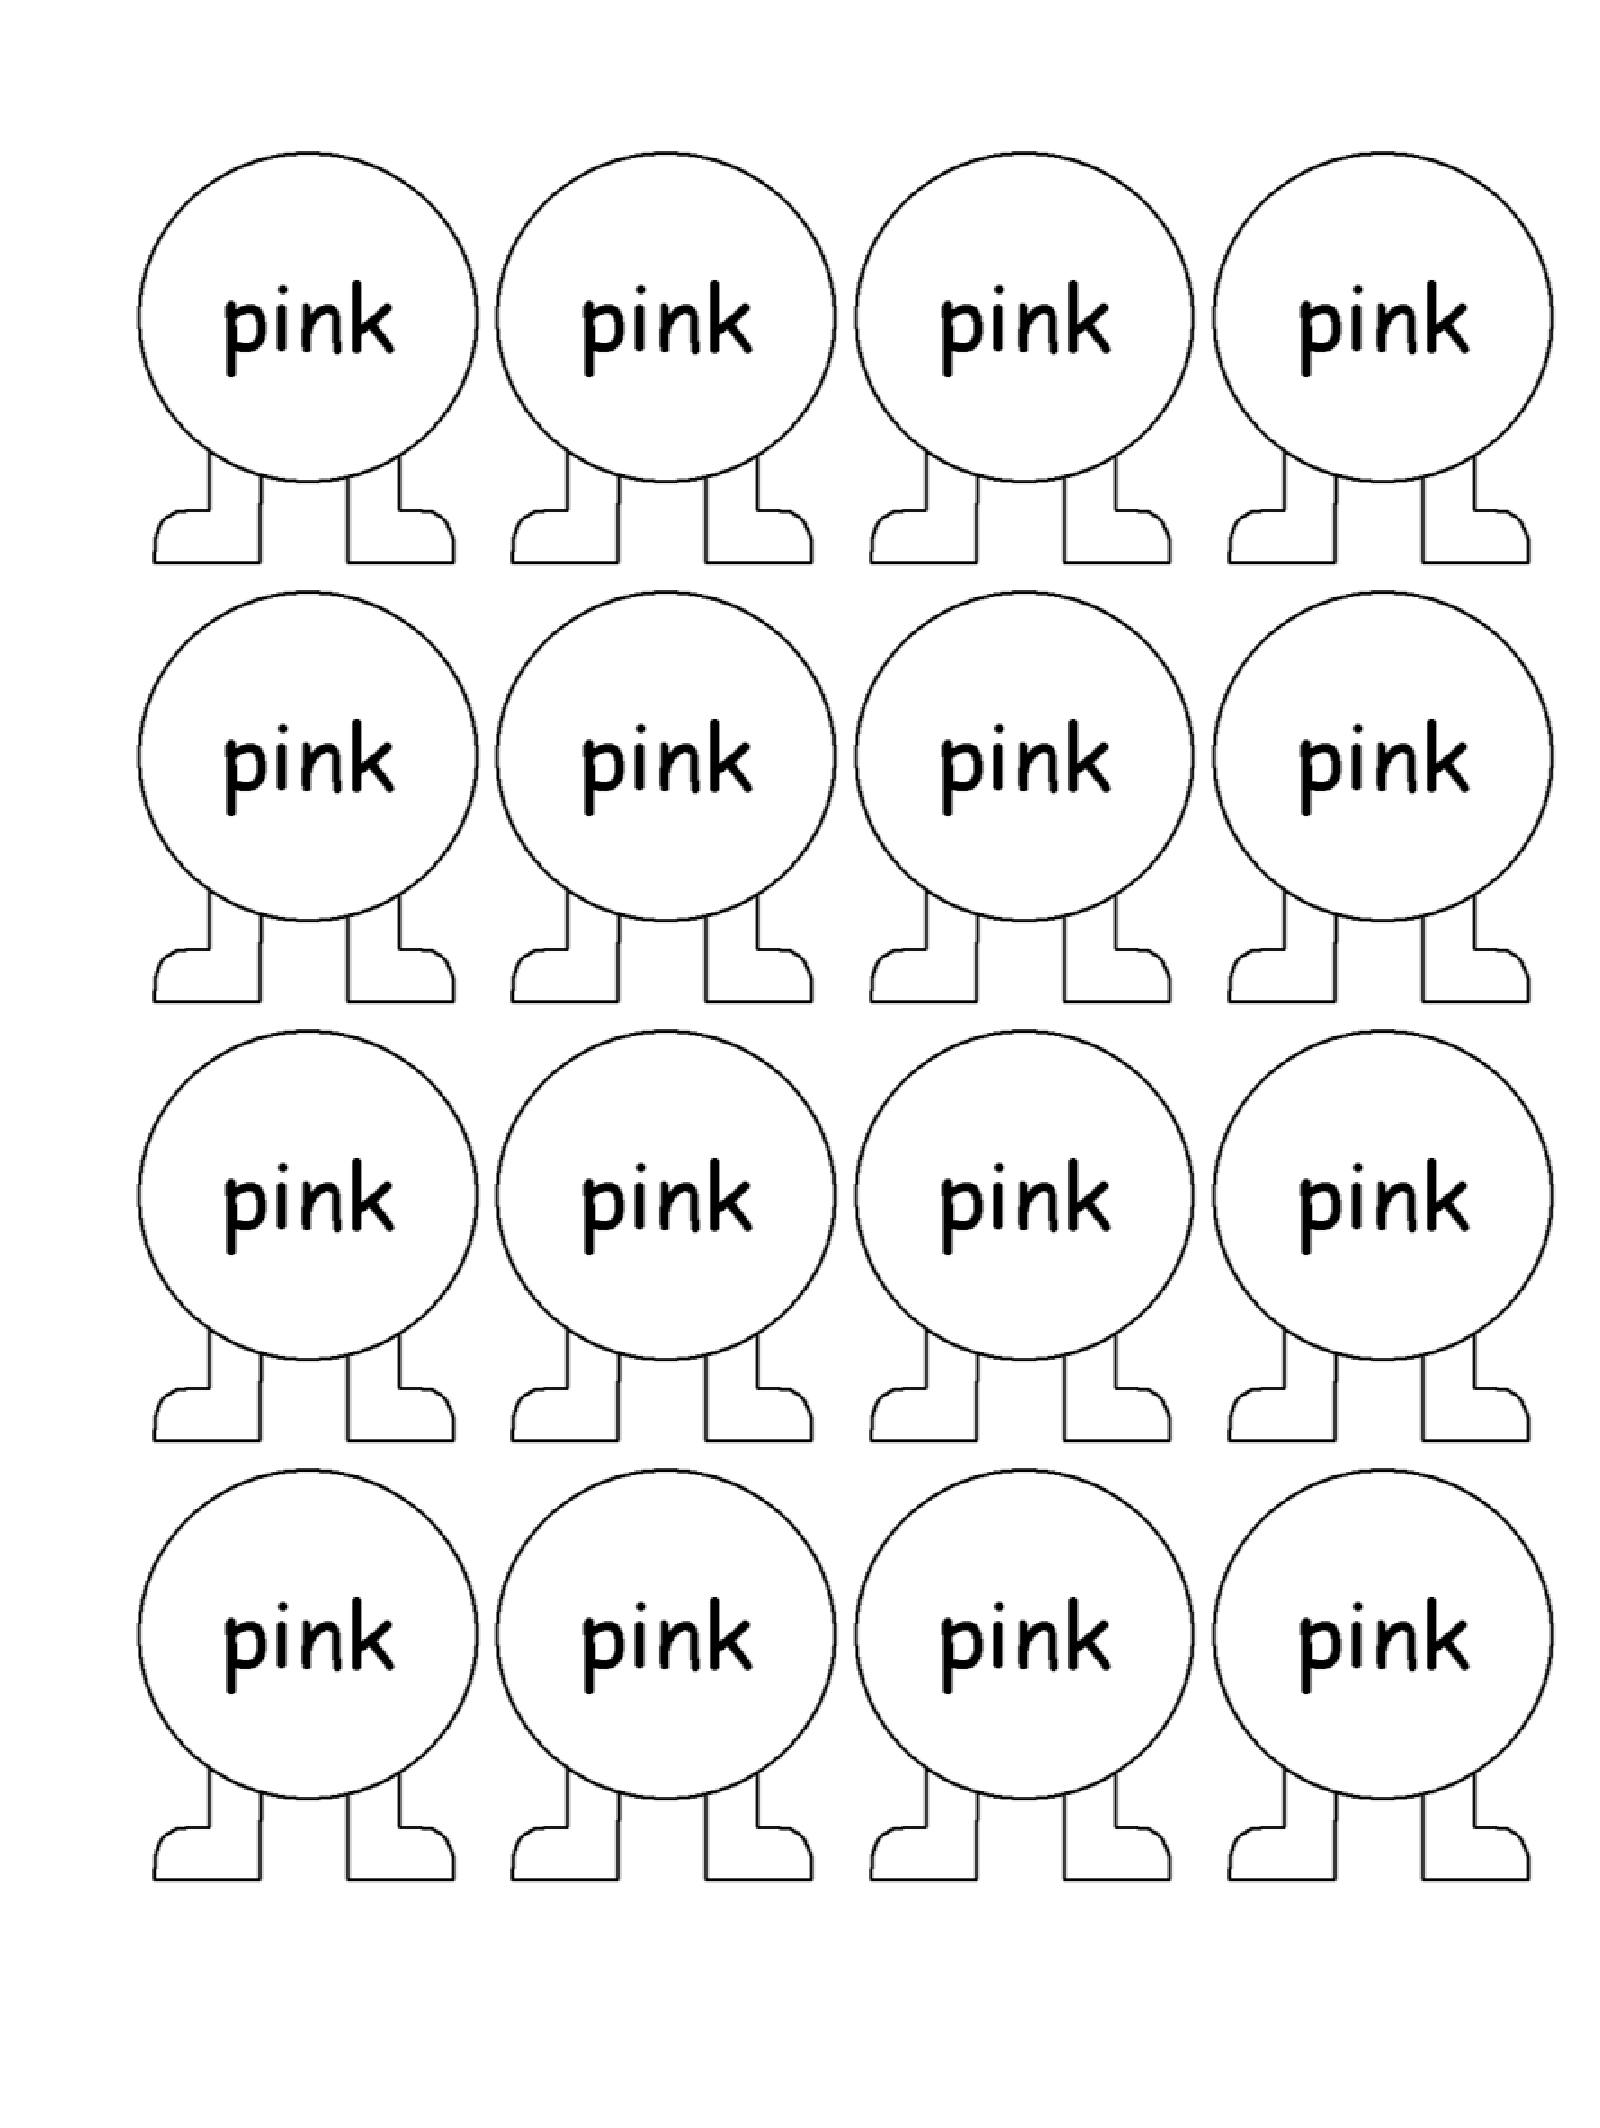
o Blue (used for Earth’s water)
- Plastic knife
- Optional: toothpicks
- Optional: tape
- Optional: marker or pen
Preparation
- Create balls of playdough of every colour, enough for each participant
- Make the balls in increasing size in this order: red, yellow, orange, green, brown, blue
Implementation
- Start with a ball of red playdough to represent the Earth’s core
- Flatten the yellow playdough ball and put it around the red
- Repeat for the other colours: orange, brown then blue
- Using the green playdough, create the land masses for Earth
- Cut the finished Earth in half to view the different layers that represent the inside of our planet
- Optional: Have the children label the different layers they see using toothpicks, tape, and a pen
Book Suggestions
Earth!: My First 4.54 Billion Years by Stacy McAnulty
Here We Are: Notes for Living on Planet Earth by Oliver Jeffers
Rivers, Seas and Oceans by Mack
Thank you, Earth: A Love Letter to Our Planet by April Pulley Sayre
Utterly Amazing Earth by Dougal Jerram
When Planet Earth was New by James Gladstone
Download Link
Images
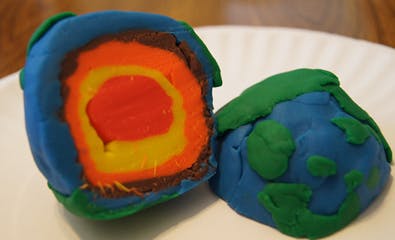
The finished playdough Earth cut in half
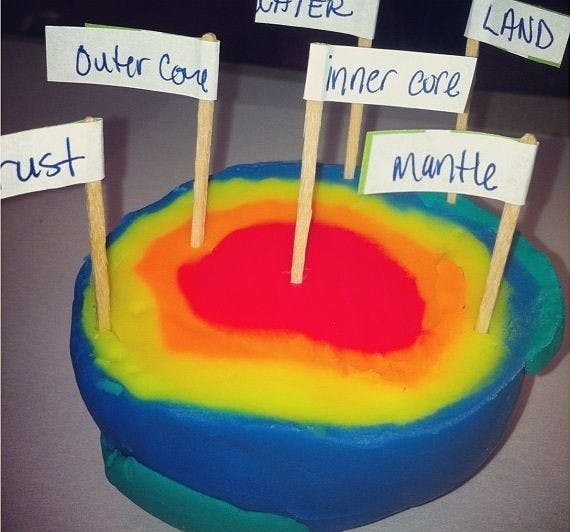
Optional: label the layers
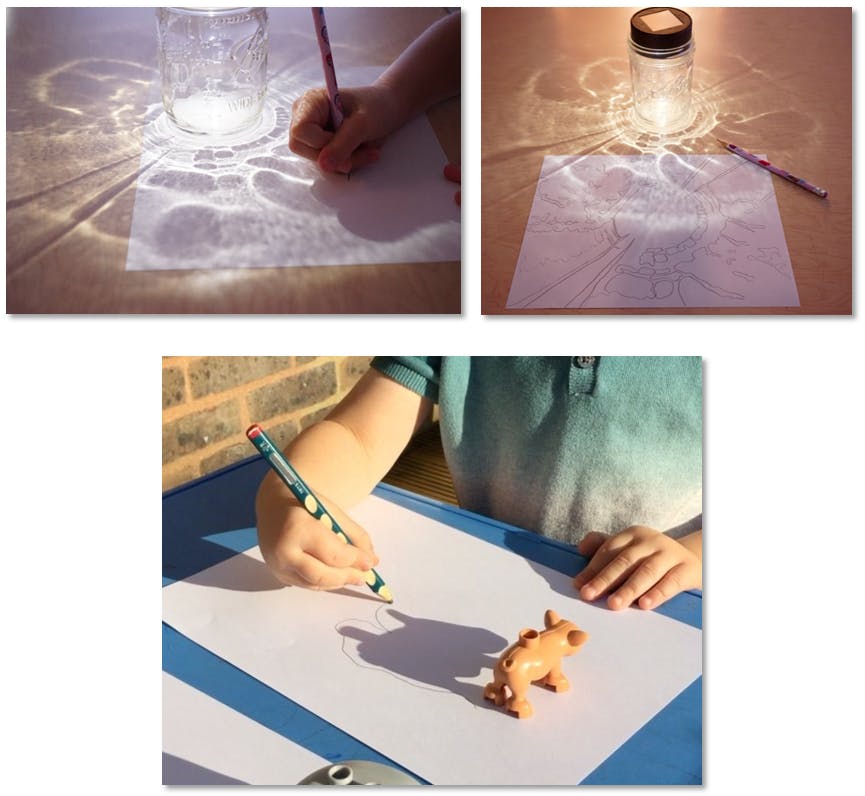
Sample English Activity
Ages 3-5
20 minutes
Sample English Activity
Description
Use shadows or reflections of light as a drawing prompt.
Competencies
- Creative and imaginative thinking
- Artistic expression
- Eye-hand coordination
Materials
- Paper
- An object for each participant to create a shadow or an interesting light pattern (e.g. glass cup, toy, stuffed animal)
- Drawing utensils (pencils, markers, highlighters, pencil crayons)
- Optional: flashlights
Implementation
- Use sunlight coming in from windows or another light source to create a shadow or light pattern; alternatively, dim the lights and use flashlights
- Place your object on a piece of paper and move it around until you like the shadow or light pattern it creates
- Trace the lines of the shadows or light patterns
- Use your imagination to add more detail after tracing
Book Suggestions
Drawn from Nature by Helen Ahpornsiri
Mountains of the World by Dieter Braun
The Night the Forest Came to Town by Charles Ghigna
Download Link
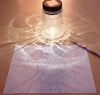
Images
Sample English Activity 1
Ages 3-5
20 minutes
Sample English Activity 1
Description
Use shadows or reflections of light as a drawing prompt.
Competencies
- Creative and imaginative thinking
- Artistic expression
- Eye-hand coordination
Materials
- Paper
- An object for each participant to create a shadow or an interesting light pattern (e.g. glass cup, toy, stuffed animal)
- Drawing utensils (pencils, markers, highlighters, pencil crayons)
- Optional: flashlights
Implementation
- Use sunlight coming in from windows or another light source to create a shadow or light pattern; alternatively, dim the lights and use flashlights
- Place your object on a piece of paper and move it around until you like the shadow or light pattern it creates
- Trace the lines of the shadows or light patterns
- Use your imagination to add more detail after tracing
Book Suggestions
Drawn from Nature by Helen Ahpornsiri
Mountains of the World by Dieter Braun
The Night the Forest Came to Town by Charles Ghigna
Download Link
Images
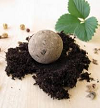
Seed Bomb
Ages 6-8
20 minutes
Seed Bomb
Description
Plant some flowers by using a seed bomb.
Competencies
- Creative and imaginative thinking
- Study of nature
- Nature studies
- Creative expression
- Following directions
Materials
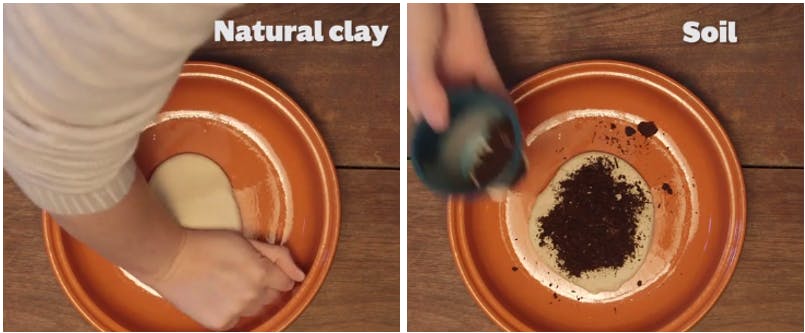
- 4 parts natural clay
- 1 part seed starting soil mix
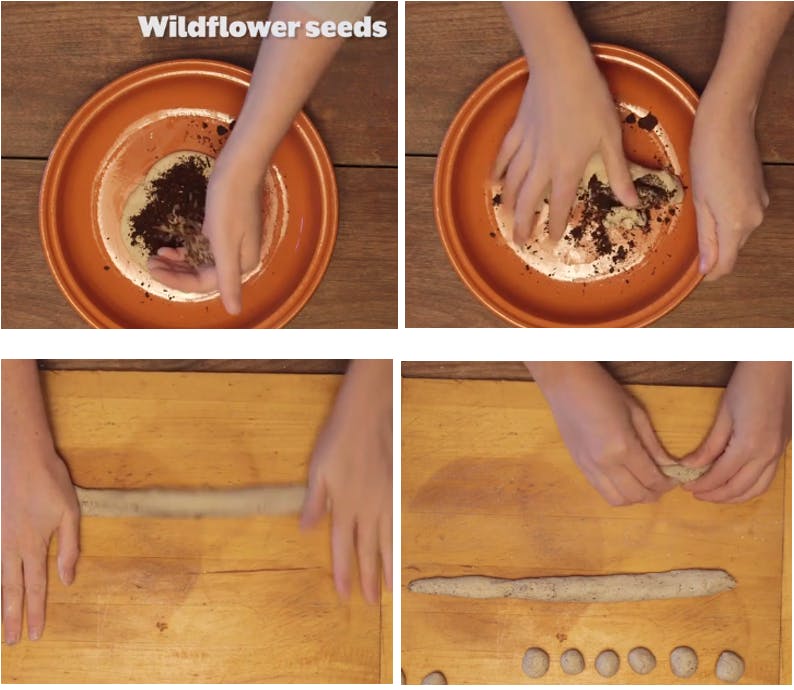
- 1 part wildflower seeds (pick wildflower seeds that are native to where you live)
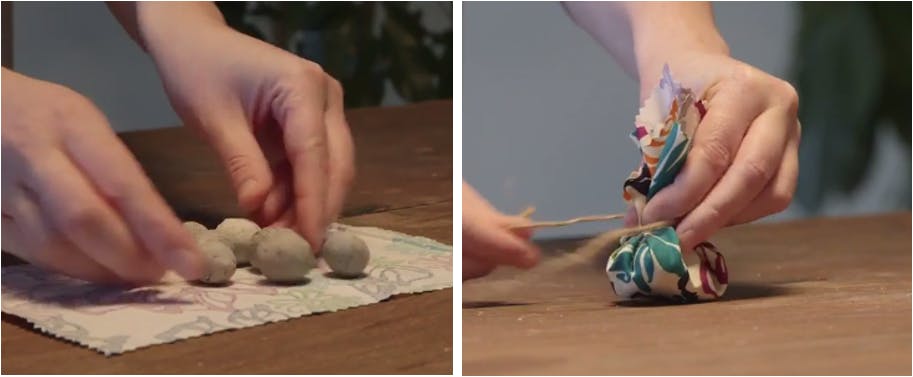
- Fabric or tissue paper
- String
- A sheet of paper or butcher paper
Preparation
- For each participant, evenly distribute the materials on the sheet of paper so they can mix it
- Precut the fabric or tissue paper into 10 cm squares
Implementation
- Have the participants flatten the clay like a pancake
- Over the clay, sprinkle the seed starting mix and wildflower seeds
- Fold the clay and knead it until everything is mixed
- Roll the clay out like a snake
- Pinch off small sections and roll those into balls
- Place the seed bomb balls onto fabric or tissue paper to hold them
- Gather the ends of the fabric or tissue paper and tie with string
- Decorate the fabric or tissue as desired
- Wait 24 hours for the clay to air dry
- Tell the participants to think of a place where they want to see their wild flowers grow
- With adult supervision or permission, throw the seed bomb!
- Alternatively, give the seed bomb to someone as a gift
Book Suggestions
Charlie's Dirt Day by Andrew Larsen
The Digger and the Flower by Joseph Kuefler
Going Wild: Helping Nature Thrive in Cities by Michelle Mulder
A Season of Flowers by Michael Garland
Seed School by Joan Holub
What Matters by Alison Hughes
Wildflowers by Libby Romero
Download Link
Images
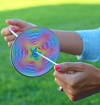
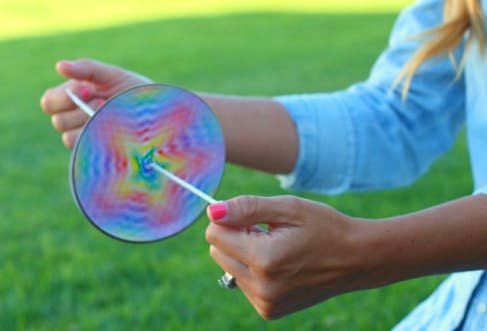
Spinners
Ages 9-12
30 minutes
Spinners
Description
Create a cool image to swirl and amaze your friends.
Competencies
- Creative and imaginative thinking
- Development of fine motor skills
- Cause and effect relationships
- Planning skills
- Creative expression
- Eye-hand coordination
Materials
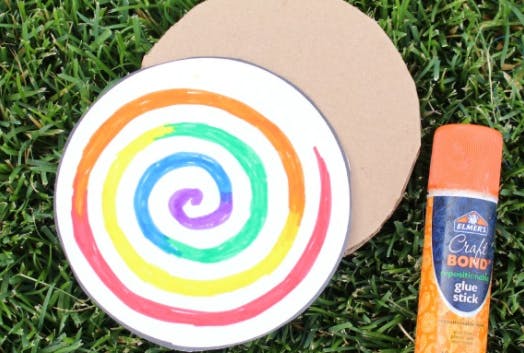
- Cardboard
- Paper
- Markers, paint or pencil crayons
- Twine
- Glue sticks
- Scissors
Preparation
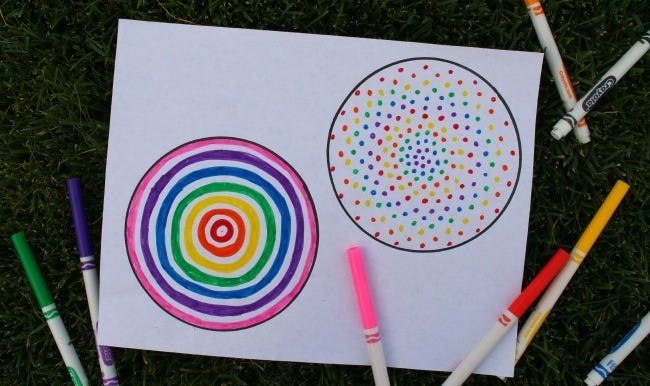
- Downloadable Templates: Print the circle template for each participant
- Optional: If short on time for the activity, cut the twine to approximately 70 cms
Implementation
2. Use the circle cutouts as a guide to trace onto and then cut a cardboard circle
3. Use a glue stick to adhere the paper circles to both sides of the cardboard circle
4. Participants draw a landscape using markers, paint or pencil crayons
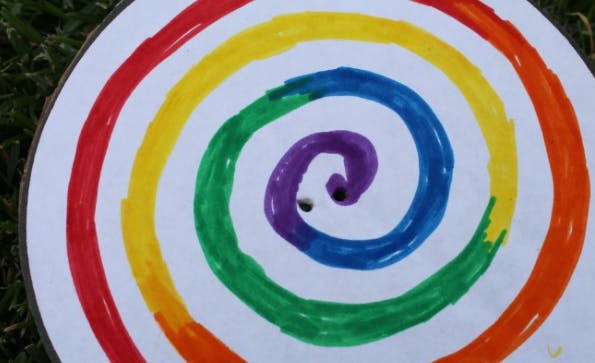
5. Create 2 holes in the circle, one in the center and another slightly beside it
6. Cut the twine to approximately 70 cms long
7. Run the twine into each hole in the spinner
8. Tie the two ends of the twine together in a knot to create a loop
9. Move the spinner to the center of the loop of twine
10. Experiment with rotating the spinner:
b) Pull, relax, then pull on it again
c) Twist the twine by rotating it first to get more speed on your spinner
11. See how your landscape changes depending on how fast it spins
Book Suggestions
Summer Color! by Diana Murray
Utterly Amazing Earth by Dougal Jerram
You Are Never Alone by Elin Kelsey
Download Links
Images

Story Dice

Ages 9-12
20 minutes
Story Dice
Description
Roll the dice to select six stimulus words and build a story around them.
Competencies
- Creative and imaginative thinking
- Organization and planning
- Written communication skills
- Creative expression
Materials
- Paper
- Pencils or pens
- Dice
- Downloadable Template: Story dice
Implementation
- Participants throw a dice six times to select a stimulus word from each of the six circles on the Story Dice template
- Write down the six stimulus words at the top of a sheet of paper
- Participants write a short story that uses all of the six stimulus words at least once
Book Suggestions
Countdown to Danger: Canadian Survival by Jeff Szpirglas
Lost! by Terry Lynn Johnson
Sukaq and the Raven by Roy Goose and Kerry McCluskey
Wild Ideas by Elin Kelsey
Download Links
Images

Storytelling Stones
Ages 9-12
60 minutes
Storytelling Stones
Description
Use stones to make art and then tell a story with them
Competencies
- Creative and imaginative thinking
- Development of fine motor skills
- Planning skills
- Oral communication skills
- Written communication skills
- Creative expression
Materials
- Stones and pebbles
- Various colours of paint (acrylic paint works best but you can use tempera, poster paint or watercolours)
- Paintbrushes
- Pencils
- Paper
- Optional: markers or paint pens
- Optional: tape
Preparation
- Collect stones of various shapes and sizes, then wash and dry them
- It’s best to choose smooth, flat stones and pebbles, but irregular and rough ones can also work
- If you are unable to collect stones outside, many craft, dollar, and garden supply stores offer a variety of stones for purchase
- Alternatively, participants can collect their own stones by going outside at the start of the program if you have a suitable location nearby, or they can be instructed to collect the stones in advance and bring them to the program
- Prepare the room for a program that uses paint
Implementation
- Provide participants with a minimum of three stones each
- Participants paint the stones as desired (e.g. faces, plants, animals, words, geometric shapes, patterns, vehicles, numbers, and letters)
- If desired, participants can outline a design in pencil on the stones before painting
- If desired, participants can use masking tape to create sharp lines (wrap the tape around a portion of the stone, paint the uncovered part, wait for the paint to dry and then carefully remove the tape)
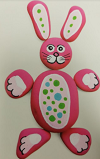
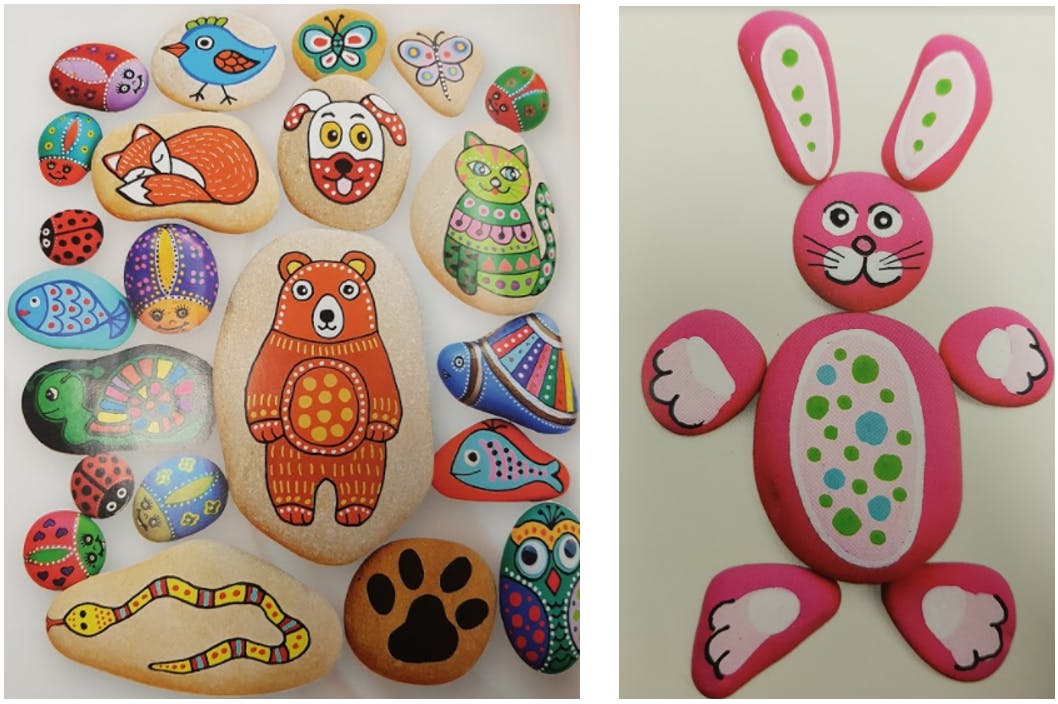
- If desired, participants can design and paint a multi-stone image (e.g. create a rabbit by using a round stone for the head, two thin oval stones for ears, a larger oval stone for the body, and four oval or triangle-shaped stones or pebbles for legs)
- Once participants have finished painting their stones, challenge them to create a story using all their designs; they can tell their story to the group, or write it down on paper
- Participants can combine their stones or switch with others and then tell different stories
Book Suggestions
Island in the Salish Sea by Sheryl McFarlane
Utterly Amazing Earth by Dougal Jerram
The Wild Beast by Eric Walters
Download Link
Images
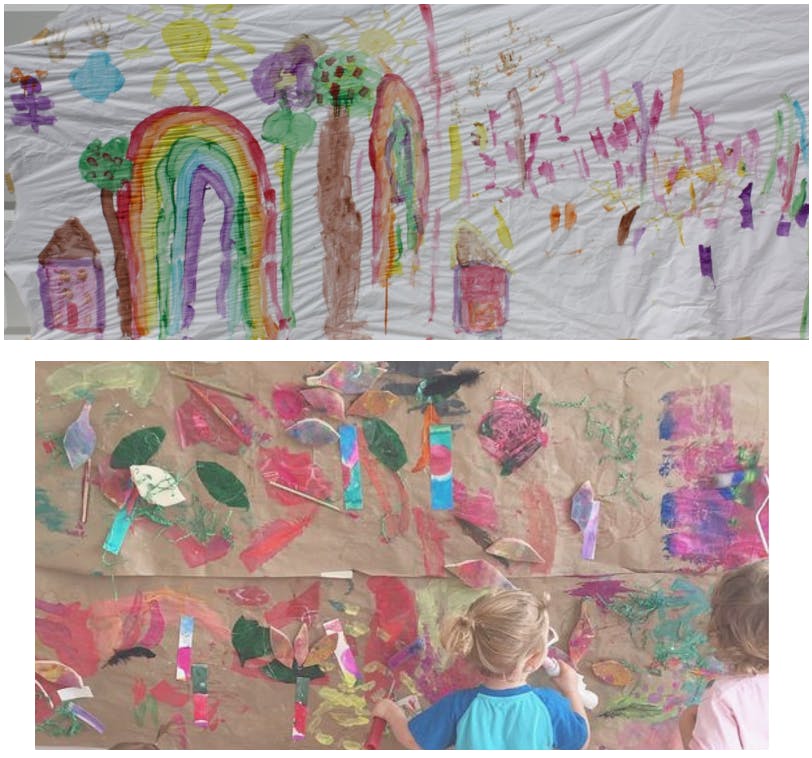
Tabletop Nature Mural
Ages 0-3
20 minutes
Tabletop Nature Mural
Description
Create a nature-themed mural using a variety of materials.
Competencies
- Teamwork
- Creative and imaginative thinking
- Development of fine motor skills
- Planning skills
- Social interaction
Materials
- Cutouts from discarded magazines with nature pictures
- Cutouts of various shapes from coloured paper (e.g. leaves, trees, etc.)
- Kraft paper roll or large poster paper
- Crayons
- Markers
- Coloured paper
- Glue
- Optional: leaves and grass
- Optional: stickers (use TD SRC stickers from a previous year if desired)
Preparation
- Prepare the room for a program that uses glue
- Line the tables or floor with a long kraft paper roll for a large group mural, or small poster paper or Bristol boards for a smaller groups
- Optional: On the paper, draw a few pencil outlines of trees or other objects in the natural world for kids to add to
- Cut out a variety of nature scenes and animals from discarded magazines or from printouts
- Cut out of a variety of shapes in a variety of colours for kids to glue onto the mural (for example, kids can combine green triangles with brown rectangles to make trees)
- Provide stickers, if you have any available that would fit with the theme of the mural (animals, nature scenes, etc.)
Implementation
- Caregivers and staff assist children with adding to the mural in various ways using crayons or markers, placing stickers, and gluing on various cutouts and nature scenes—there is no wrong way to add to the mural!
- You can provide a specific theme for the mural, if desired (for example, a rainforest theme) or just let the kids and caregivers work away on their portion of the mural as they see fit!
- Optional: Hang the mural somewhere in the library or the program room for kids to see their creation
Book Suggestions
Carson Crosses Canada by Linda Bailey
Explorers of the Wild by Cale Atkinson
I Give You the World by Stacey McCleary
Life by Cynthia Rylant
Splish, Splash, Foxes Dash! by Geraldo Valério
Thank You, Earth by April Pulley Sayre
A Walk in the Forest by Maria Dek
You Are Never Alone by Elin Kelsey
Download Link
Images
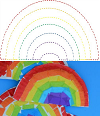
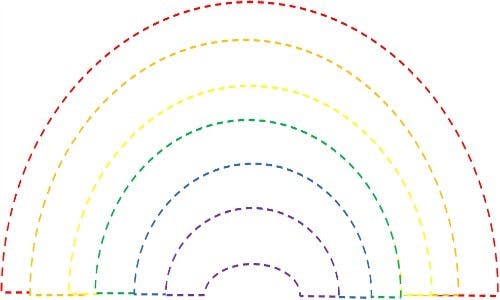
Tissue Paper Rainbow
Ages 0-3
15 minutes
Tissue Paper Rainbow
Description
Create a rainbow using tissue paper.
Competencies
- Development of fine motor skills
- Planning skills
- Creative expression
Materials
- Tissue paper or coloured paper (red, orange, yellow, green, blue, and purple)
- Downloadable Templates: Rainbow template
- Glue
Preparation
- Cut the tissue paper into small squares and rectangles
- Prepare the room for a program that uses glue
Implementation
- Provide each participant with a rainbow template and scraps of tissue paper
- Participants glue the pieces of tissue paper onto the corresponding part of the rainbow
Book Suggestions
I Give You the World by Stacey McCleary
Picture the Sky by Barbara Reid
Summer Colour! by Diana Murray
Download Links
Images

Tracing Shadows
Ages 3-5
20 minutes
Tracing Shadows
Description
Use shadows or reflections of light as a drawing prompt.
Competencies
- Creative and imaginative thinking
- Artistic expression
- Eye-hand coordination
Materials
- Paper
- An object for each participant to create a shadow or an interesting light pattern (e.g. glass cup, toy, stuffed animal)
- Drawing utensils (pencils, markers, highlighters, pencil crayons)
- Optional: flashlights
Implementation
- Use sunlight coming in from windows or another light source to create a shadow or light pattern; alternatively, dim the lights and use flashlights
- Place your object on a piece of paper and move it around until you like the shadow or light pattern it creates
- Trace the lines of the shadows or light patterns
- Use your imagination to add more detail after tracing
Book Suggestions
Drawn from Nature by Helen Ahpornsiri
Mountains of the World by Dieter Braun
The Night the Forest Came to Town by Charles Ghigna
Download Link
Images
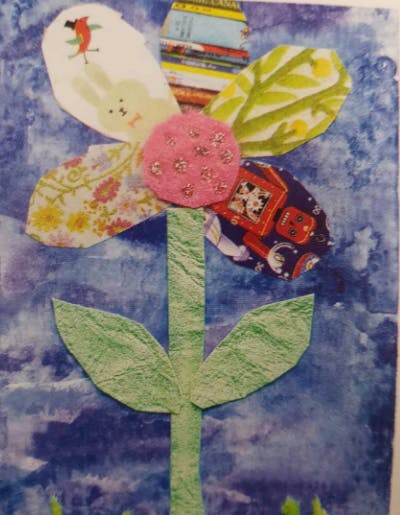
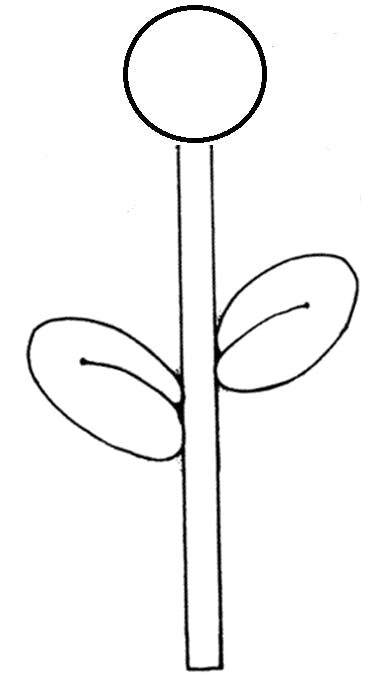
Wacky Flowers
Ages 3-5
20 minutes
Wacky Flowers
Description
Make a flower with fun, colourful petals.
Competencies
- Creative and imaginative thinking
- Development of fine motor skills
Materials
- Pages from discarded magazines, comic books, or books with lots of images
- Paper
- Pen or marker
- Downloadable Templates: petal, stem
- Safety scissors
- Optional: Felt or coloured paper
Preparation
- Collect various discarded magazines with fun and interesting pictures
- Print and cut out the petal templates
- Print out the flower template
- Prepare the room for a program that uses glue
Implementation
- Participants use the petal templates to trace around five images or scenes in magazines of their choosing
- Participants cut out the images from the magazines with caregiver or staff assistance as needed
- Participants glue five or six petals onto the flower template
- If desired, allow participants to cut out felt to use for the stem and stamen
- If desired, allow participants to cut out petals in any size they want (e.g. long and skinny), without using the template
Book Suggestions
The Digger and the Flower by Joseph Kuefler
The Honeybee by Kirsten Hall
I Love You Like…by Lori Joy Smith
Plant the Tiny Seed by Christie Matheson
A Season of Flowers by Michael Garland
Seed School: Growing Up Amazing by Joan Holub
Summer Color! by Diana Murray
Wild Ideas by Elin Kelsey
Download Links
Images
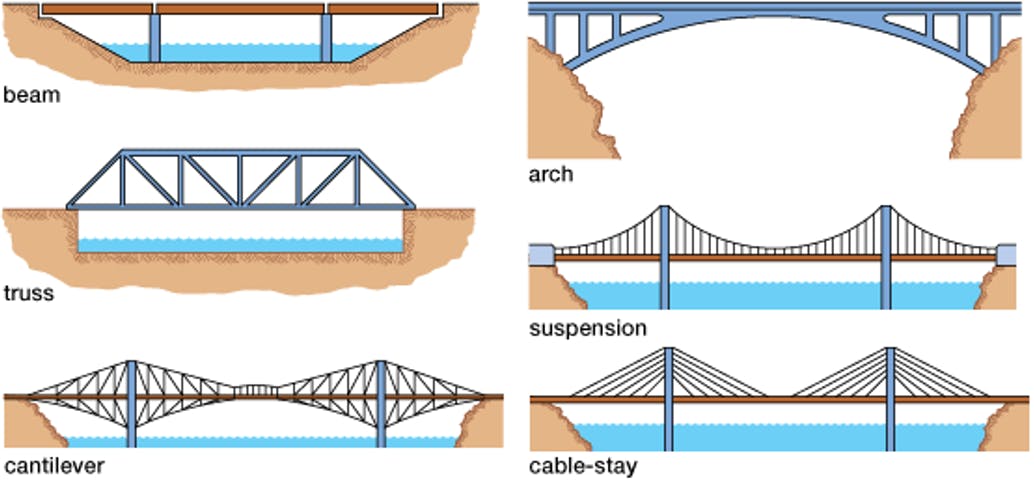
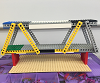
Wild Bridges
Ages 6-8
20 minutes
Wild Bridges
Description
Design and create bridges inspired by nature.
Competencies
- Working collaboratively
- Development of fine motor skills
- Planning skills
- Problem solving
Materials
- Plastic building blocks, craft sticks, or any other material suitable for building
- Glue
- Optional: shoeboxes, building blocks or books
- Optional: Bristol board, playdough and books if attempting the “Test a Truss” experiment (see Implementation Step 4)
Preparation
- Prepare the room for a program that uses glue
- Print out or photocopy pictures of different types of bridges, such as beam, arch, suspension, and truss, or use the bridge template
Implementation
1. Participants attempt to create the bridge of choice using Lego, craft sticks, or any other material suitable for building
2. If desired, set up two shoeboxes or blocks or books as far apart as you want the bridge to span and attempt to bridge the gap
3. When your bridge is complete (and the glue is dry, if necessary), test it with objects of varying weights to see how strong your design is; analyze your bridge and rebuild it so it will hold more weight, if needed
4. For an added STEM (Science, Technology, Engineering, and Math) challenge, attempt the “Test a Truss” experiment on page 21 of Wild Buildings and Bridges by Etta Kaner, also copied here:
- Make 10 or more 2.5 cm balls of playdough (a little smaller than ping-pong balls)
- Stand two piles of books 18 cm apart
- Place two strips of Bristol board (15 cm x 30 cm), one on top of the other, across the gap to form a bridge. How many balls of playdough do the strips hold?
- Accordion-fold one of the strips of Bristol board lengthwise. Place it across the gap with the other (flat) strip on top. How many balls does your bridge hold now?
- Talking point: This experiment demonstrates the strength of the Truss bridge
Book Suggestions
Rivers, Seas and Oceans by Mack
Wild Buildings and Bridges by Etta Kaner
Download Link
Images