Activities
Here are some fun games, activities and crafts to offer at your library. All fit with this summer’s theme.
The full instructions for each activity provide all the details you need to run them, including space considerations, materials lists, preparation steps, and tips to make activities inclusive for kids with varying abilities. It can be helpful to ask if participants have any accessibility accommodations and to include written and visual instructions to make it easier for families to participate. For more tips, visit the Plan for Accessibility page.
There are also passive programming options with ready-to-print templates, as well as programs that can be adapted for outdoor settings.
Visit the Canadian Space Agency website for more activities and free resources in English and French.
Alphabet Garden
Ages 0-3
15-30 minutes
Alphabet Garden
Description
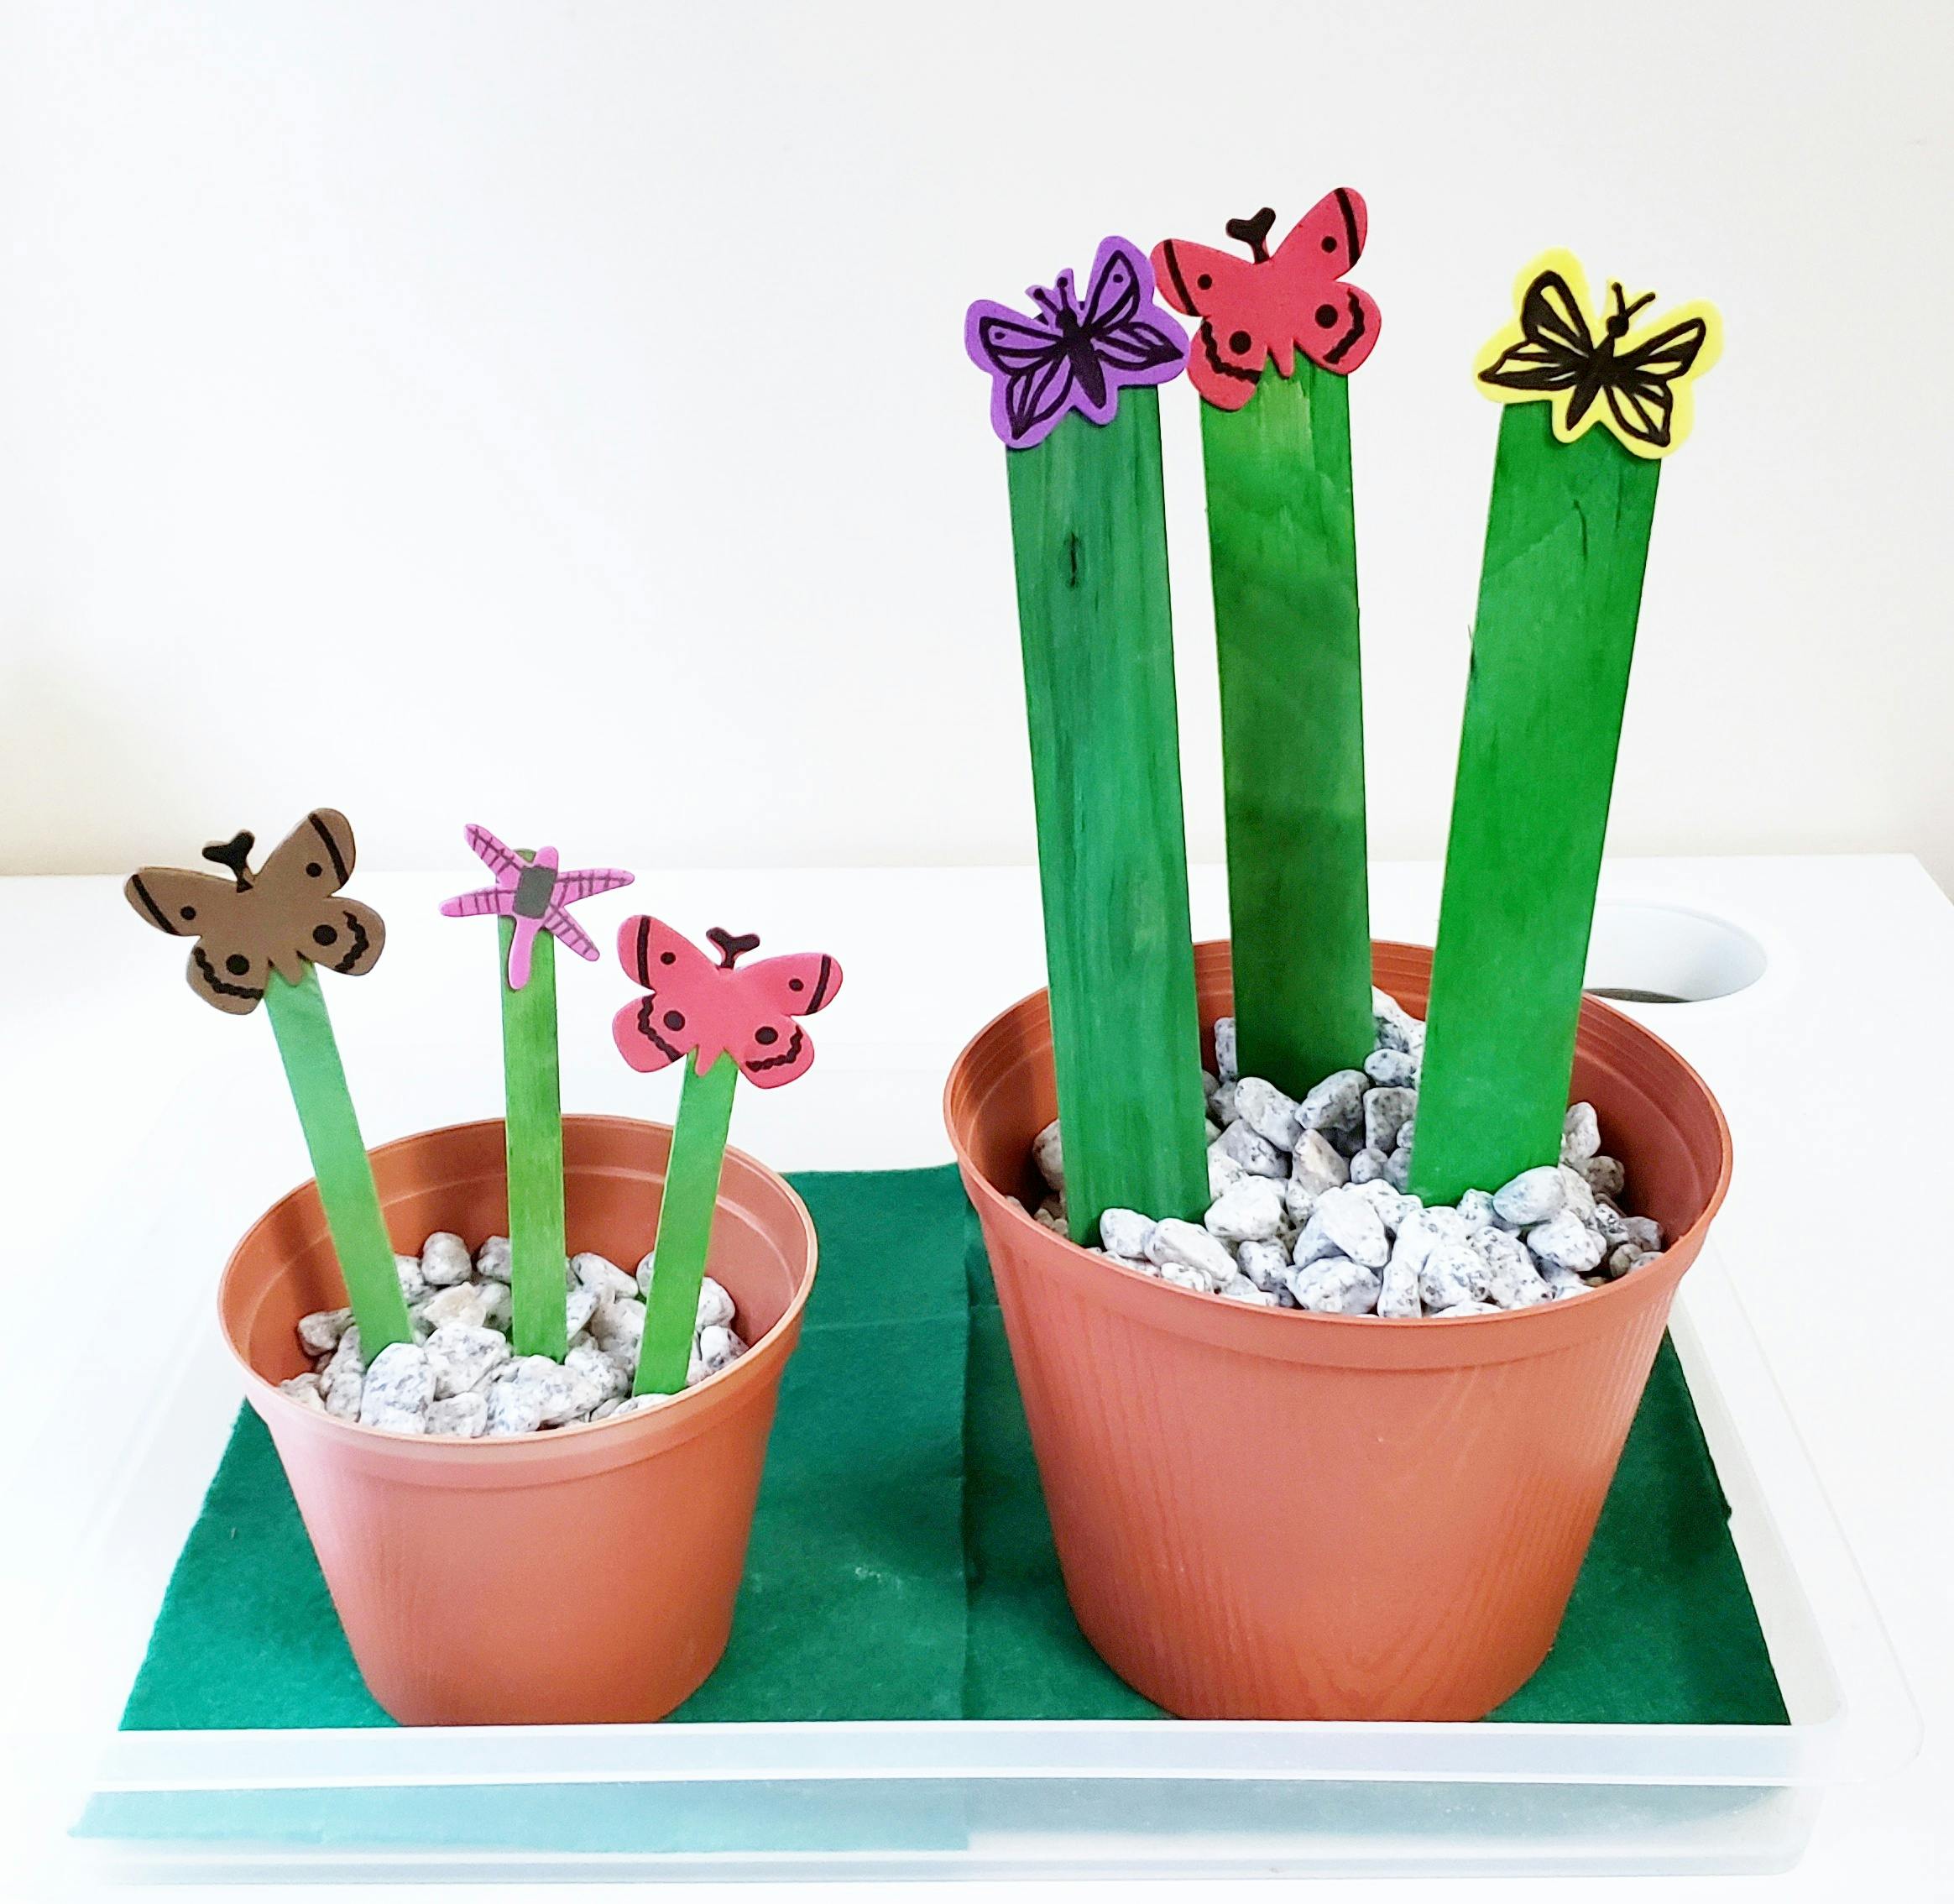
This activity will create alphabet flowers that can be used to spell names, words or be used for other word-related activities.
Number of Participants
For a minimum of 1 participant
Space Considerations
Any type of space where kids can be seated to do a craft
Competencies
- Artistic expression
- Creative expression
- Development of fine motor skills
- Spatial relationships
- Understanding shapes
Materials
- Plastic flower pots in various sizes
- Stones (or anything that can fill the flower pots and hold the “flowers” in place)
- Craft sticks
- Green liquid watercolour paint or food colouring (optional)
- Flower and/or bug stickers
- Black permanent marker
- Tray, cookie sheet or flat container
- Green felt
Preparation
Optional: Colour plain craft sticks green to look like flower stems
1. Soak craft sticks overnight in green food colouring or liquid watercolour paint
2. Rinse them in water the next day and place them on paper towels to dry
Implementation
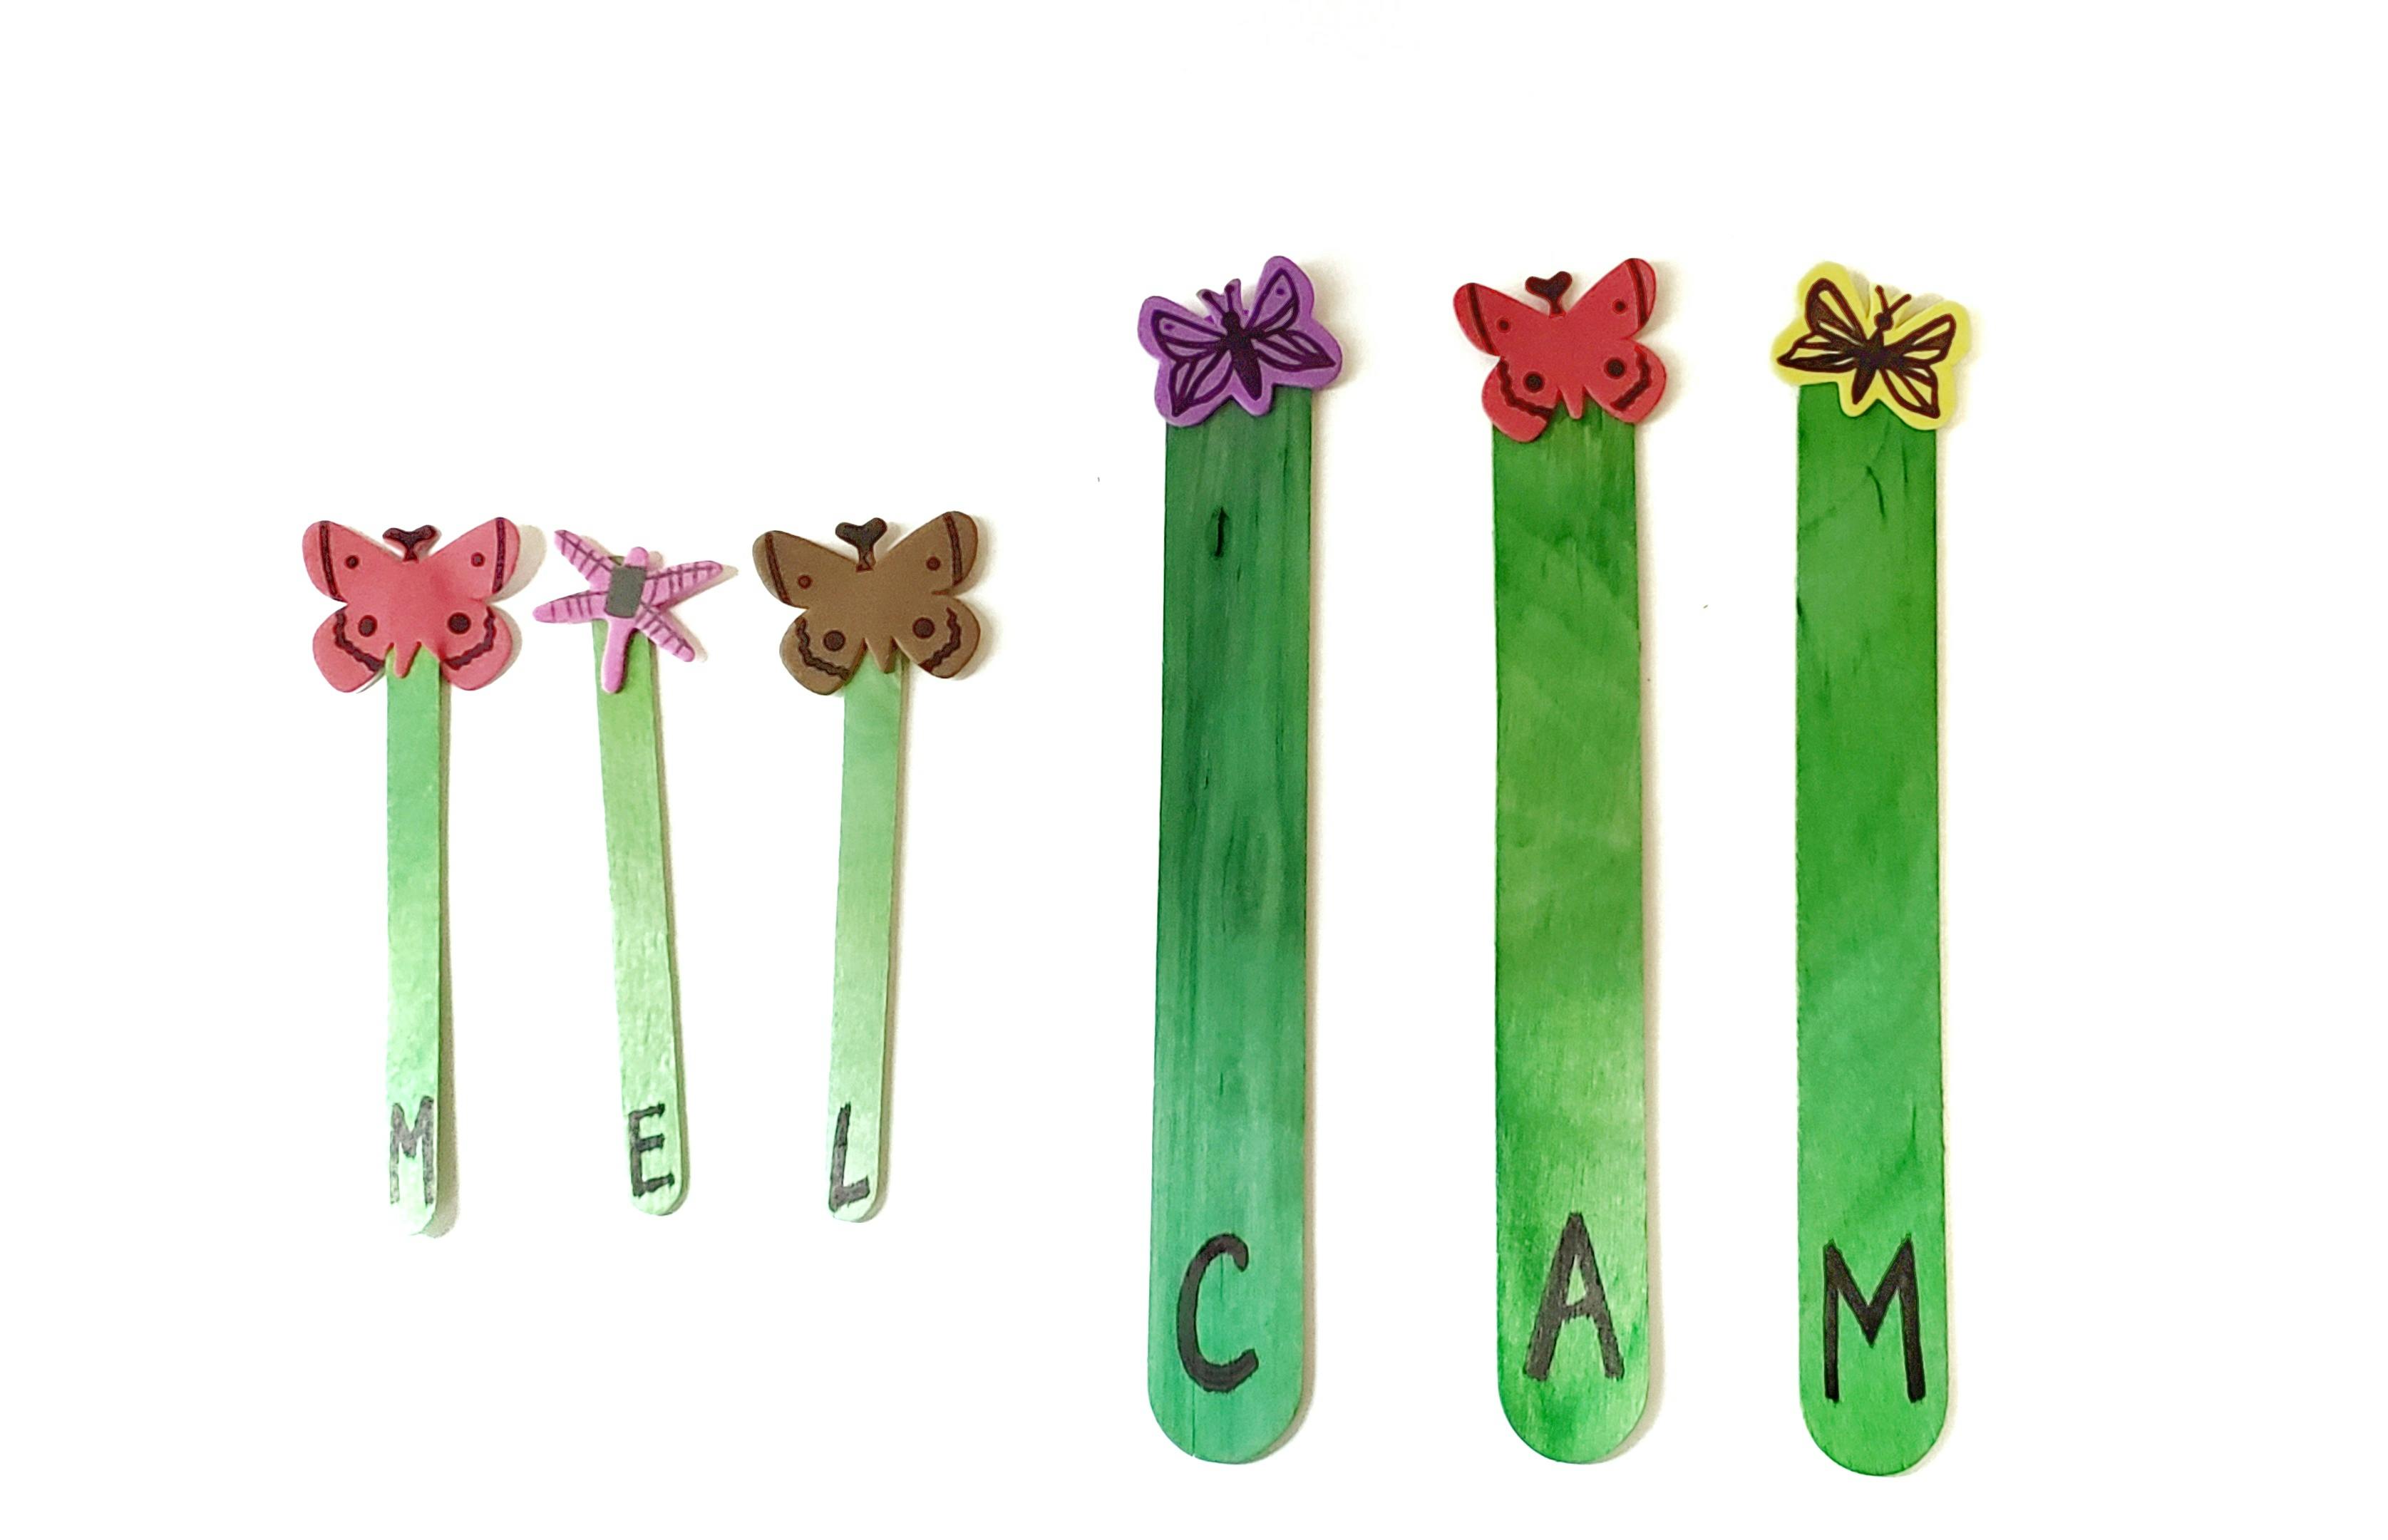
1. Create the flowers
a. Write one letter of the alphabet toward the bottom of each stick using a black permanent marker
b. Place one flower or bug sticker at the top of each stick
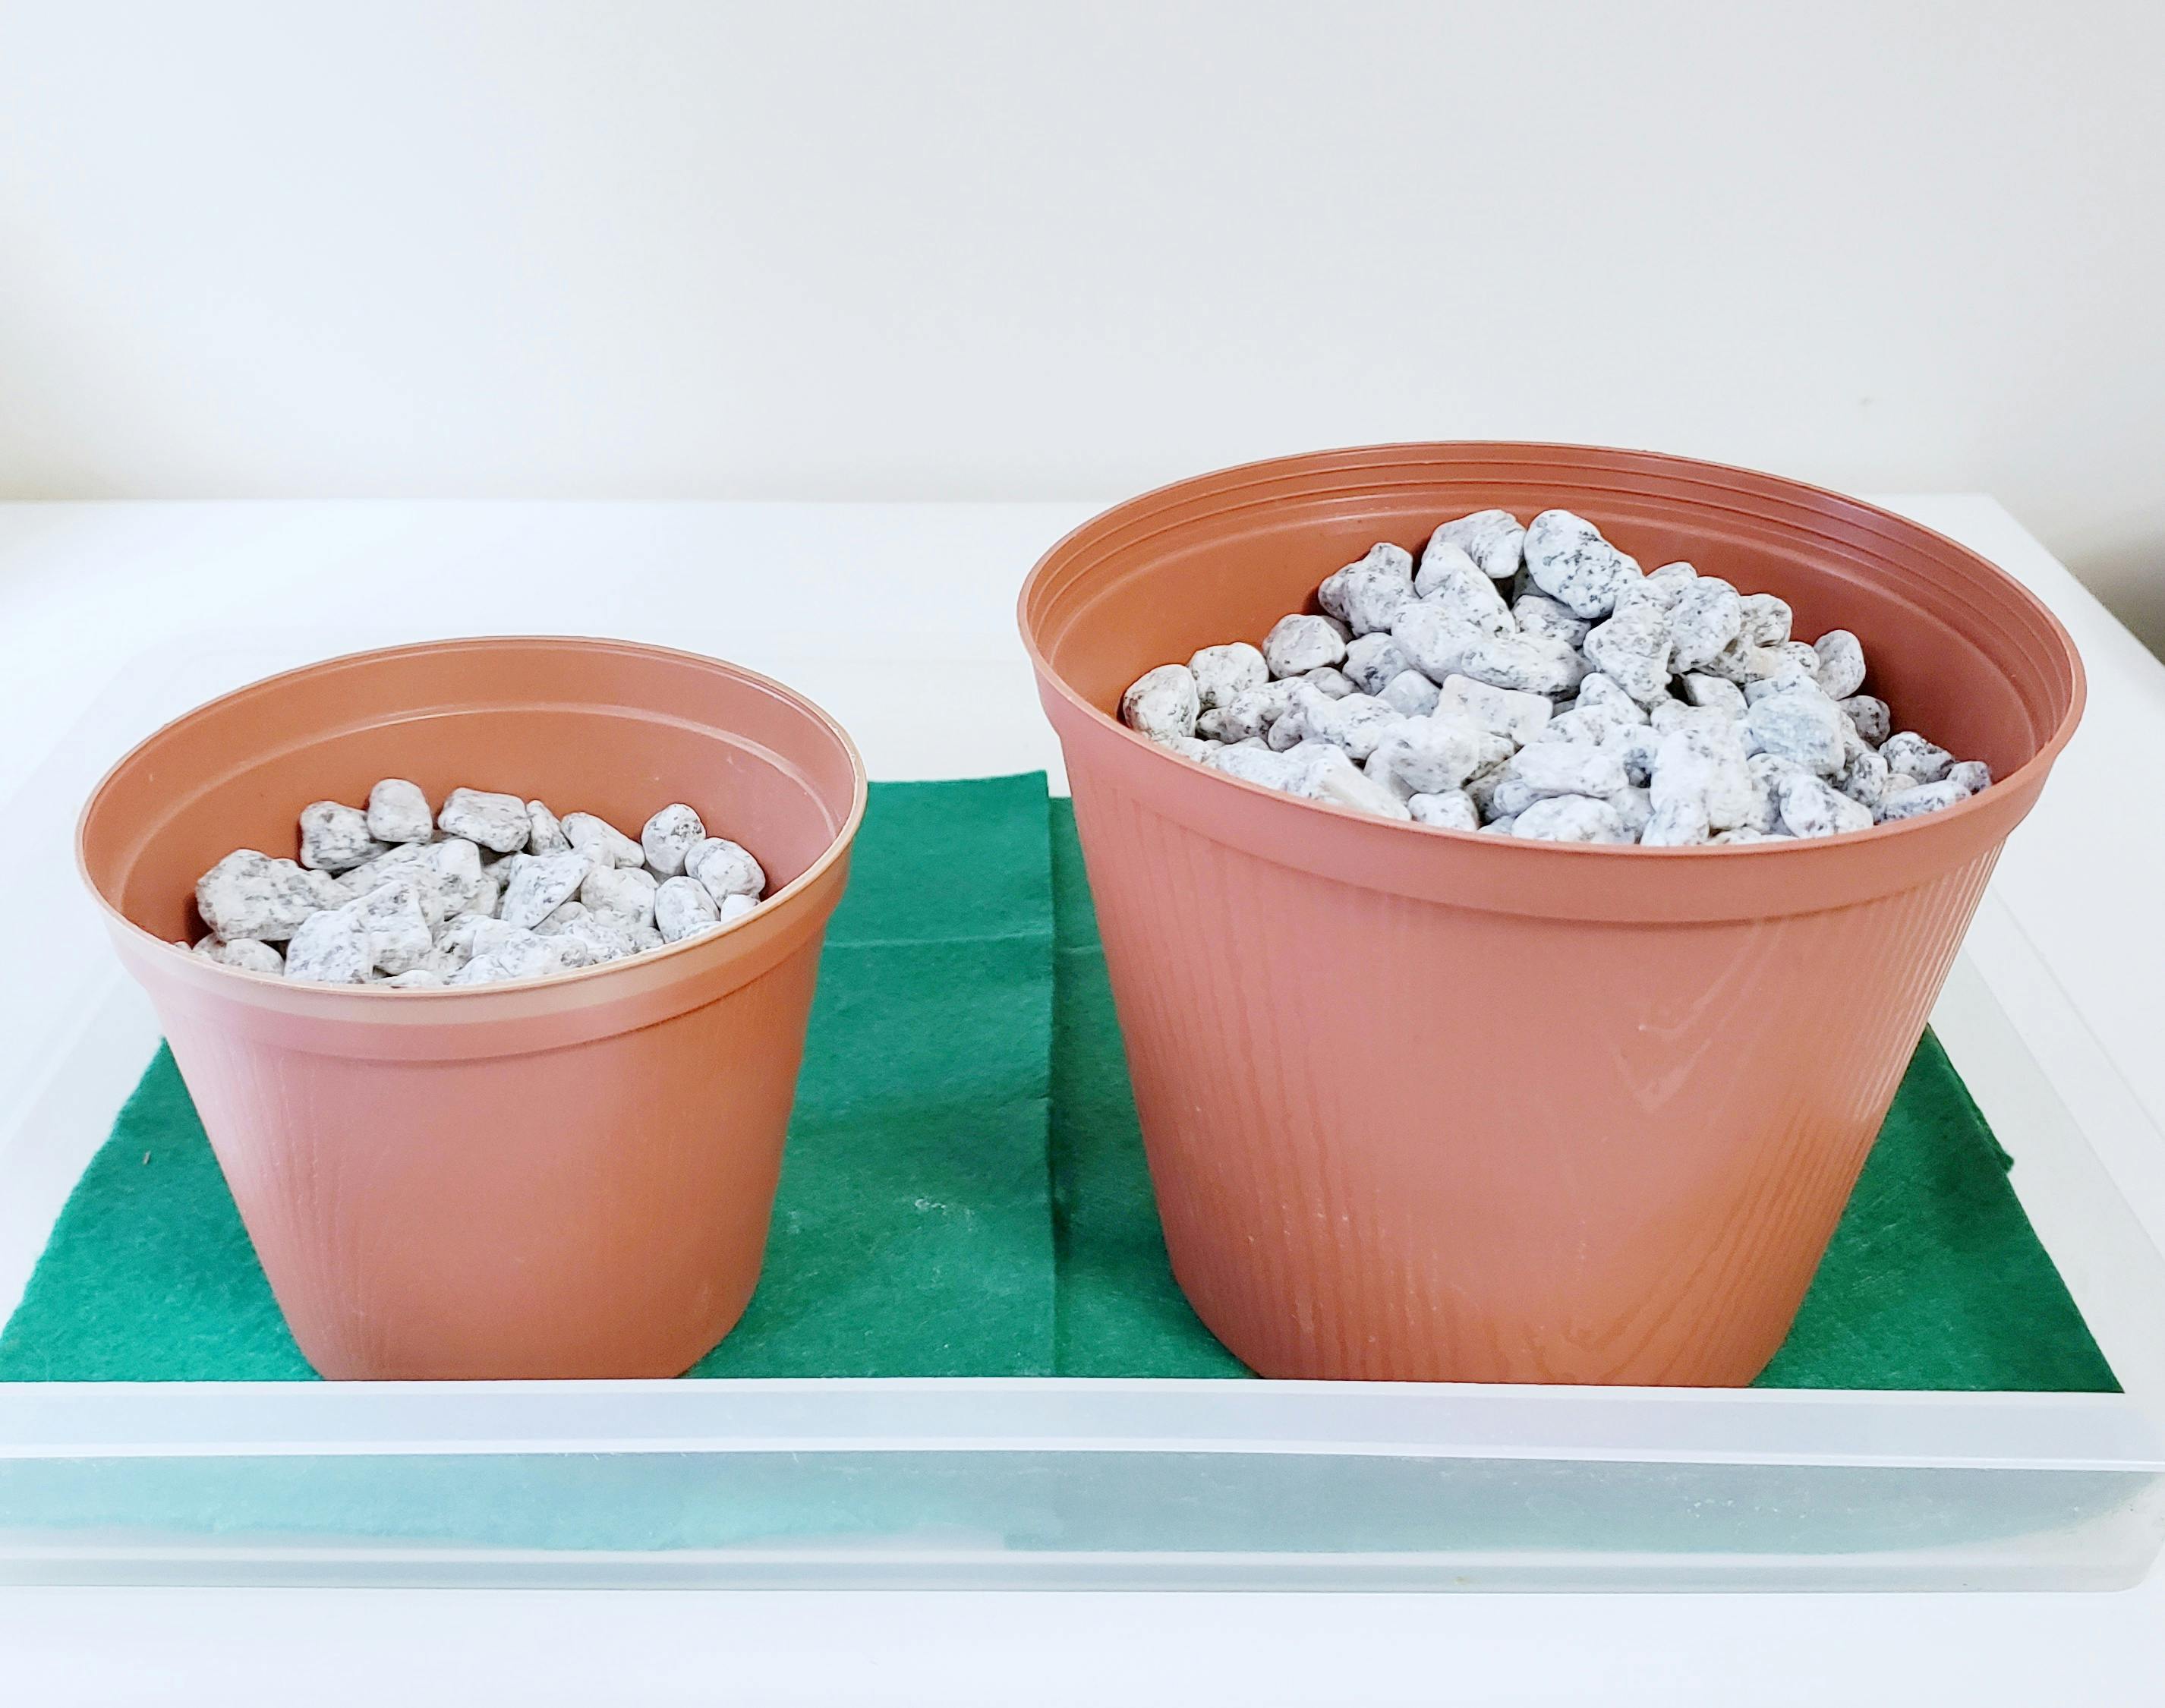
2. Create the garden
a. Line a tray or cookie sheet with green felt (this keeps the pots from sliding around and adds some colour)
b. Fill each flower pot with stones and place the pots on the tray
c. Add your “flowers” to the pots by pushing the letter end into the stones

Accessibility Considerations
- Use medium- and large-sized flower pots
- Use larger craft sticks
- Use foam flower or bug stickers (or pre-cut flowers or bugs with velcro dots to attach them to the sticks)
Book Suggestions
The Canadian Kids’ Guide to Outdoor Fun by Helaine Becker
Recycle and Remake by DK
Gurple and Preen: A Broken Crayon Cosmic Adventure by Linda Sue Park
Download Links
Images and Templates

Basketball Coding
Ages 9-12
30 minutes
Basketball Coding
Description
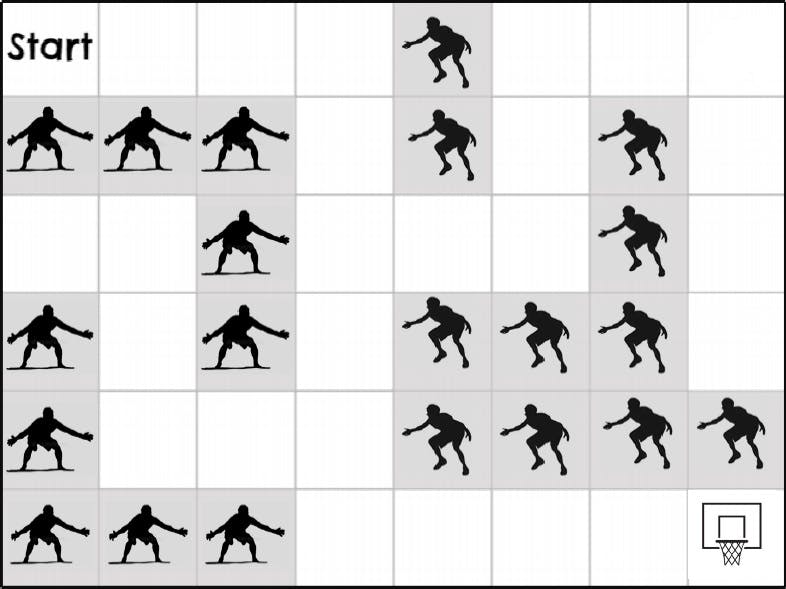
Learn the basics of coding language as you maneuver a character through a paper basketball court, and then try out your new coding skills on the computer.
Number of Participants
For a minimum of 1 participant
Space Considerations
Participants will need access to tables and enough space to spread out the coding printouts. If the computer coding portion of this activity is included, all participants will also need access to a computer or tablet (individually or shared in small groups).
Competencies
- Computer literacy
- Logic and sequencing
- Problem solving
- Understanding cause and effect relationships
Materials
- Paper for printing basketball court templates
- Paper for printing coding commands
- Computers or tablets (optional)
- Scissors (staff use only)
- Characters (figurines similar in size to a LEGO person), or paper printouts of small characters (one per participant)
- Pencils
Preparation
- Print several copies of the coding commands—about one copy for every two participants
- Separate all the coding commands by cutting along the grey lines
- Print the basketball court templates, one for each participant
Implementation
Basketball Court 1: Beginner
1. Hand out Basketball Court 1: Beginner
• Introduce the concept of “sequence”:
o Code must be written in a specific order called a sequence
o Just like a story wouldn’t make sense if the sentences were re arranged in the wrong order, code won’t work if it’s written in the wrong sequence
• Hand out the following pre-cut coding instructions: Go Forward, Turn Right, Turn Left, End
• Participants need to create a long list of the instructions that they think the character needs to follow to reach the basketball hoop (assuming the character already has the basketball in their hand)
• The character must avoid the defenders on the court and only stay on the white squares
• Once participants have organized their list from top (first command) to bottom (final command, or End), place the character on the start square
• Another participant, staff or a caregiver can check the code by moving the character and following the instructions in the list
o Flip over each command as it is completed
o Participants can make corrections as needed—young children often need corrections on left and right turns, as they must think about the turns from the characters’ perspective
Basketball Court 1: Advanced
2. Hand out Basketball Court 1: Advanced
• For the advanced level, we are still working with the same coding commands: Go Forward, Turn Right, Turn Left, End. However, now we assume that our player does not have the basketball in their hands at the start. They must avoid defenders to go and get the basketball, turn around (hint: two left or right turns in a row will have the character facing the opposite, correct direction), and then make their way to the hoop
• Once participants have organized their list from top (first command) to bottom (final command), place the character on the start square
• Another participant, staff or a caregiver can check the code by moving the character and following the instructions in the list
o Flip over each command as it is completed
o Participants can make corrections as needed
Basketball Court 2: Beginner
3. Hand out Basketball Court 2: Beginner
• Introduce the concept of “loops”:
o This is when you want to repeat steps in a sequence
o Rather than piecing together three separate “move forward” commands, children can learn to use the code “for ___ steps, move forward,” filling in the blank space with the amount of steps needed
• Hand out the following pre-cut coding instructions: Go Forward, Turn Right, Turn Left, For ___ Steps, End, and a pencil
• Participants need to create a long list of the instructions that they think the character needs to follow to reach the basketball hoop
o It’s a good habit to start indenting the line of code underneath the loops—this is required by some computer coding languages, and it also makes the language much more readable
• Once participants have organized their list from top (first command) to bottom (final command), place the character on the start square
• Another participant, staff or a caregiver can check the code by moving the character and following the instructions in the list
o Flip over each command as it is completed
o Participants can make corrections as needed
Basketball Court 2: Advanced
4. Hand out Basketball Court 2: Advanced
• For the advanced level, use the same coding commands as the beginner level: Go Forward, Turn Right, Turn Left, For ___ Steps, End. However, now we assume that our player does not have the basketball in their hands at the start. They must avoid defenders to go and get the basketball, turn around (hint: two left or right turns in a row will have the character facing the opposite direction), and then make their way to the hoop
• Once participants have organized their list from top (first command) to bottom (final command), place the character at the start box
• Another participant, staff or a caregiver can check the code by moving the character and following the instructions in the list
o Flip over each command as it is completed
o Participants can make corrections as needed
Basketball Court 3
5. Hand out Basketball Court 3 (note: this is an advanced concept so there is no beginner level)
• Introduce the concept of “if-then-else” statements:
o These will enable kids to think about writing as short a program as possible
o An if-then-else statement is comparable to answering a true or false question—if the answer is true, a certain action occurs; if the answer is false, another action occurs
o To get their character to walk in a straight line, participants could come up with the following code: “If > there is no > in front of me > go forward”
• Hand out all of the coding instructions: Go Forward, Turn Right, Turn Left, For ___ Steps, If, Else, Else If, There is a , There is Not a , In Front of Me, To My Left, To My Right, On All Three Sides
• Participants need to create a long list of the instructions that they think the character needs to follow to reach the basketball hoop
o There are many possible codes that can be written based on these options
o Allow participants to experiment with the different options and see if they can write a variety of code to get their character to the hoop
o Once participants have organized their list from top (first command) to bottom (final command), place the character on the start square
• Another participant, staff or a caregiver can check the code by moving the character and following the instructions in the list
o Flip over each command as it is completed
o Participants can make corrections as needed
6. If you have access to computers or tablets for the program, or if you would simply like to encourage participants to practice their coding after the program, try out the basketball coding challenges on the Hour of Code website. If there is interest, there are also more general sports coding challenges available on the same website.
Accessibility Considerations
- We’ve included a variety of levels to the basketball courts and coding printouts. Depending on the age and ability of your participants, you can select which basketball courts and coding printouts are most suitable
- Read out and explain all the coding commands for kids before the program
- On the Hour of Code website, there is an option for participants to see the instructions in larger font as well as to have the instructions read out to them—see the top right corner of the screen for these options
- If available, offer participants an accessible computer space with a mouse and a larger screen. If using a tablet, instruct participants how they can adjust the zoom of the screen if possible
- There are a number of free, accessible websites that participants may also check out:
- Code.org
- Code Monster
- Scratch
Book Suggestions
Level 13: A Slacker Novel by Gordon Korman
The Boy Who Thought Outside the Box: The Story of Video Game Inventor Ralph Baer by Marcie Wessels
The Magic of Basketball by Kayla Alexander and Kesia Alexander
Download Links
Images and Templates
Download Basketball Court 1 Beginner
Download Basketball Court 1 Advanced
Download Basketball Court 2 Beginner
Beetle
Ages 6-8
30-60 minutes
Beetle
Description
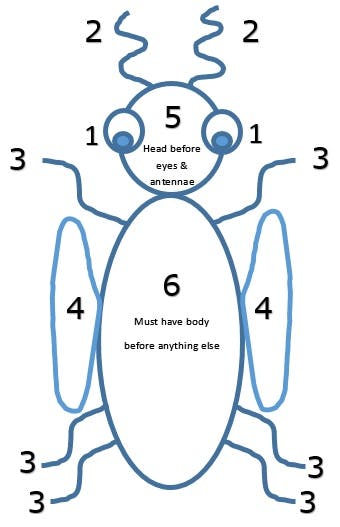
Beetle is a British game in which one draws a beetle in parts. The part drawn is decided by the roll of a die. Players take turns rolling and the first player to draw all the beetle parts wins.
Number of Participants
For a minimum of 1 participant
Space Considerations
An open space (indoors or outdoors), either on the ground or with tables and chairs
Competencies
- Development of fine motor skills
- Eye-hand coordination
- Following directions
- Logic and sequencing
- Understanding shapes
Materials
- Paper
- Pen or pencil
- Dice
- Card stock (optional)
Preparation
- Print beetle templates (legend and body parts)
- Optional: Prepare paper die if using that format
Implementation
How to Play (Source: Wikipedia)
- Players roll a die in order to draw a part of the beetle.
- The body must be drawn first before any other body parts, therefore a player must roll the number corresponding to the body in order to start drawing the beetle.
- The head must be drawn before the eyes and antennae.
- The traditional rolls are:
• 6 is for the body, of which there is one (must be drawn first)
• 5 is for the head, of which there is one (must be drawn before the eyes and antennae)
• 4 is for a wing, of which there are two
• 3 is for a leg, of which there are six
• 2 is for an antenna, of which there are two
• 1 is for an eye, of which there are two
Note: Before starting, players can choose to change which body part corresponds to each number on the die. Mark these changes on the legend template.
5. The first person to complete the beetle drawing wins.
Accessibility Considerations
- Give participants the option to work in groups or alone, as they prefer.
- Use larger dice, such as paper dice made with the template included or foam dice (can be purchased at dollar stores).
- Instead of dice, use one of the following options:
• Spoons: Place 6 spoons with numbers attached to them in a cup. Players draw a spoon each turn to determine their number.
• Playing cards: Create a set of six cards (Ace to 6). Players randomly draw a card each turn to determine their number. - Pre-cut the beetle pieces from the template provided.
- Add tactile features to the template pieces, using materials such as:
• Playdough
• Wikki Stix
• 3D markers
• Craft glue (once dried will become tactile)
Book Suggestions
The Button Book by Sally Nicholls
Do Not Eat the Game! by Matthew McElligott
Megabat Is a Fraidybat by Anna Humphrey
Download Links
Images and Templates

Boccia
Ages 9-12
15-20 minutes
Boccia
Description
Attempt to toss or slide objects towards a target in this activity modelled after the Paralympic sport by the same name
Number of Participants
For a minimum of 2 participants
Space Considerations
A large, clear indoor or outdoor space where participants can safely toss, slide or roll beanbags, balls or other similar objects
Competencies
- Body awareness
- Sensory motor skills
- Strategic thinking
- Teamwork
Materials
- Boccia ball set, beanbags, balls with bells (so they make noise when they roll), or any soft type of ball that can be tossed, slid or rolled along the ground
- Tape or pylons (optional, to mark court boundaries)
Implementation
1. Before you start playing, it’s a good idea to show participants a brief video on the Paralympic sport of boccia: https://www.youtube.com/watch?v=itPWqcx7xBg
2. Modify the rules as needed based on your preferred throwing object, the number of participants in your activity, and whether you prefer to run a competition between individuals, pairs or teams. The following instructions uses beanbags as objects and teams.
a. Give each team a set of beanbags—one colour for one team and a different colour for the second team. Six beanbags for each side is recommended, but you can adjust as desired.
b. One team plays (throws, slides or rolls) the jack (a different coloured beanbag) onto the court, and then plays their first beanbag. Then, the other team plays their first beanbag. The aim of the game is to get your beanbag closer to the jack than your opponent.
c. The team whose beanbag is furthest from the jack throws until they get a beanbag closer or run out of beanbags. Once one of these things happens, then the other team will take its turn to throw their beanbags. Turns are taken based on these rules until both teams have played all their beanbags.
d. Players can hit their own beanbags, the other team’s beanbags and the Jack.
e. Once all the beanbags have been played, it’s time for scoring. The scoring is similar to curling. Score the round by awarding a point to the team with the beanbag that is closest to the Jack. If that team has two beanbags closer to the Jack than its opponent, it gets two points, and so on. Only one team scores for each round.
f. Complete as many rounds as desired (4 to 6 rounds are typical in boccia), totalling the scores from all rounds to determine a winner.
Accessibility Considerations
- Participants can compete while seated (including in wheelchairs) or standing up
- Have a variety of objects available for participants: e.g. balls of various sizes and weights; beanbags, which may be easier to grip; balls with bells inside to make noise when they are rolled, etc. Allow participants to choose what they feel most comfortable with
- Based on the group, make the boundaries of the court smaller (easier) or larger (harder). You can also vary the starting throwing position for participants based on individual needs
- Allow the option for participants to play individually for practice before starting the game
Book Suggestions
The Canadian Kids' Guide to Outdoor Fun by Helaine Becker
Extreme Abilities: Amazing Human Feats and the Simple Science Behind Them by Galadriel Watson
What Are the Paralympic Games? by Gail Herman
Download Links
Images and Templates

Button Game
Ages 3-5
20 minutes
Button Game
Description
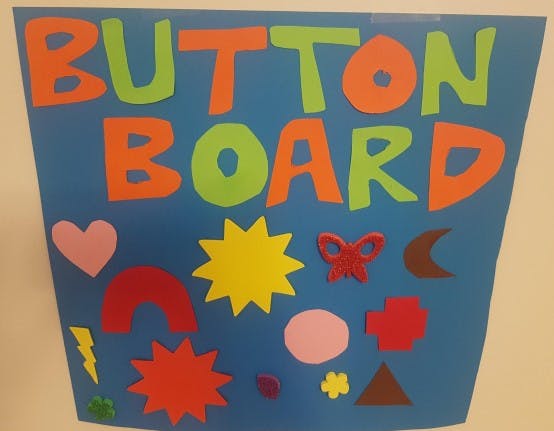
Inspired by “The Button Book” by Sally Nicholls, create your very button board and assign actions to your creation
Number of Participants
For a minimum of 2 participants
Space Considerations
Any type of space where participants can be seated to work on a craft
Competencies
- Creative and imaginative thinking
- Following directions
- Memory
- Sensory motor skills
Materials
- Felt board, poster board or bristol board
- Cut outs of various shapes on construction paper in various colours
- Card stock
- Foam shapes or other tactile items (e.g. pompoms, pipe cleaners, playdough, etc.) (optional)
- Crayons, pencil crayons or markers
- Scissors (adult use only)
- Glue
Preparation
- If desired, create a large button board to display for children. Glue large shapes of various colours (i.e. buttons) onto a large poster board. It is recommended to have between 4 and 10 buttons total.
Implementation
This activity is ideal to combine with a storytime that includes reading The Button Book by Sally Nicholls.
- Consider creating a large button board to demonstrate to participants. Include various shapes on the board. Explain that each button represents an action for participants to do, and we only know what that action is after we press the button.
- Assign actions to each of the buttons as they are pressed. There are a lot of possibilities. Here are a few examples of actions:
a. Clap your hands 5 times
b. Spin around
c. Do the head and shoulders actions as fast as you can
d. Sing Twinkle, Twinkle Little Star
e. Say your name five times fast
f. Make an animal sound
g. Bounce in place
h. Invent your very own dance move
i. Dance like a robot
j. Freeze in a funny pose
k. Pretend to fall asleep - As each button is pressed, announce the action and encourage participants to try it out (e.g. “Let’s press the square red button. Oh, that’s the singing button! We have to sing Twinkle, Twinkle Little Star.”
- After all buttons have been pressed, go back and press some buttons silently—can the participants remember what the actions were for that button? Depending on the age range of your group, you can assist and adapt this as necessary.
Craft component: Encourage children to create their own button boards
- Distribute a sheet of card stock and a set of shape cut-outs or other tactile items to participants. It is recommended to distribute between 4 and 10 shapes to each participant.
- Participants glue the shapes onto their board and decorate with crayons, pencil crayons or markers.
- Participants should think about actions that each button represents and attempt to remember those actions. Participants can then get other children, parents, caregivers, or staff to test out their button boards—press each button and let the participant tell you what the action is!
Accessibility Considerations
- Storyboards and activities where kids can follow the sequence of what will happen next are ideal for sensory storytimes
- Use large shapes for the buttons if using construction paper cut-outs. There are many tactile alternatives for this activity, including material like pompoms, playdough, pipe cleaners, foam shapes, etc. Have a variety of material on hand for kids of different abilities to choose from.
- When assigning actions to the button board demonstrated by staff, select simple actions that are suitable for your age group and for all participants. If necessary, you can also have alternatives ready to adapt. Be considerate of kids who may not like to be in a setting with loud noises. For example, encourage clapping hands quietly if the group is very large, or suggest two-finger clapping instead.
- For participants who are deaf or hard of hearing, print out the text of each action and hold it up for all to see when the button is pressed.
- Pre-cut the shapes used for the buttons or offer easy-grip scissors to all participants.
Book Suggestions
The Button Book by Sally Nicholls
David Jumps In by Alan Woo
Peanut Goes for the Gold by Jonathan Van Ness
Download Links
Images and Templates

Colour By Number
Ages 3-5
5-15 minutes
Colour By Number
Description
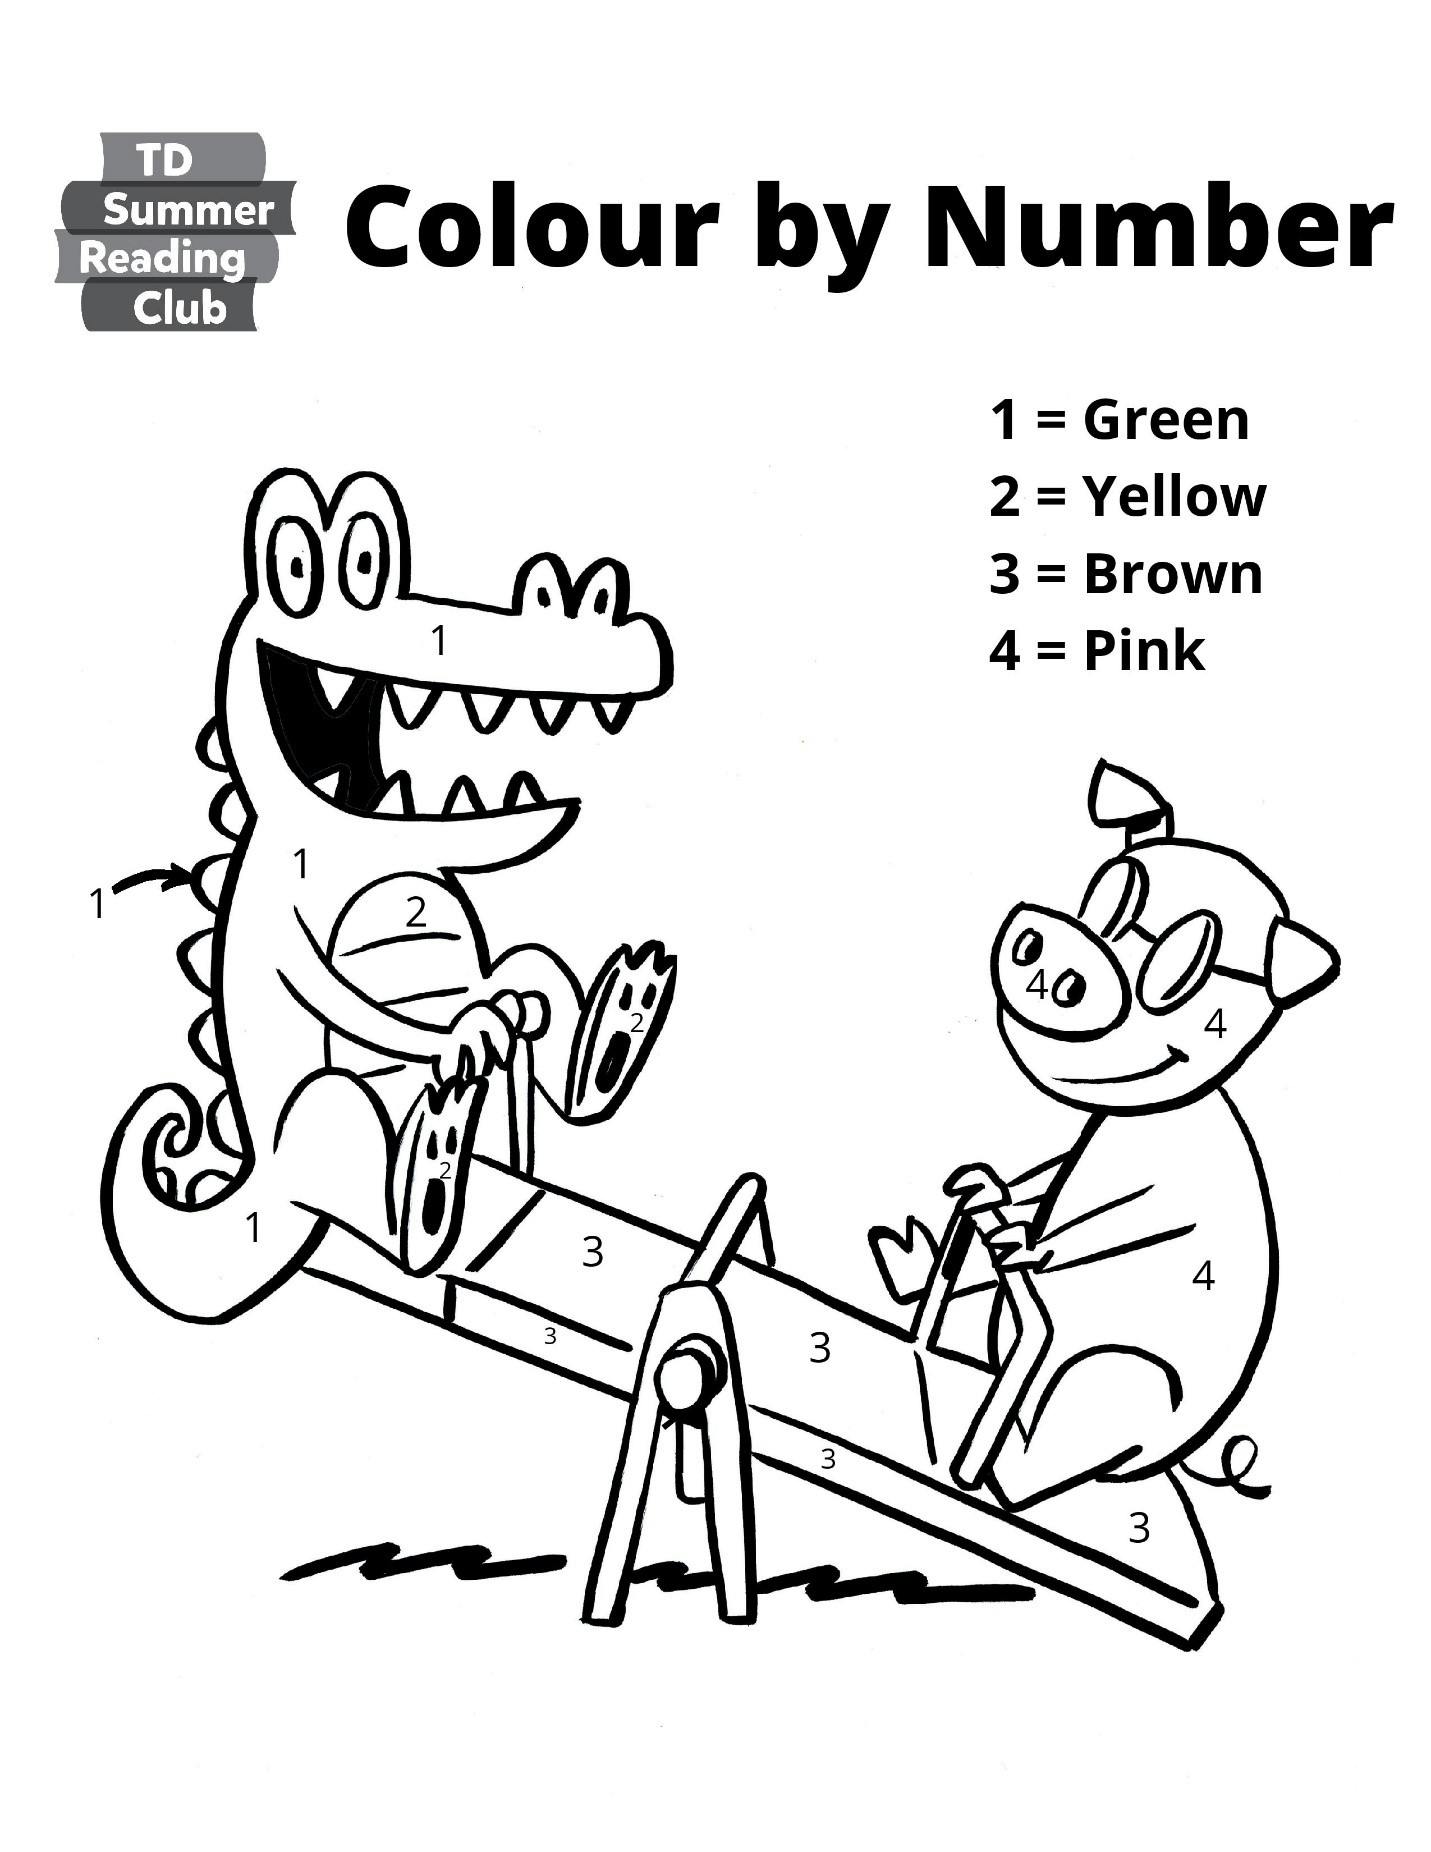
Follow the colouring legend and colour the pictures by Dave Whamond
Number of Participants
For a minimum of 1 participant
Space Considerations
Indoor space where participants can complete a worksheet
Competencies
- Development of fine motor skills
- Following directions
Materials
- Crayons, pencil crayons or markers
- Printouts of the Colour by Number pages (listed in order of difficulty, from easiest to hardest):
o Alligator and Pig
o Flying a Kite (bookmark template)
o Notebook Cover
o Rainbow Rabbit
o Sleeping Dinosaur - If using Flying a Kite (bookmark template)
o Scissors (adult use only)
o Card stock preferred
Implementation
- Choose a Colour by Number worksheet based on the age group of your participants.
- Print and distribute the Colour by Number worksheets to participants.
- Distribute crayons, pencil crayons or markers.
- Encourage participants to colour in the images by following the colouring legend (e.g. 1=blue, 2=red, etc.). If participants do not have access to a specific colour, they can swap it out for any colour of their choosing. Additionally, for very small images that do not have numbers on the notebook cover, kids can choose their own colour.
- You may consider printing the colouring sheets to have some available for kids as a passive activity to do outside of a scheduled program.
Accessibility Considerations
- Offer kids a variety of instruments to colour their image and encourage them to choose what they feel most comfortable with.
- The colouring pages vary in their difficulty, with the simple worksheets containing less colours and bigger font for the numbers.
Book Suggestions
The Button Book by Sally Nicholls
Little Fox by Britta Teckentrup
A Potato on a Bike by Elise Gravel
When We Are Kind by Monique Gray Smith
Download Links
Images and Templates
Colouring Pages
Ages 3-5
20 minutes
Colouring Pages
Description
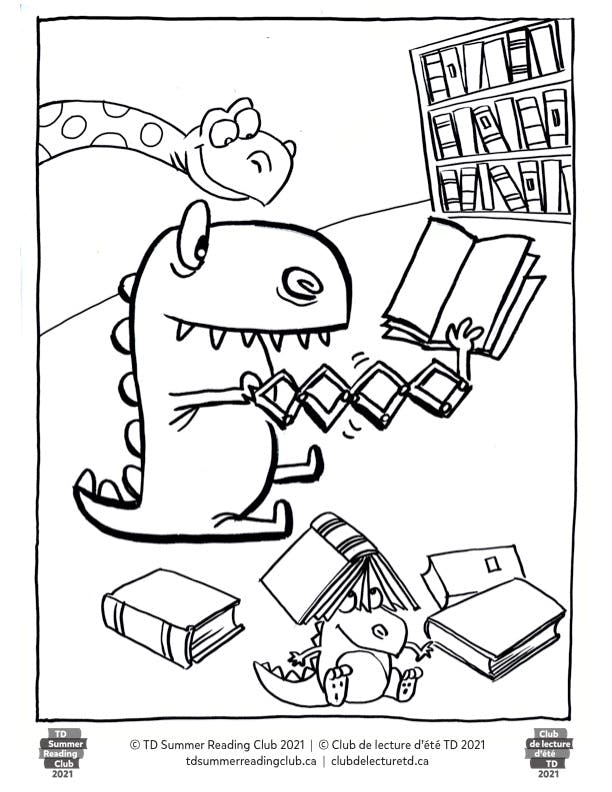
Colour the illustrations by Dave Whamond
Space Considerations
Any type of space where children can be seated
Competencies
- Creative expression
- Development of fine motor skills
Materials
- Colouring pages
- Crayons, pencil crayons or markers
Preparation
- Print the memory card templates and cut out each card
- For more durability, consider laminating the cards
Implementation
- Distribute the colouring pages and crayons to participants
- This activity can be run as a passive program, where you print the images and allow kids to colour them anywhere in the library, at any time of day
Book Suggestions
The Button Book by Sally Nicholls
Little Fox by Britta Teckentrup
A Potato on a Bike by Elise Gravel
When We Are Kind by Monique Gray Smith
Downloads
Connect the Dots
Ages 0-3
10 minutes
Connect the Dots
Description
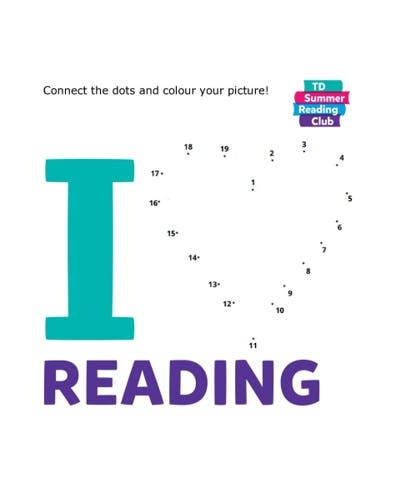
Connect the dot worksheets using artwork by Dave Whamond
Space Considerations
Indoor space where participants can complete a worksheet
Competencies
- Artistic expression
- Development of fine motor skills
- Eye–hand coordination
- Following directions
Materials
- Pencil
- Crayons, pencil crayons or markers
- Printouts of the Connect the Dots templates (in order of difficulty):
o Connect the Dots—Kite
o Connect the Dots—I Love Reading
o Connect the Dots—Magician
o Connect the Dots— Moose and Tree
o Connect the Dots—Sun
Implementation
1. Print out and distribute a version of the Connect the Dot worksheets, chosen based on the age group of your participants.
2. Distribute pencils and crayons, pencil crayons or markers.
3. Encourage participants to connect the dots by starting at the number 1 and then drawing a line to the next number, until they reach the last number in the series. Participants should connect the last number in the series back to number 1.
4. After connecting the dots, participants can colour the image.
5. You may consider printing the worksheets to have the sheets available for kids as a passive activity outside of a scheduled program.
Accessibility Considerations
- Offer children a variety of writing instruments to connect the dots and allow them to choose what they feel most comfortable with.
- We have varied the level of difficulty in these worksheets, with the Kite template containing less dots, larger font for the numbers, and a straightforward pattern.
- The following printables contain sans serif fonts: Magician Hat, I Love Reading and Sun.
- Bump dots (or 3D markers) could be used to create a tactile, accessible option.
Book Suggestions
Yoga Baby by Amy Hovey
When We Are Kind by Monique Gray Smith
Download Links
Images and Templates
Download Connect the Dot Worksheet - I Love Reading
Download Connect the Dot Worksheet - Kite
Download Connect the Dot Worksheet - Magician
Day and Night Craft
Ages 3-5
30-45 minutes
Day and Night Craft
Description
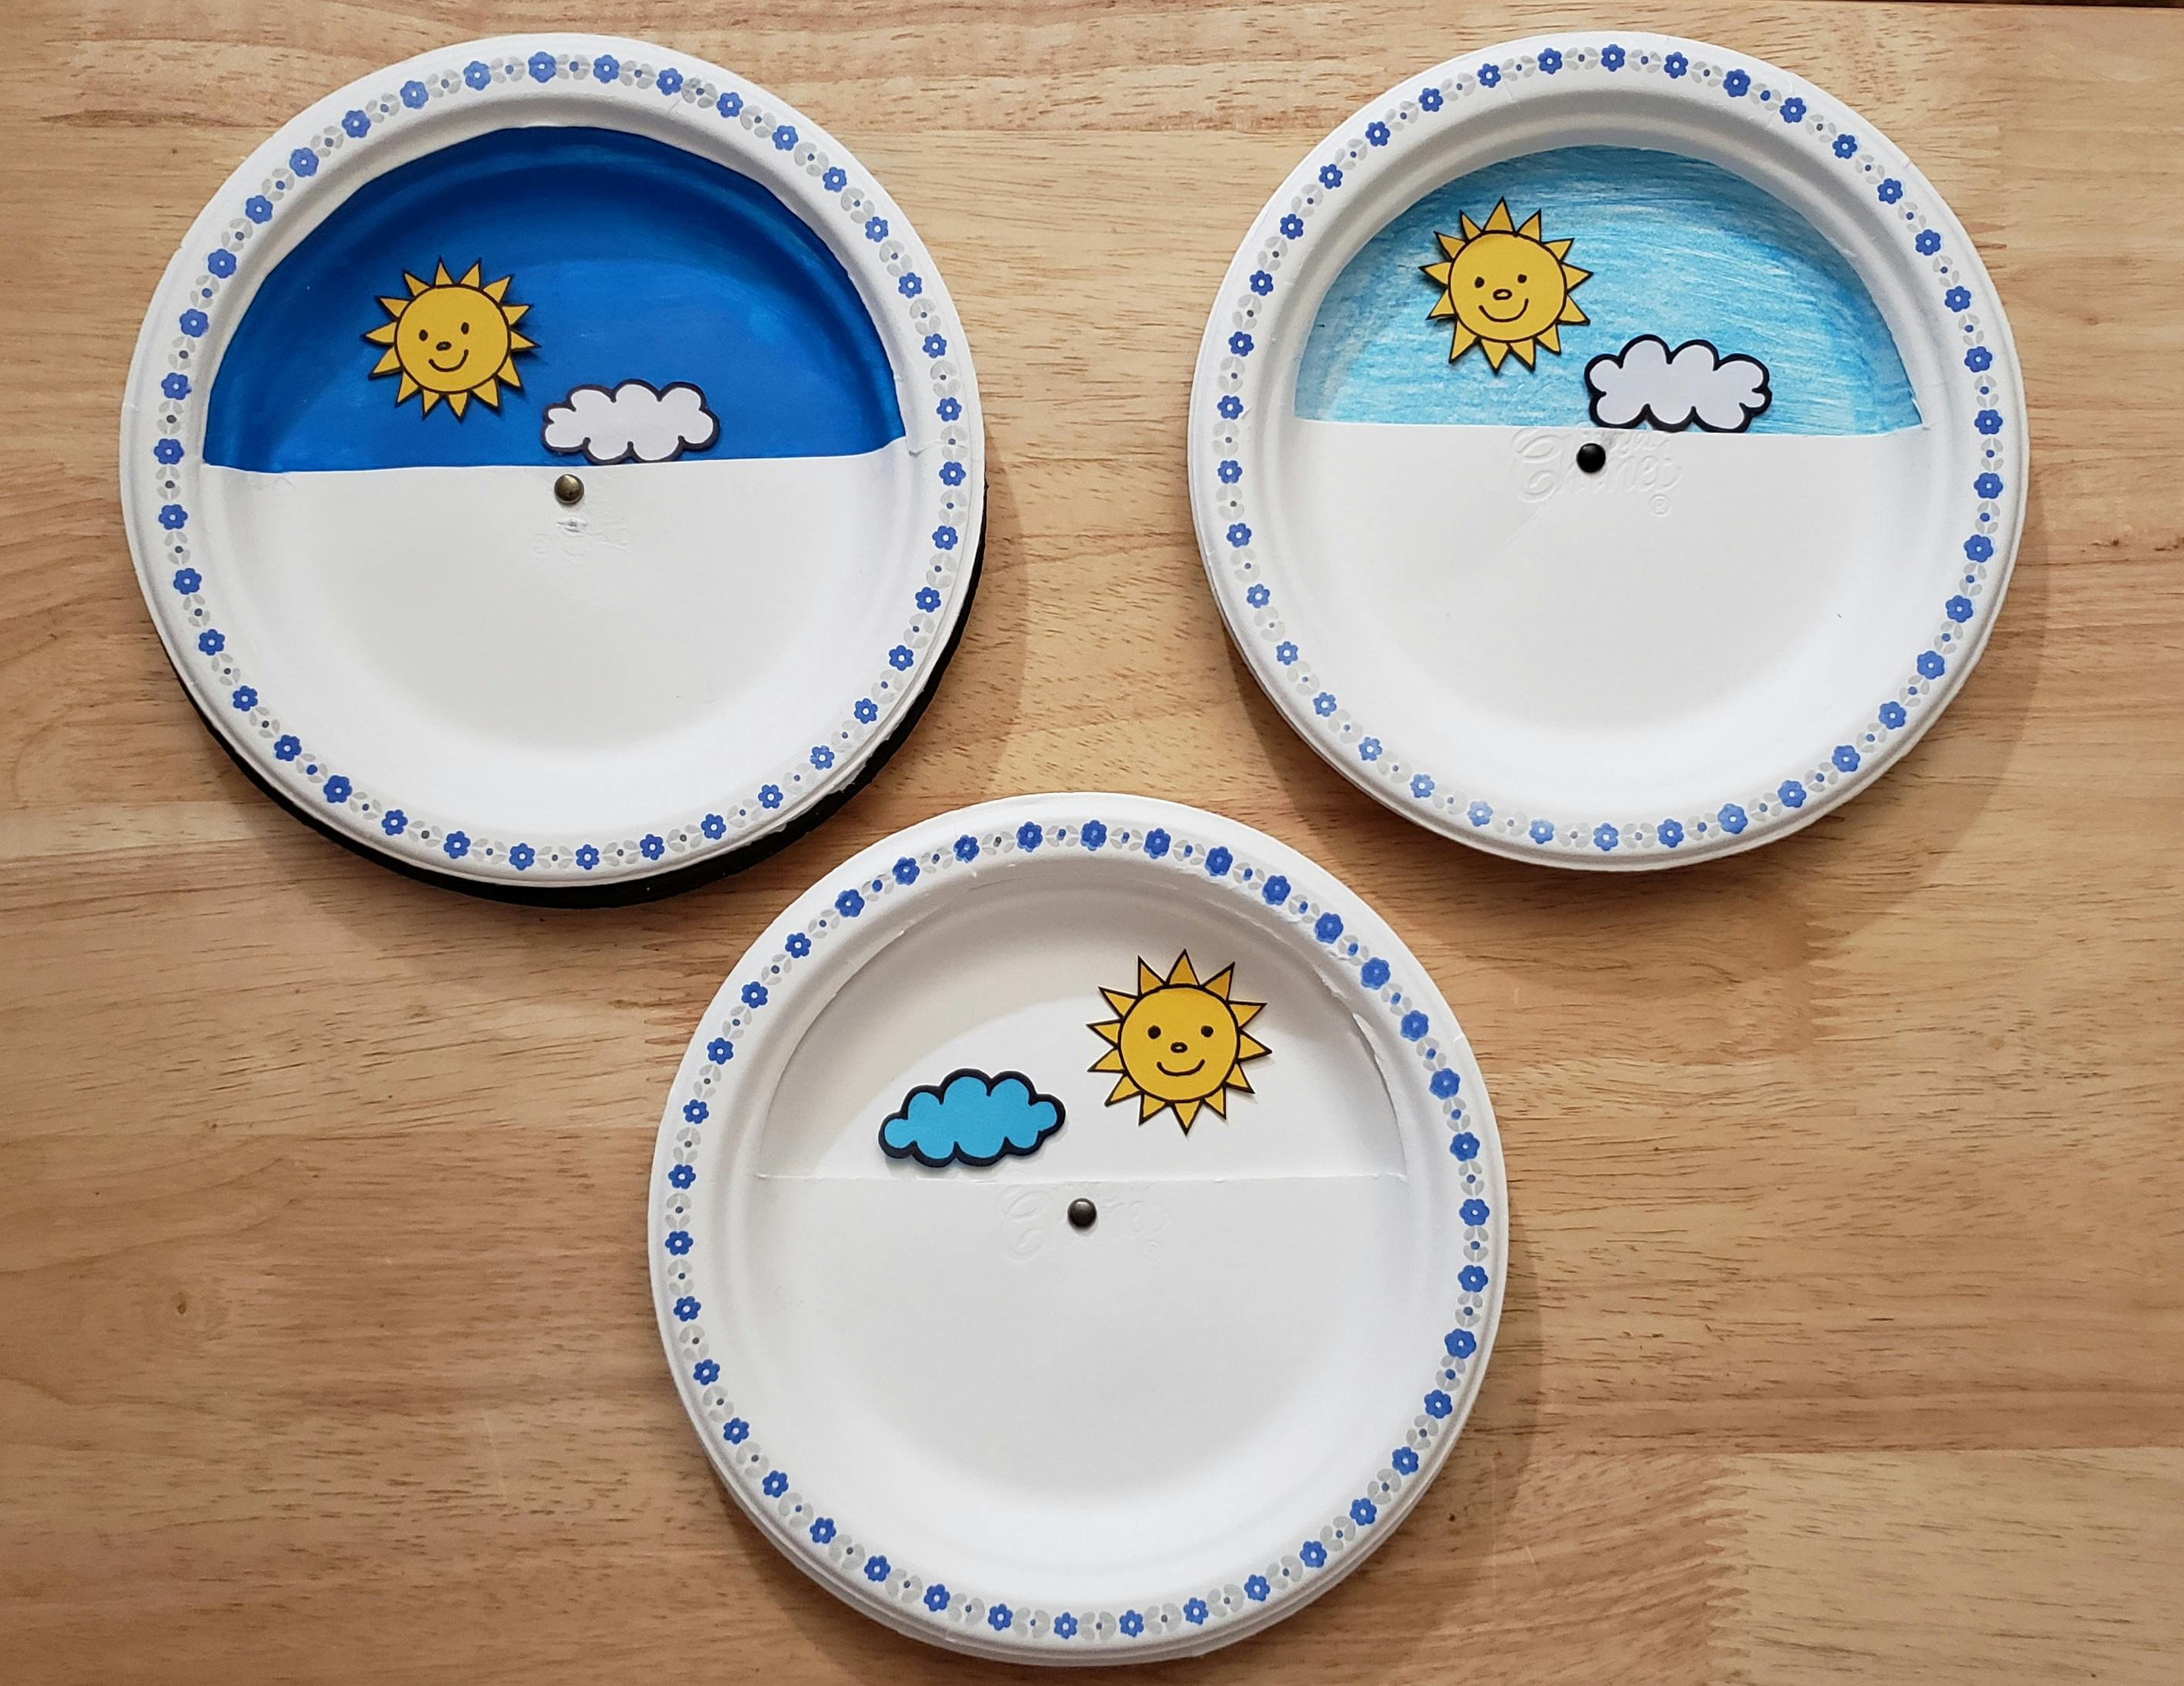
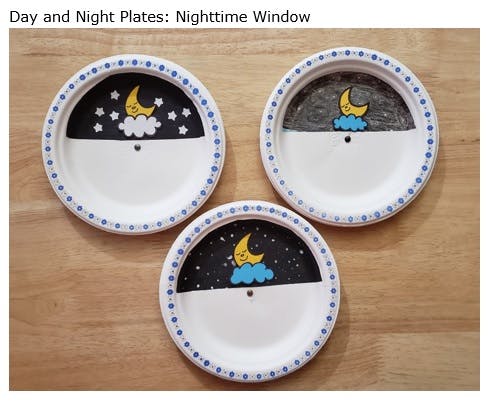
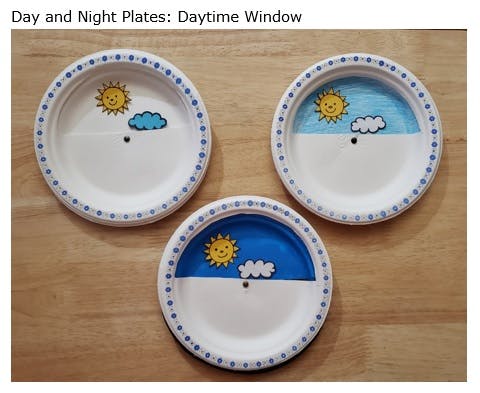
Participants will create a craft featuring the sun and the moon. The window in the top plate will allow participants to switch from daytime to nighttime.
We recommend reading one of the following books at the beginning of your program for an Indigenous tie-in:
- Meet Your Family = Gikenim Giniigi'igoog by David Bouchard and Kristy Cameron
- The Origin of Day and Night by Paula Ikuutaq Rumbolt and Lenny Lishchenko
- We Learn from the Sun by David Bouchard and Kristy Cameron
Space Considerations
Any indoor space with tables and chairs for participants to do a craft or paint (optional)
Competencies
- Artistic expression
- Creative and imaginative thinking
- Development of fine motor skills
- Eye-hand coordination
- Following directions
Materials
- Sun and moon template
- Two paper plates per participant
- Pencils, crayons, pencil crayons or markers
- Scissors (adult use only)
- Paper fasteners
- Glue sticks or wet glue
- Tape (optional)
- Paint and paint brushes (optional)
- Star-shaped paper punches (optional)
Preparation
- Print out sun and moon template (optional)
- Prepare space for paint (optional)
Implementation
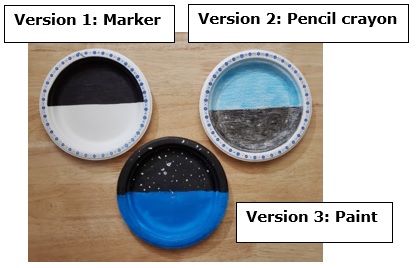
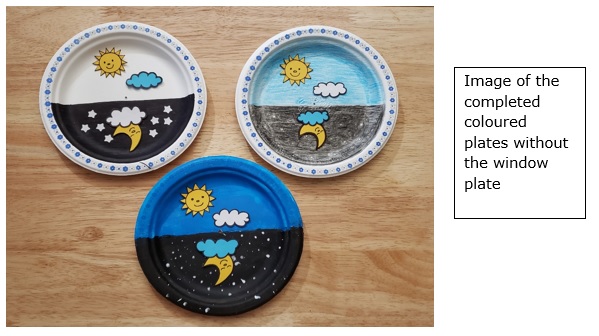
Some of the images below show several versions of the activity: marker, pencil crayon and paint. Only one version needs to be made.
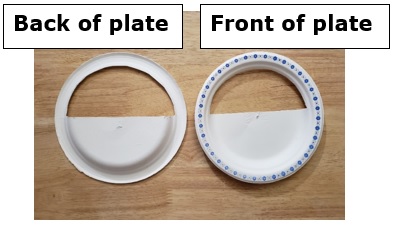
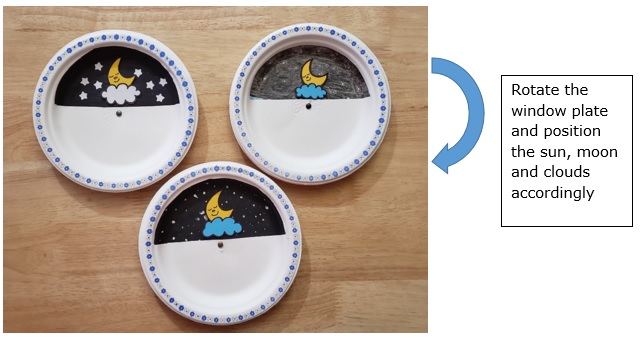
- Using scissors, cut a window (half the plate in length) in one of the two plates, as shown.
2. Colour the other plate half black for the nighttime sky, and half blue or half white for the daytime sky.
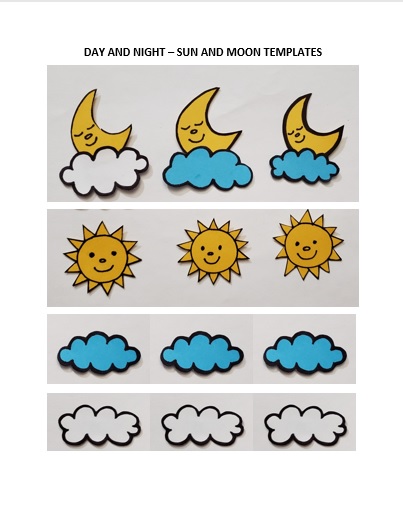
3. Draw and cut out the sun, moon and clouds, or cut them out from the template. You can also make stars from leftover parts of the template with a star-shaped paper punch.
4. Place the window plate on top of the coloured plate. Try placing (but not gluing or taping) the daytime sun and clouds on the coloured plate for positioning. Push a paper fastener through the window plate close to the centre and then through the coloured plate. If necessary, use scissors to poke a small hole. You can tape or glue down the details in the next step.
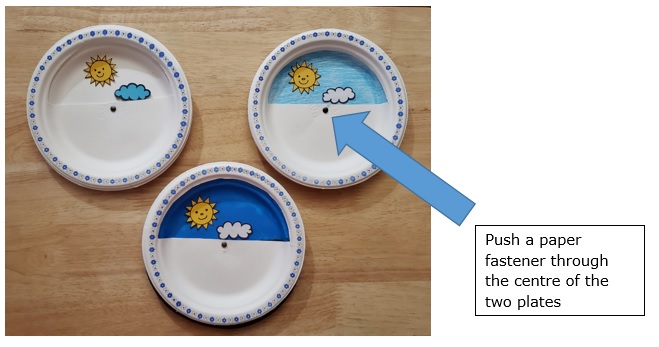
5. Once the paper fastener is inserted, slightly lift the window plate and rotate it to make sure it aligns with the coloured plate in the daytime and nighttime.
It is best to add the sun, moon and clouds when the window plate is on, as you might want to reposition things once the window is rotated. You can now glue the daytime sun and moon down and attach the nighttime moon and clouds, and any other details, through the window plate.
6. If your daytime background is blue, we recommend using a white cloud. If the daytime has a white background, you can use a blue cloud.
Accessibility Considerations
- Use large glue sticks and larger sheets of card stock
- Use medium or large paper plates
- Pre-cut images
- Pre-cut window plates
- Use tactile elements like foam stickers
Book Suggestions
Meet Your Family = Gikenim Giniigi'igoog by David Bouchard and Kristy Cameron
Moon Pops by Heena Baek
The Origin of Day and Night by Paula Ikuutaq Rumbolt and Lenny Lishchenko
We Learn from the Sun by David Bouchard and Kristy Cameron
Images
Download Links
Day and Night Craft Instructions PDF
Sun, moon and clouds templates PDF (three versions)
Design a Flag
Ages 0-3
15 minutes
Design a Flag
Description
Get creative as you design your own flag that best represents you
Space Considerations
Any type of space where kids can be seated to do a craft
Competencies
- Artistic expression
- Creative expression
- Development of fine motor skills
Materials
- Card stock or regular paper for flag template
- Crayons, pencil crayons or markers
- Pompoms, pipe cleaners, foam shapes and other tactile decorative items
- Stickers (optional)
- Discarded magazines (optional)
- Glue sticks (large and small)
- Scissors (optional; adult use only)
Preparation
- Optional: Pre-cut various pictures from discarded magazines, including animals, nature, food, etc.
Implementation
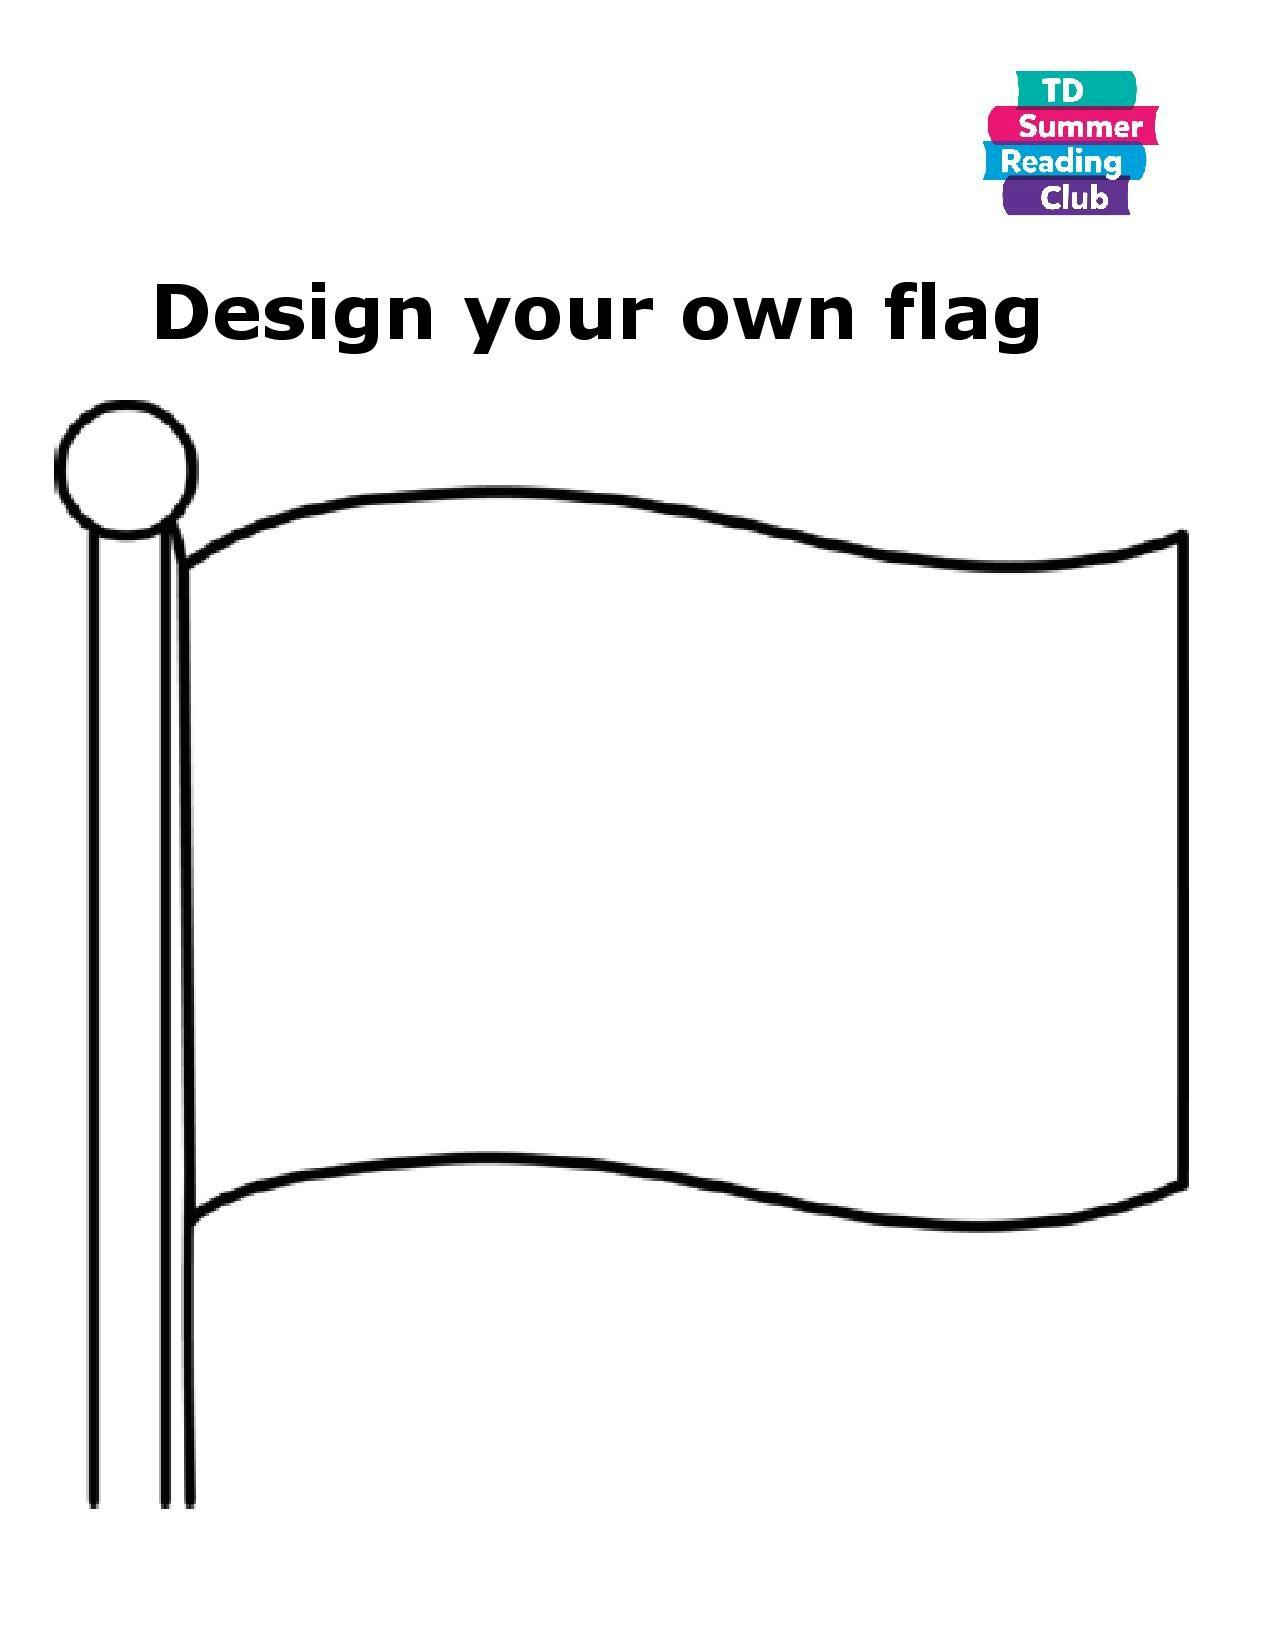
- Distribute the flag template to all participants.
- With parent or caregiver assistance as needed, encourage participants to decorate their flag in any way they see fit. They can use colouring instruments, glue down various tactile items or pre-cut pictures from magazines, or use stickers to decorate their flags.
- Encourage parents and caregivers to talk to their children about their flags and why they made certain choices, if children are old enough to discuss.
Accessibility Considerations
- Offer a variety of options for colouring the flag—crayons, pencil crayons and markers
- Offer tactile items for kids to use to decorate their flag, along with large glue sticks
Book Suggestions
Gurple and Preen: A Broken Crayon Cosmic Adventure by Linda Sue Park
Little Fox by Britta Teckentrup
Nibi is Water / Nibi Aawon Nbiish by Joanne Robertson
Download Links
Images and Templates
Download Design a Flag Template

Feed The Monster: Letter Game
Ages 3-5
20 minutes
Feed The Monster: Letter Game
Description
A letter game where young participants feed a monster letters of the alphabet on command
Number of Participants
For a minimum of 2 participants
Space Considerations
Any type of space where participants can be seated to work on a craft
Competencies
- Artistic expression
- Classification skills
- Development of fine motor skills
- Understanding shapes
Materials
For monster(s):
o Small paper bags or small boxes (e.g. shoebox)
o Googly eyes, pompoms, pipe cleaners or any other tactile items that could be used to decorate the craft
o Construction paper (optional)
o Crayons, pencil crayons or markers
o Glue sticks
o Scissors (adult use only)
For letters:
o Pre-cut foam letters and cutouts of printed letters
- Small bells (optional: see accessible considerations below)
Implementation
Craft component:
1. Consider whether you want to create one large “monster” before the program or allow participants to each create their own monster.
· If staff are creating one large monster:
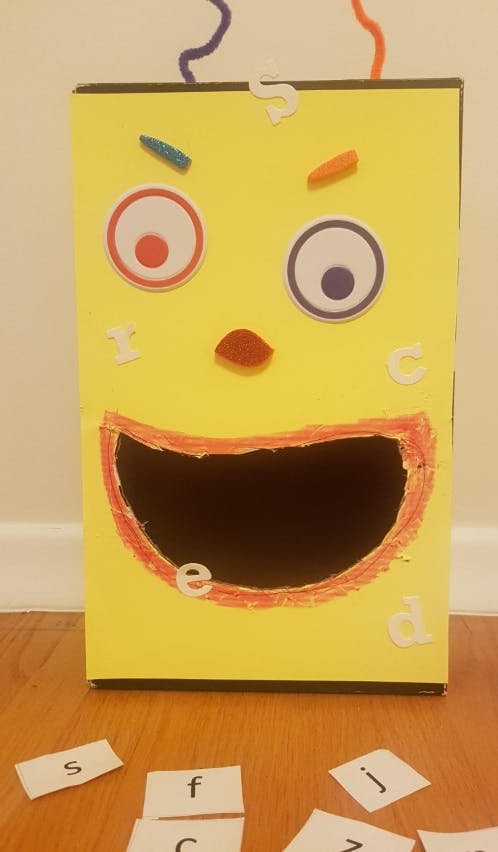
i. Use a small cardboard box or a shoebox and cut a large hole out for the mouth. Decorate the monster by affixing googly eyes, pompoms, pipe cleaners and other objects with glue. There is a lot of flexibility in how you create and decorate this monster—just ensure the mouth hole and box is large enough to accept the letters that you distribute to kids.
· If allowing participants to each create their own monster:
i. Pre-cut a mouth hole in each of the paper bags or shoeboxes that you distribute, or ask parents/caregivers to cut out a hole for a mouth that is large enough to accept the letters.
ii. Distribute the paper bags or a shoebox to each participant along with tactile objects that can be used for decoration: googly eyes, pompoms, pipe cleaners, etc.
iii. Encourage participants to decorate their monster by gluing on the decorative objects and using crayons, pencil crayons or markers.
Playing the Game:
1. Distribute a set of foam letters or letter cut-outs to all participants. Depending on the age of participants, you have the option to give them an entire set of 26 letters or a smaller set of letters that you will call out for the game. For example, younger children who are just learning their letters can be given a set of 5 letters to sort through.
2. Call out a letter that participants should feed their monster (ensure it is one that children have in their stash of letters!). Consider saying something like, “The monster is hungry for a letter. Can you feed the monster the letter X?”
3. If you only have one monster created by staff, participants should walk up and feed that letter to the large monster—this creates more of a group activity rather than an individual one.
4. Repeat calling out letters as long as desired.
Adaptations:
There are a lot of ways to adapt this program to fit your group of participants, by making the game easier, harder, more group-oriented or more individual. Here are a few examples:
- Place sets of letters in a mixed-up jumble in the middle of the room. When you call out a letter, participants have to search through the jumble to find the correct letter and place it in the monster’s mouth. Make sure you print enough letters for each participant!
- Try using the sounds of the letters rather than calling for letter names. For example, you would say “Feed the monster the letter that makes the ssssss sound.”
- Instead of calling for a letter, ask participants to bring you a letter that starts a specific word. For example, “Feed the monster the letter that is at the beginning of the word apple.” (They would have to find and feed the monster the letter a.) Or, you can ask for the first letter of their first name—this would mean kids would be feeding different letters to their monsters.
- To increase the difficulty, you can ask kids to bring you a letter within a word. For example, “Feed the monster the third letter in the word Canada.” (They would have to find and feed the monster the letter n.)
Accessibility Considerations
- For the craft portion: offer large, tactile objects for decorating the monster—for example, large pompoms and large googly eyes. Offer a variety of colouring instruments and allow participants to choose whatever they feel most comfortable using.
- For participants with limited mobility and for those who may be less comfortable socially: Allow them to create an individual monster or have staff bring the large monster around the room and allow kids to place their letter in the monster. This way, participants won’t have to come to the front of the room each time.
- For participants with low vision/no vision, consider making this a tactile game with shapes. For example, cut out or provide foam shapes like circles, squares, rectangles, etc. Then, ask children to feed the monster a specific shape that participants determine by touch. Consider adding bells to the objects that feed the monster so they hear when the object falls into the monster’s mouth.
- Participants with limited hand dexterity may have difficulty placing the letters in the monster’s mouth. Make the monster mouth very large, or allow participants to work as a team with other participants or their caregivers so they only have to point to the letter that the other person should feed the monster.
Book Suggestions
The Button Book by Sally Nicholls
Farm Crimes: Cracking the Case of the Missing Egg by Sandra Dumais
Karate Kakapo by Loredana Cunti
Lucy Tries Basketball by Lisa Bowes
Teamwork by Robert Munsch
Download Links
Images and Templates

Fly a Flag
Ages 6-8
25 minutes
Fly a Flag
Description
Create a flagpole to raise and lower a flag as an introduction to pulleys
Number of Participants
For a minimum of 1 participant
Space Considerations
Any type of space where kids can be seated to do a craft
Competencies
- Development of fine motor skills
- Engineering
- Problem solving
Materials
- Card stock or construction paper
- Wooden skewer or dowel
- Styrofoam block
- Spools (2 for each participant)
- Crayons, pencil crayons or markers
- Glue gun
- String or twine, cut in 60 cm pieces
- Acrylic paint (optional)
- Paintbrushes (optional)
- Scissors (adult use only) or safety scissors
Implementation
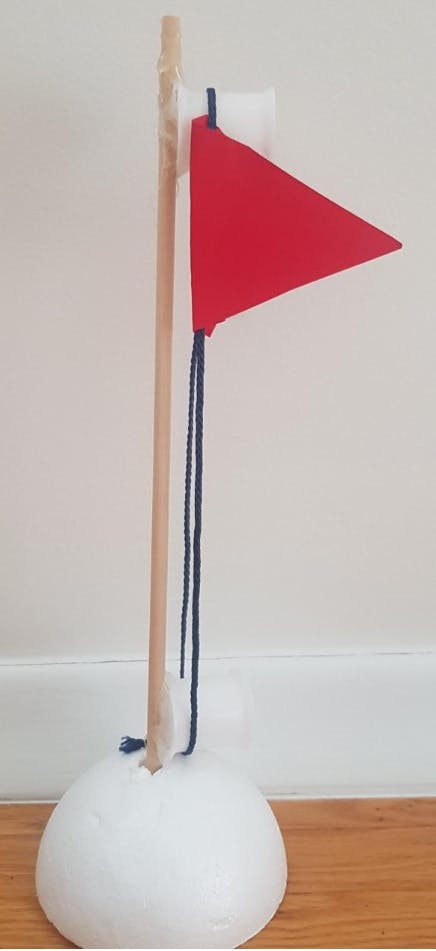
- If desired, you can provide participants with acrylic paint to allow them to paint their spools and skewer.
• If doing this, you must factor in the time to allow the paint to dry—you may want to incorporate a short activity or read a story while the paint dries. - Participants stick one end of the wooden skewer or dowel into the foam.
- With adult assistance as needed, use a glue gun to glue a spool near the top of the skewer.
- Glue another spool near the bottom of the skewer, ensuring that you leave a little bit of room between the spool and the foam.
- Distribute the string.
- Participants should loop the string around both spools and tie a tight knot, then trim the ends of the string with scissors.
- Participants use safety scissors to cut a small triangle out of card stock or construction paper to serve as the flag and colour it as desired.
- Affix the flag to the string by using hot glue along one edge of the flag and pressing it against the string, being careful not to touch the glue. Let the glue dry.
• Alternatively, you can use a second triangle and tape the flags together and onto the string. - Participants can gently pull on the string to raise and lower the flag. They now have working pulleys!
Accessibility Considerations
- Provide assistance with gluing, cutting, and tying the knot in the string, as needed
- Pre-cut the flags or offer easy-grip scissors
Book Suggestions
Boxitects by Kim Smith
Recycle and Remake by DK
Download Links
Images and Templates

Fukuwarai - Lucky Laugh
Ages 6-8
15-30 minutes
Fukuwarai - Lucky Laugh
Description
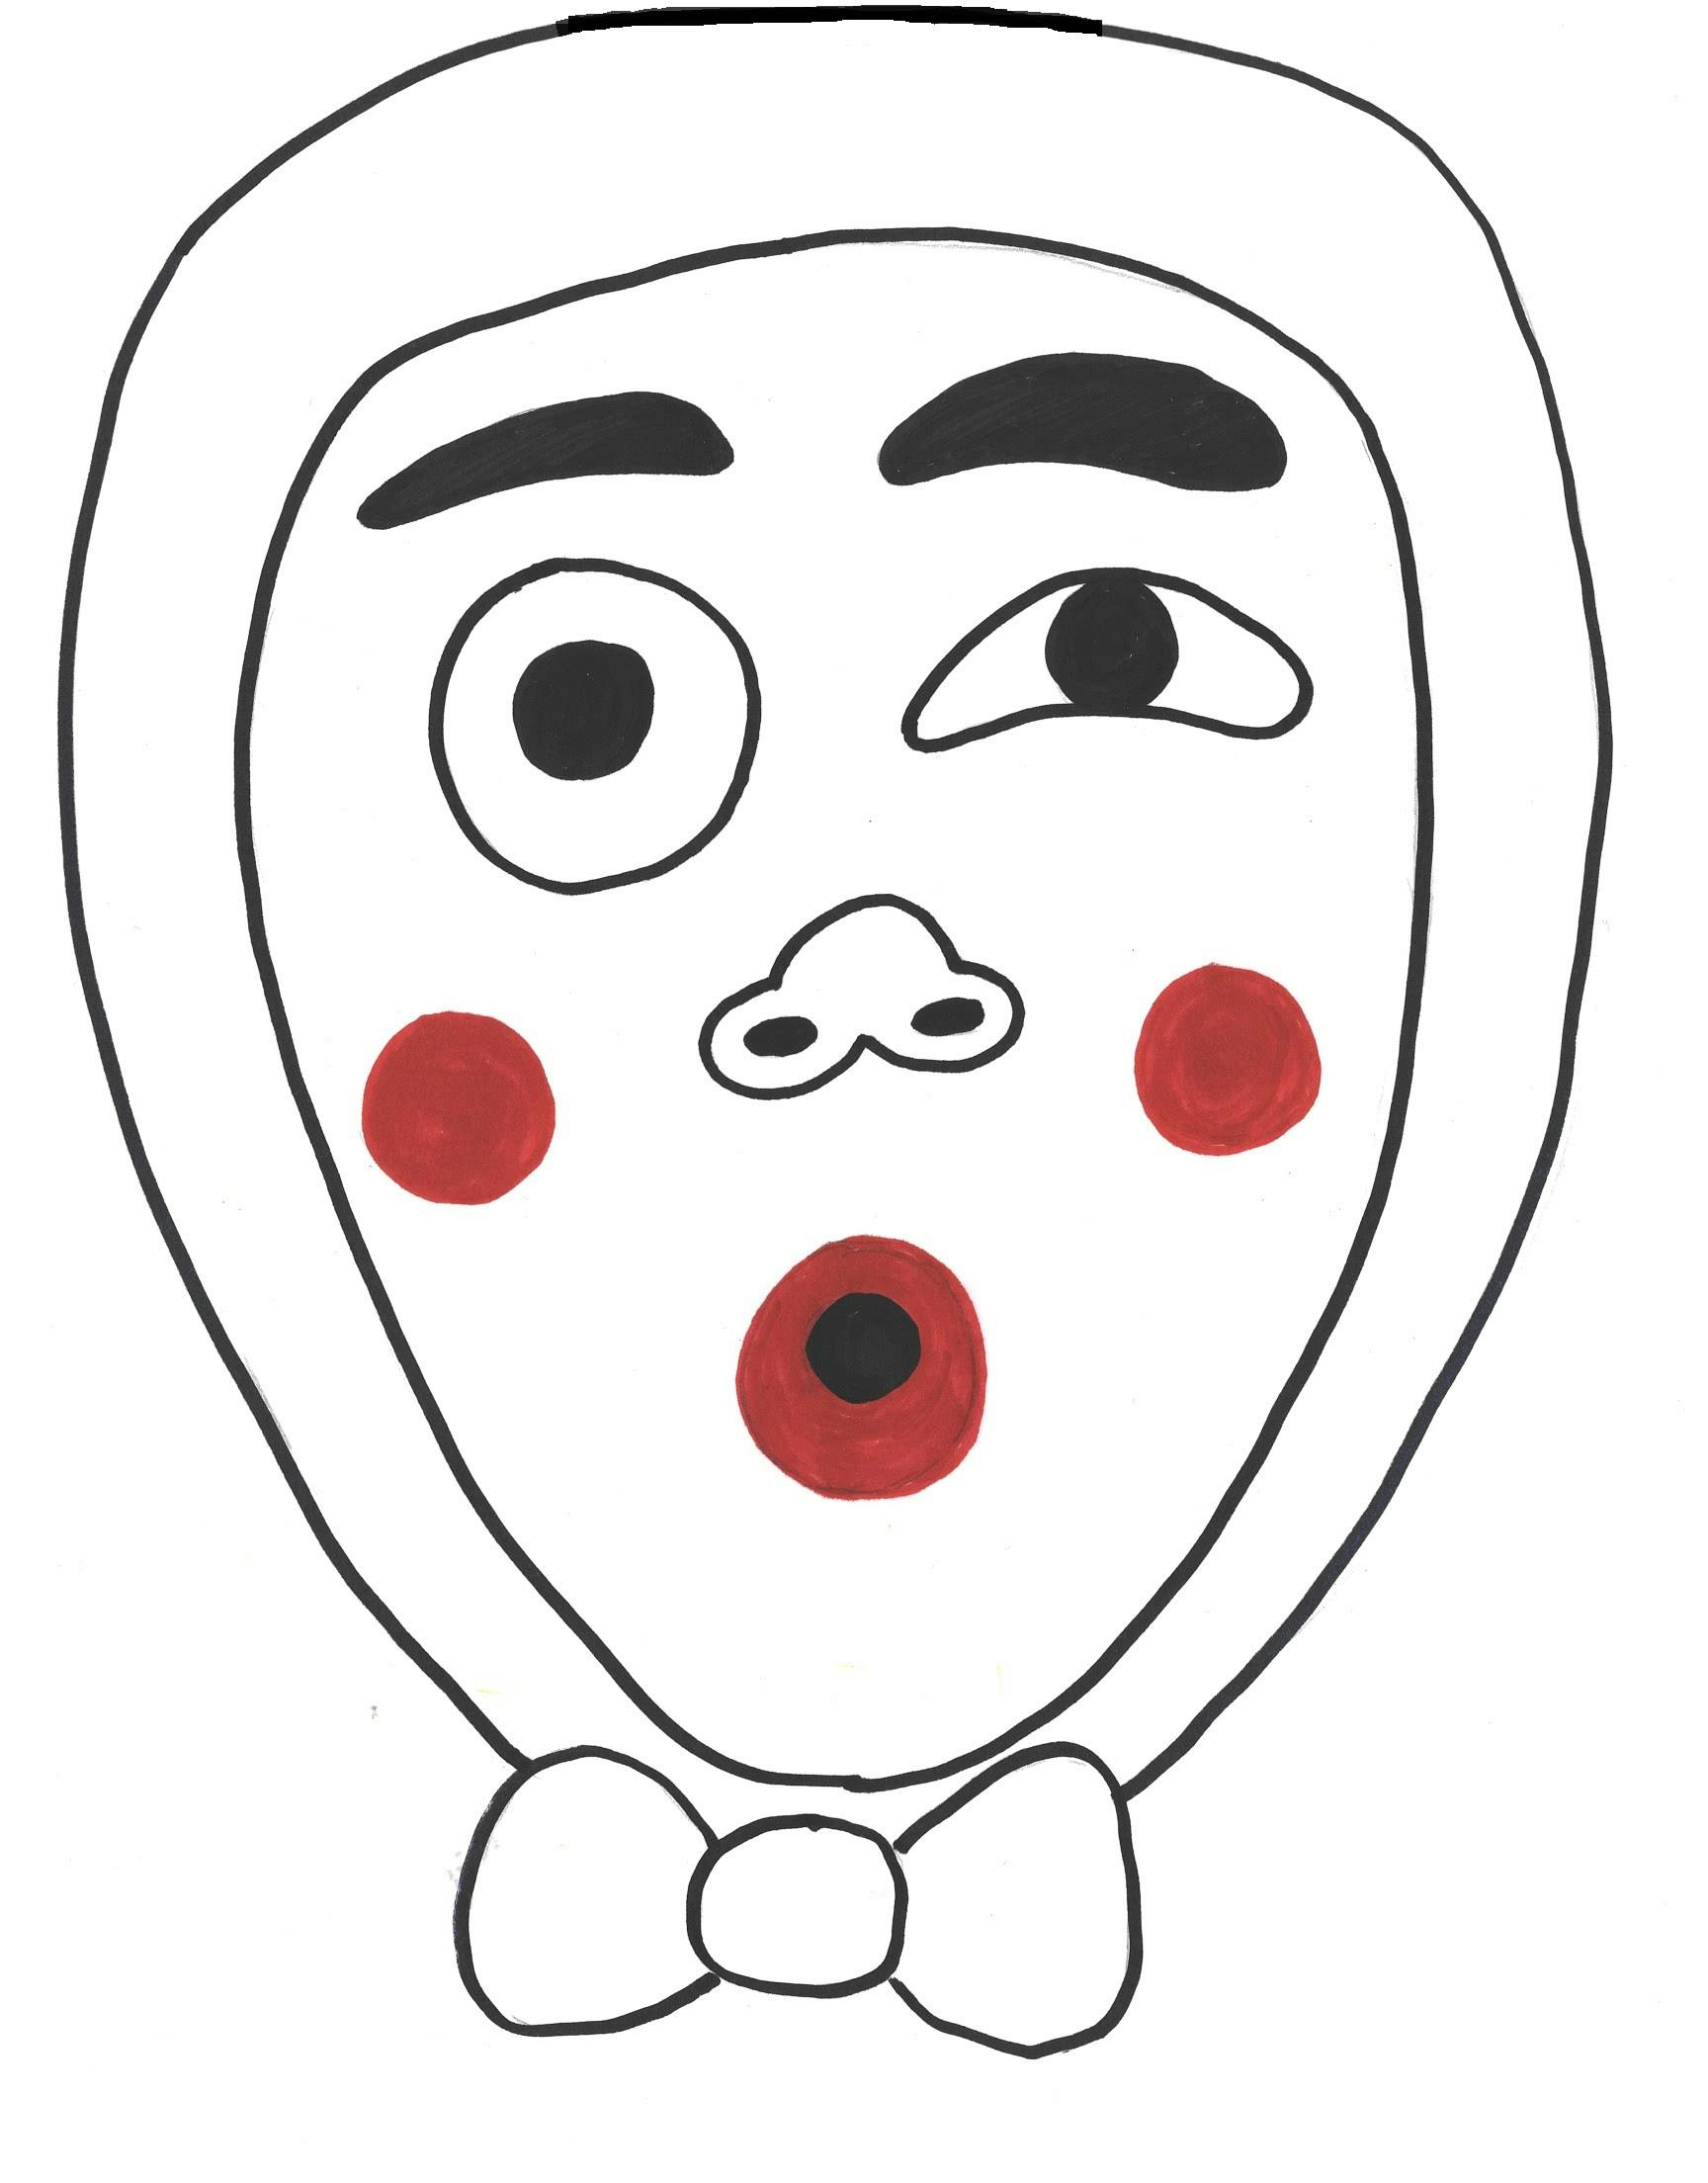
Fukuwarai (Lucky Laugh) is a Lunar New Year game that originates from Japan and is similar to Pin the Tail on the Donkey. Participants try to correctly place a collection of facial features on an empty face while they are blindfolded.
Number of Participants
For a minimum of 1 participant
Space Considerations
An open space (indoors or outdoors), either on the ground or with tables and chairs
Competencies
- Development of fine motor skills
- Eye-hand coordination
- Following directions
- Understanding shapes
Materials
- Card stock, bristol board or fabric (cloth, felt, etc.)
- Scissors
- Scarf/blindfold
- Playdough (optional)
Preparation
- Construct a large face on bristol board or fabric, or print the face templates on card stock.
- Print the facial feature templates on card stock or make your own facial features.
- Cut out the facial features.
- Optional: Laminate the facial features for easy cleaning and multiple use.
Implementation
There are various ways to play this game.
Option #1—Solo Play
- Participant views the Fukuwarai (Lucky Laugh) face.
- A blank version of the face is placed in front of the participant, along with the facial feature cut-outs. Optionally, the face can be outlined in playdough.
- Participant is blindfolded and mixes up the facial feature cut-outs.
- Participant tries to put the facial features in their proper places.
- Solo play: https://www.youtube.com/watch?v=n0Wsp6bBjIM
Option #2—Team Play
- Player 1 views the Lucky Laugh face and is then blindfolded.
- Player 1 or 2 mixes the facial features on the face.
- Player 2 instructs Player 1 on how to put the face back together.
- 2 player version (one person placing pieces, one instructing): https://www.youtube.com/watch?v=yeJlx5sKKww
Accessibility Considerations
- You can use the oversized facial features template to create a Lucky Laugh face out of felt, card stock on felt, or other tactile materials.
- The game can be played on the floor, on a table with the participant standing or seated, or it can be posted on a wall.
- Participants can play alone or with others, as desired.
Book Suggestions
The Button Book by Sally Nicholls
Do Not Eat the Game! by Matthew McElligott
Download Links
Images and Templates

Download Fukuwarai - Lucky Laugh Face Example
Giant Paper Popsicles
Ages 0-3
15-30 minutes
Giant Paper Popsicles
Description
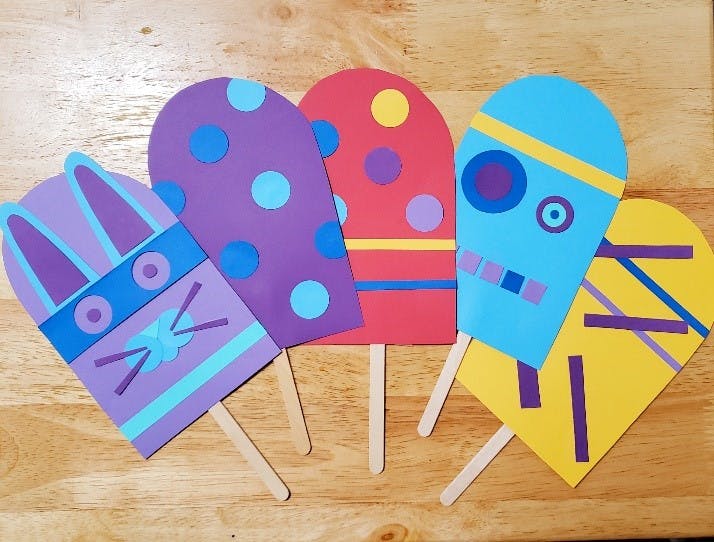
Create your own giant paper popsicle!
Number of Participants
For a minimum of 1 participant
Space Considerations
Any type of space where kids can be seated to do a craft
Competencies
- Artistic expression
- Creative expression
- Development of fine motor skills
- Spatial relationships
- Understanding shapes
Materials
- Card stock (preferably coloured)
- Craft or popsicle sticks
- Glue sticks
- Tape
- Scissors (adult use only)
- Paper edge scissors (adult use only)
- Crayons or pencil crayons
- Circle cutters or shape punches (optional)
- Foam shapes (optional)
- Smartphone or camera (optional)
Preparation
- Print the popsicle templates on card stock
- Print the shape templates (squares, lines and circles) on card stock
o Staff can cut these out in advance or parents and caregivers can cut them out during the program
Implementation
- Provide each participant with a popsicle template or with blank card stock to create their own popsicle. Also provide them with the shapes, glue, tape, sticks, and crayons or pencil crayons.
- Participants decorate the popsicle template, or draw and decorate a popsicle.
- Staff or parents and caregivers cut out popsicles.
- Participants glue or tape their decorated popsicle to a craft or popsicle stick, with adult assistance as needed.
- Optional: Parents and caregivers may take a photo of their child holding their giant popsicle.
Accessibility Considerations
- Use large glue sticks and larger sheets of card stock
- Pre-cut shapes, foam shapes and popsicle templates
Book Suggestions
The Canadian Kids’ Guide to Outdoor Fun by Helaine Becker
Recycle and Remake by DK
Gurple and Preen: A Broken Crayon Cosmic Adventure by Linda Sue Park
Download Links
Images and Templates

Goalie Mask
Ages 6-8
15 minutes
Goalie Mask
Description
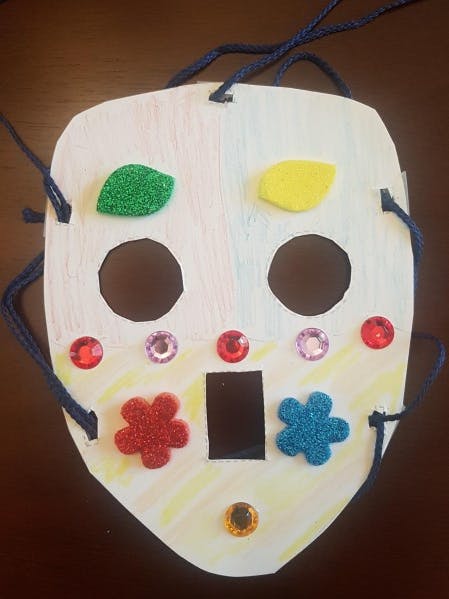
Decorate your own goalie mask, inspired by the book That’s Not Hockey by Andrée Poulin
Number of Participants
For a minimum of 1 participant
Space Considerations
Any type of space where kids can be seated to do a craft
Competencies
- Artistic expression
- Development of fine motor skills
Materials
- Card stock for printing the goalie mask template
- Crayons, pencil crayons or markers
- Construction paper or cardboard
- Glue sticks
- String or twine (5 pieces of 30 cm string for each participant)
- Tape
- Stickers, pompoms, beads, glitter and other decorative items (optional)
- Scissors (adult use only)
- One-hole punch (optional)
Preparation
- Print the goalie mask templates on card stock.
- Optional: Pre-cut the mask, including the eyes, the mouth, and five small holes inside the border of the mask for the string. A one-hole punch may be useful for creating starter holes for scissors. For extra durability, you may consider gluing the mask onto construction paper or cardboard.
Implementation
- Distribute the goalie mask templates.
- Optional: Provide participants with safety scissors if they are cutting around the borders of the mask. Cutting holes for the eyes, mouth and string is much more challenging—it is recommended this be done by staff or parents/caregivers.
- Participants can colour their masks and affix various decorative items—stickers, glitter, pompoms, beads, etc.—using glue when needed.
- Recommended: Place a small piece of tape between the string holes and the border of the mask—this will improve the durability of the mask.
- Distribute five pieces of string or twine to each participant.
- With adult assistance as needed, participants should thread a piece of string through each hole and tie a knot. They should be careful not to pull too tight as this might rip the masks.
- With a mask held on the participant’s face, staff or a parent/caregiver can help gently tie the mask behind the head.
Accessibility Considerations
- Provide a variety of tactile items and colouring instruments that participants can use to decorate their masks in any way they see fit
- Offer pre-cut options for the mask, including all string holes
- Assist with knot tying as needed
- Offer easy-grip scissors if asking participants to cut out their own masks
Book Suggestions
Breaking the Ice: The True Story of the First Woman to Play in the
National Hockey League by Angie Bullaro
Hockey Night in Kenya by Danson Mutinda and Eric Walters
Let’s Play a Hockey Game by Kari-Lynn Winters
Meet Willie O'Ree by Elizabeth MacLeod
That’s Not Hockey by Andrée Poulin
Download Links
Images and Templates

Greater Than Alligators
Ages 3-5
15-30 minutes
Greater Than Alligators
Description
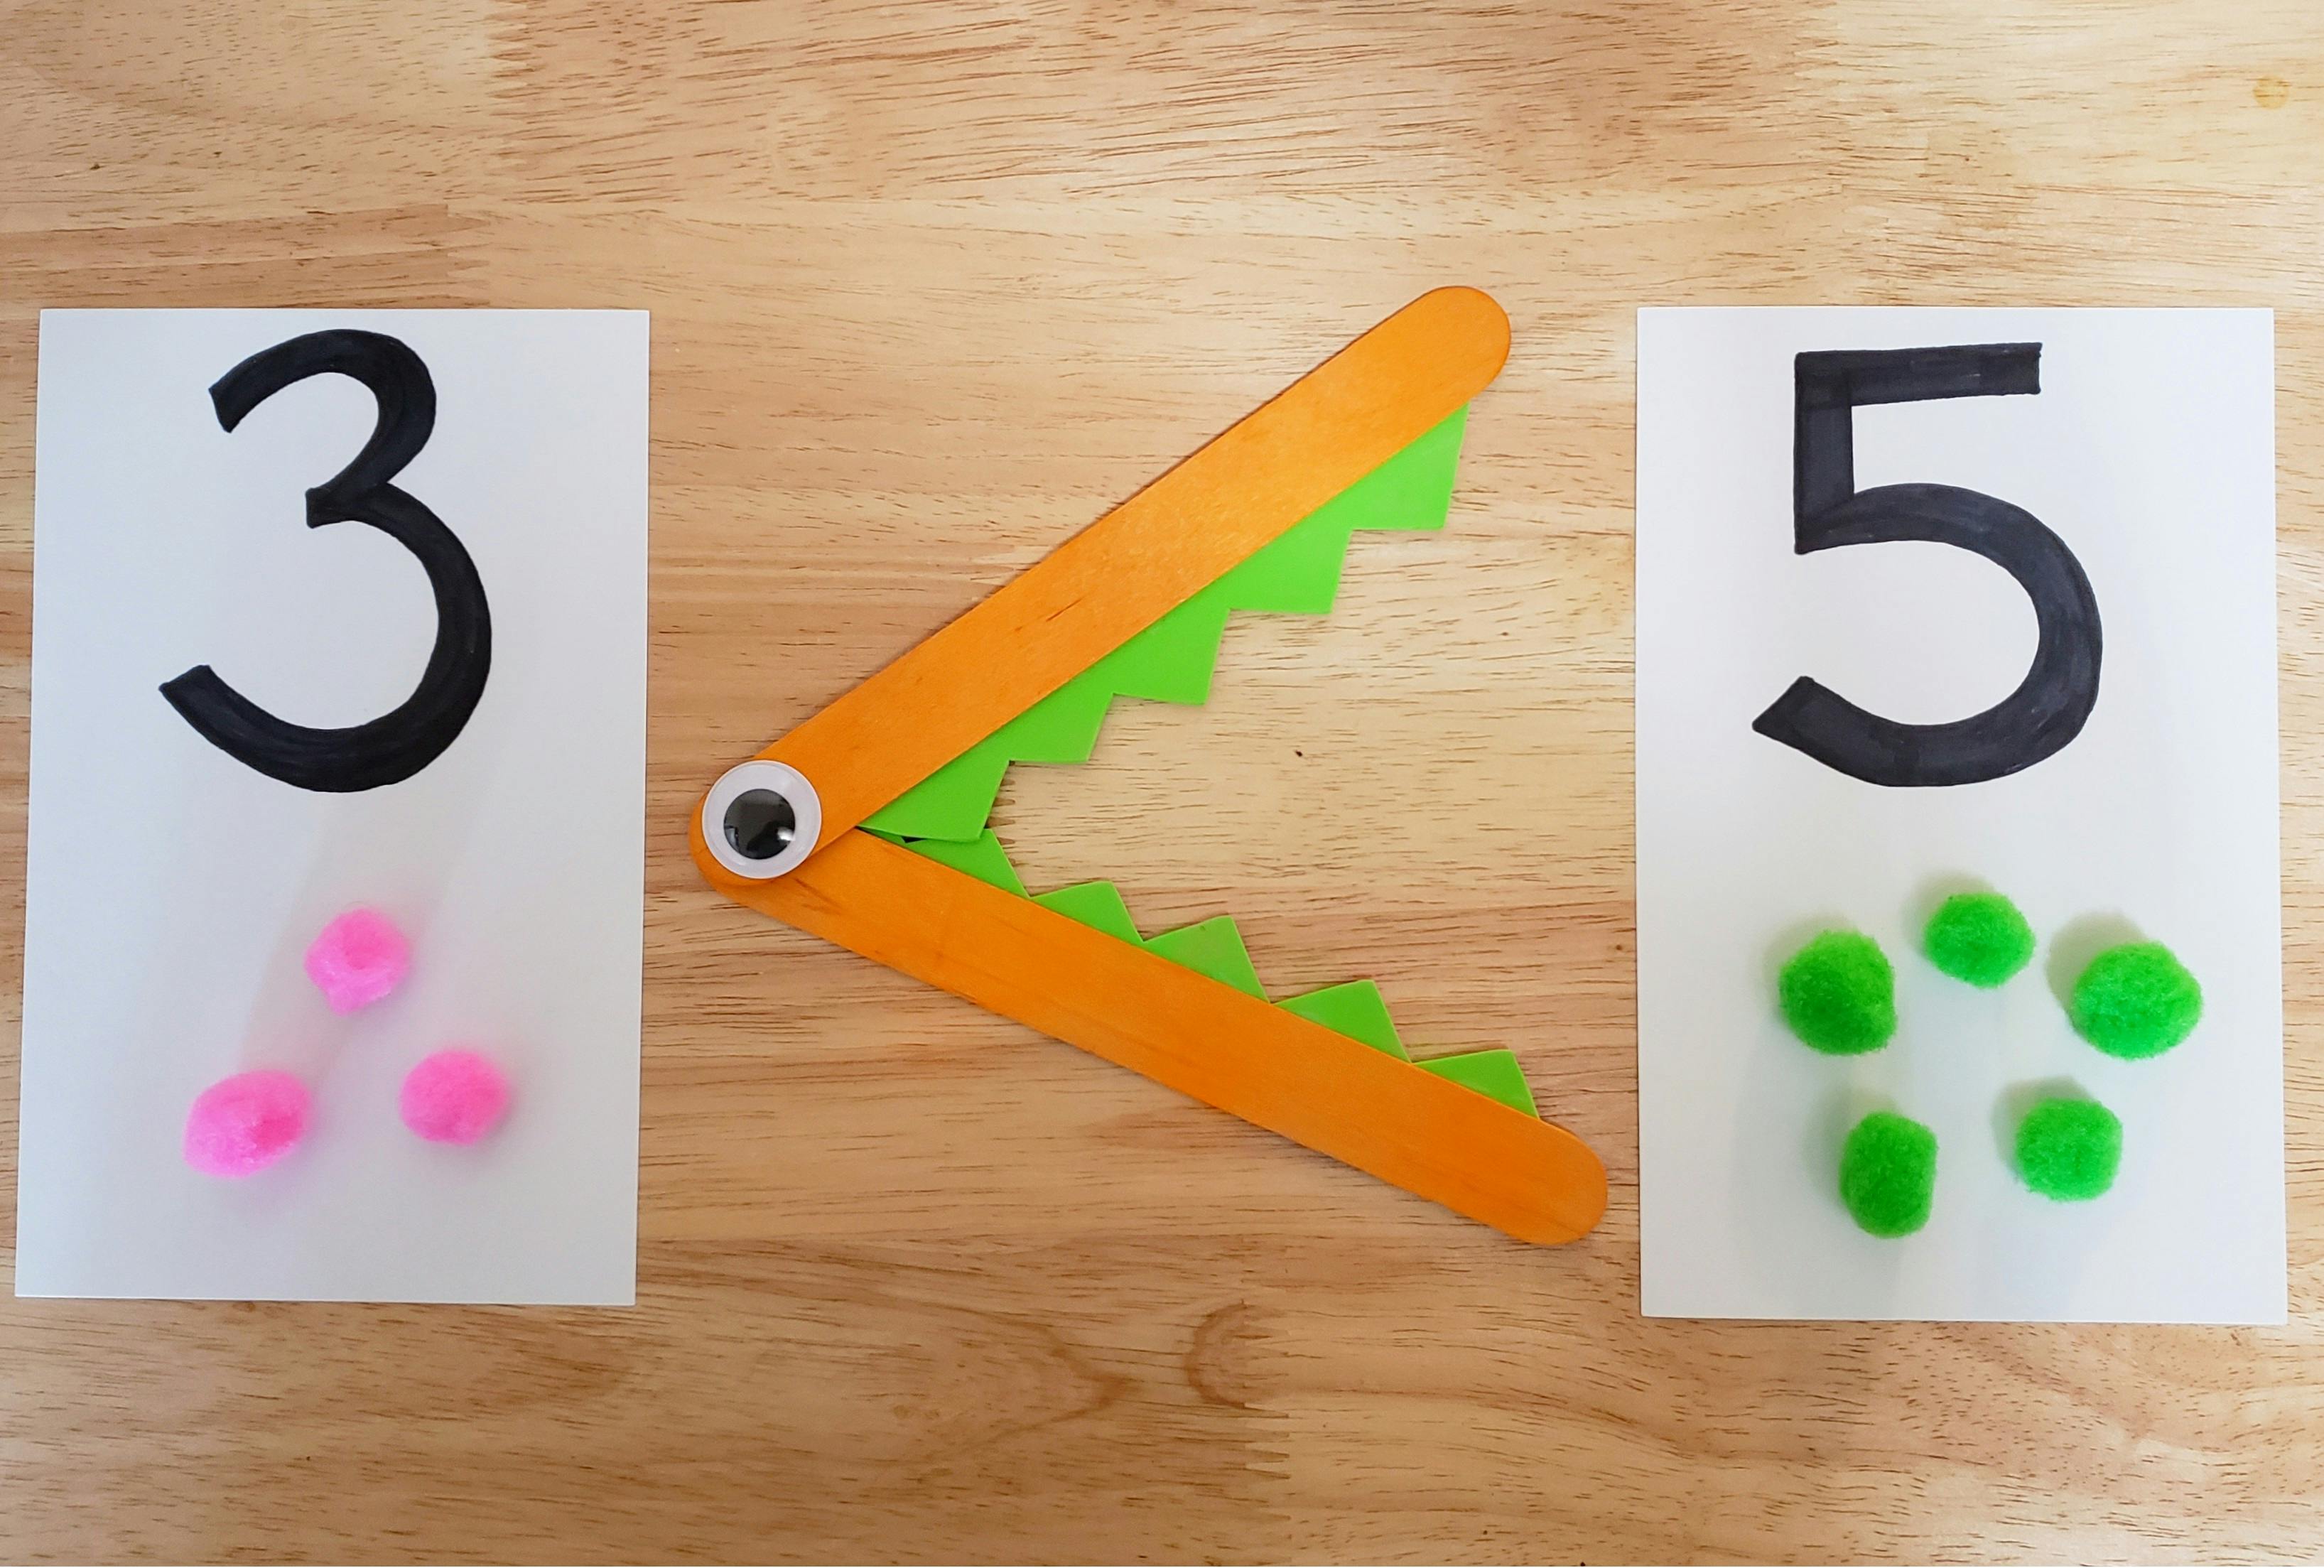
Make math fun by creating greater than, less than and equal to alligators out of popsicles sticks. Use them to solve math equations.
Number of Participants
For a minimum of 1 participant
Space Considerations
Any type of space where kids can be seated to do a craft
Competencies
- Creative and imaginative thinking
- Logic and sequencing
- Mathematics
- Problem solving
Materials
- Card stock
- Permanent markers
- Popsicle sticks
- Foam sheets
- Googly eyes
- Pompoms
- Glue sticks
Preparation
- Print equation and number templates on card stock
- Distribute 6 popsicle sticks, 2 foam sheets and 6 googly eyes to each participant
- Set out glue sticks, permanent markers, templates and extra foam sheets
Implementation
Create the Equation Symbols
Less Than Alligator
1. Cut out teeth from foam sheets and glue them onto the popsicle sticks.
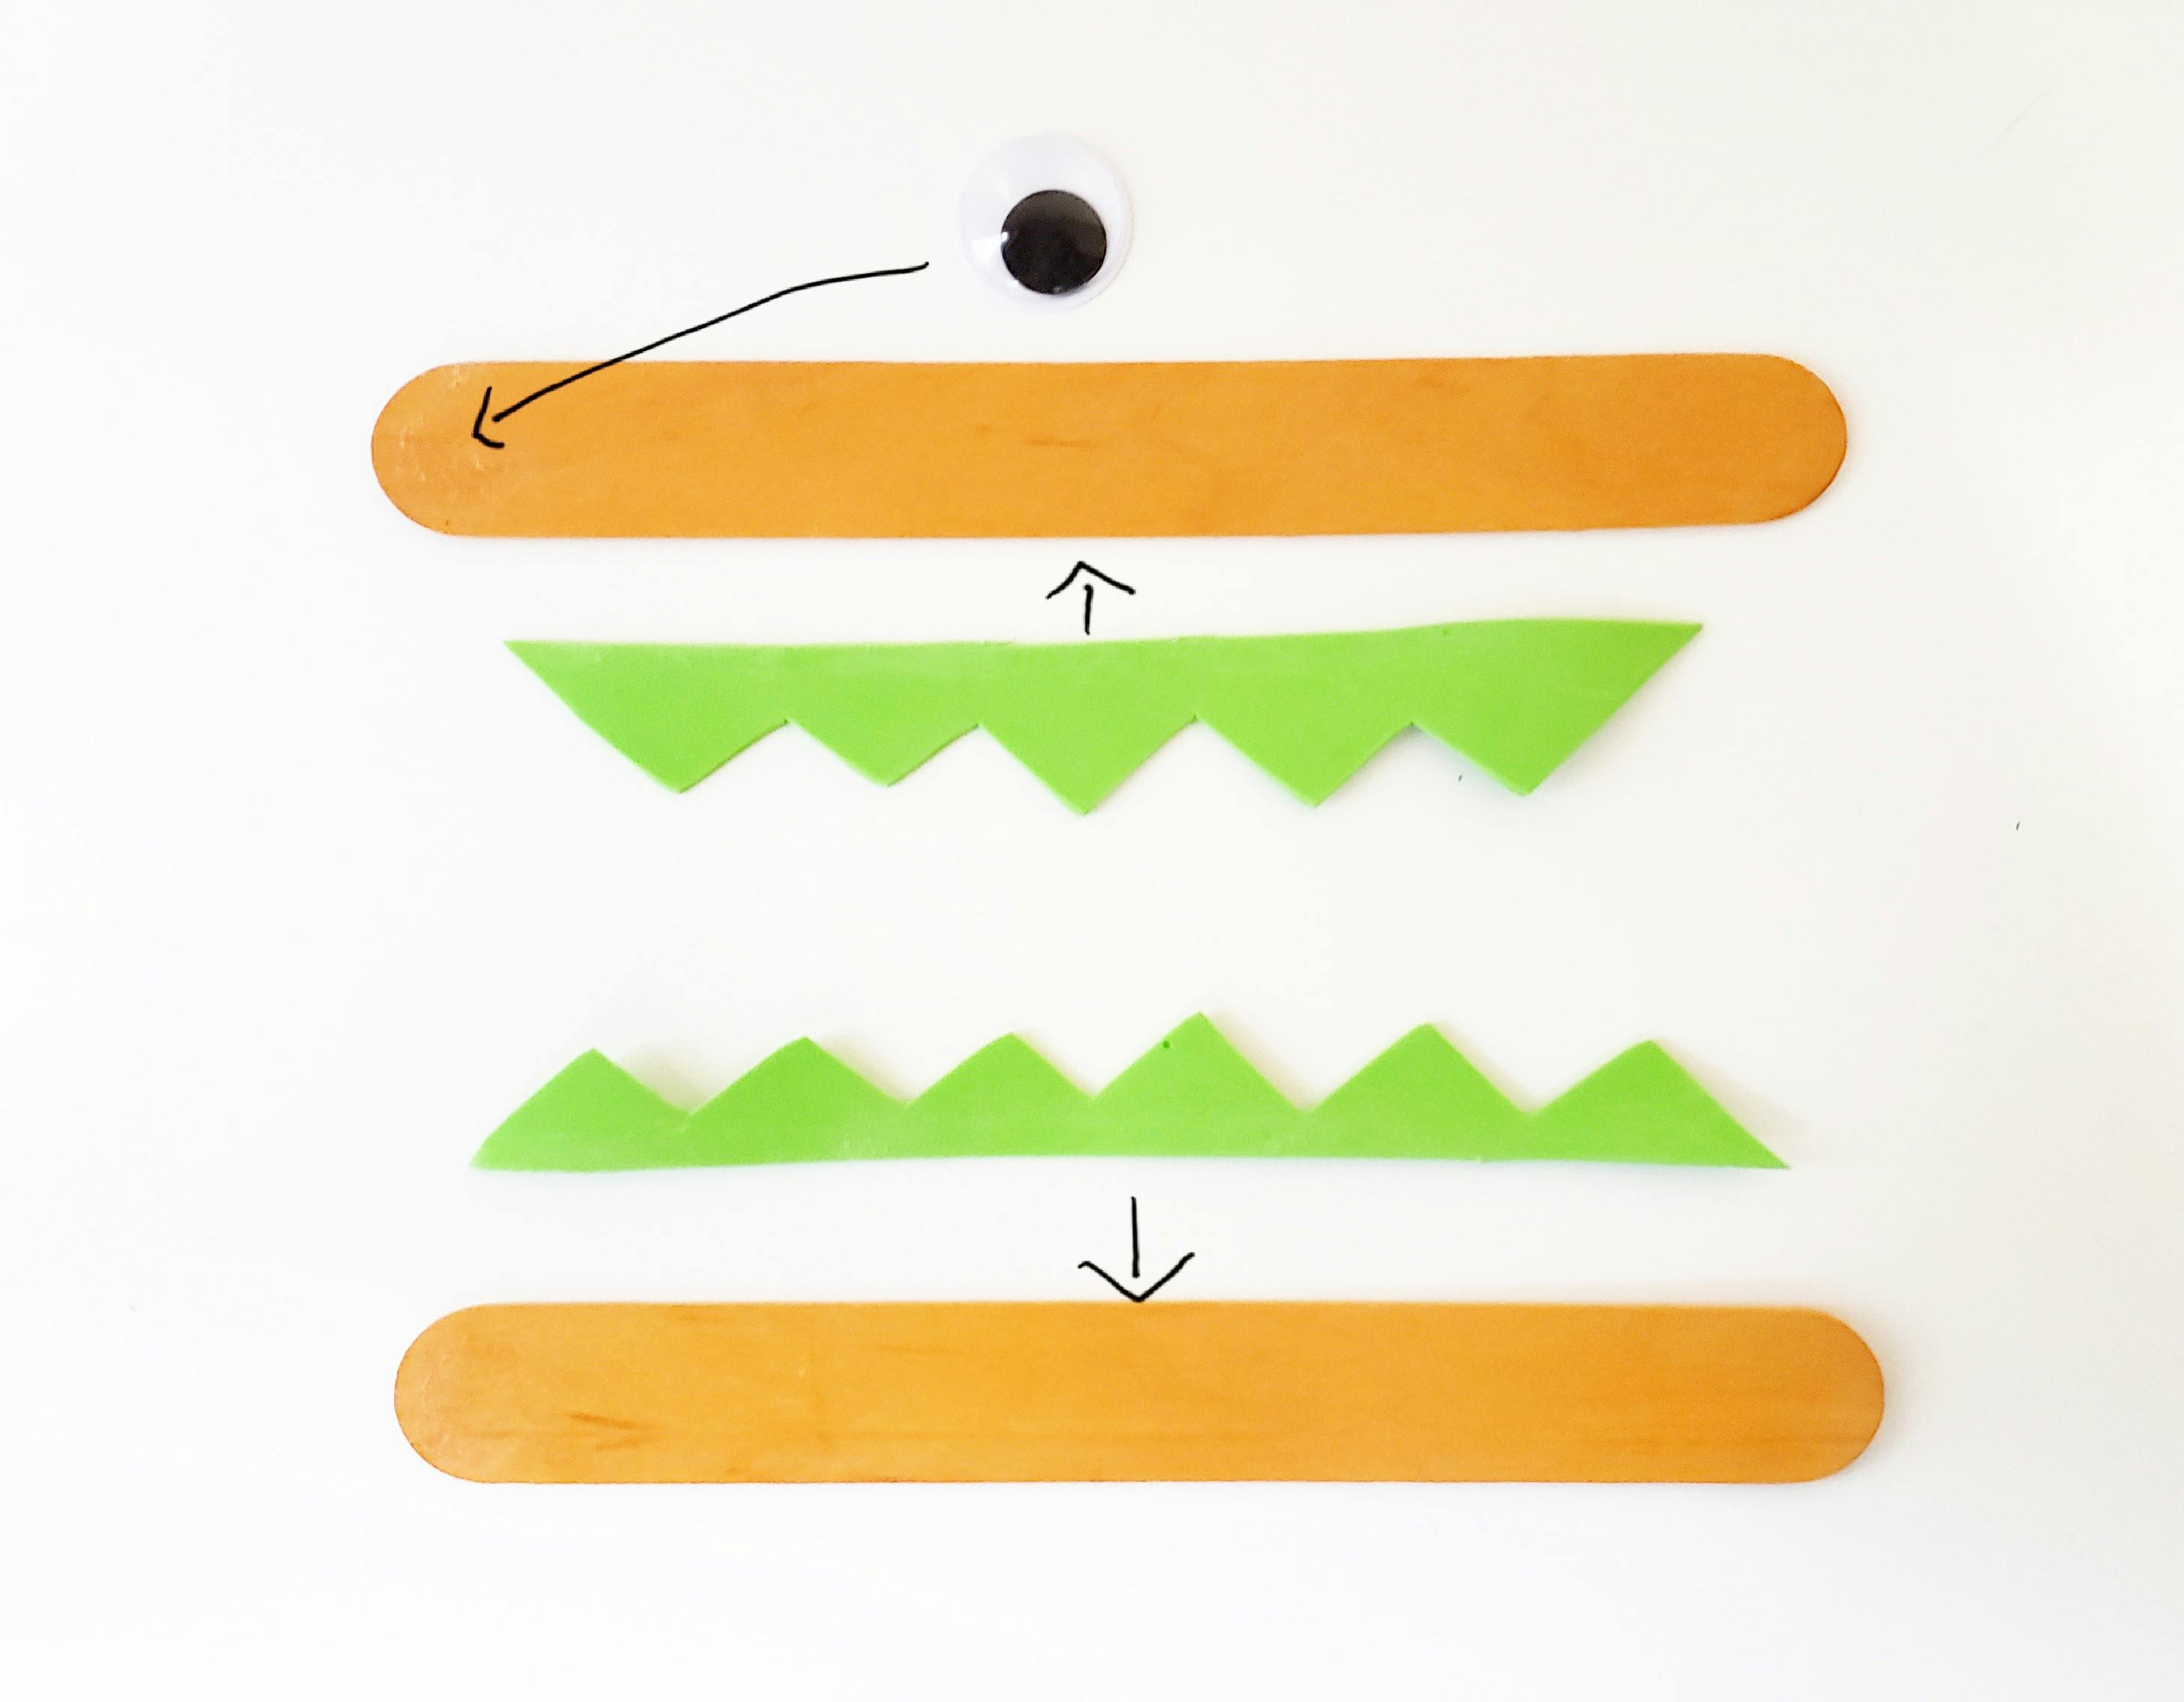
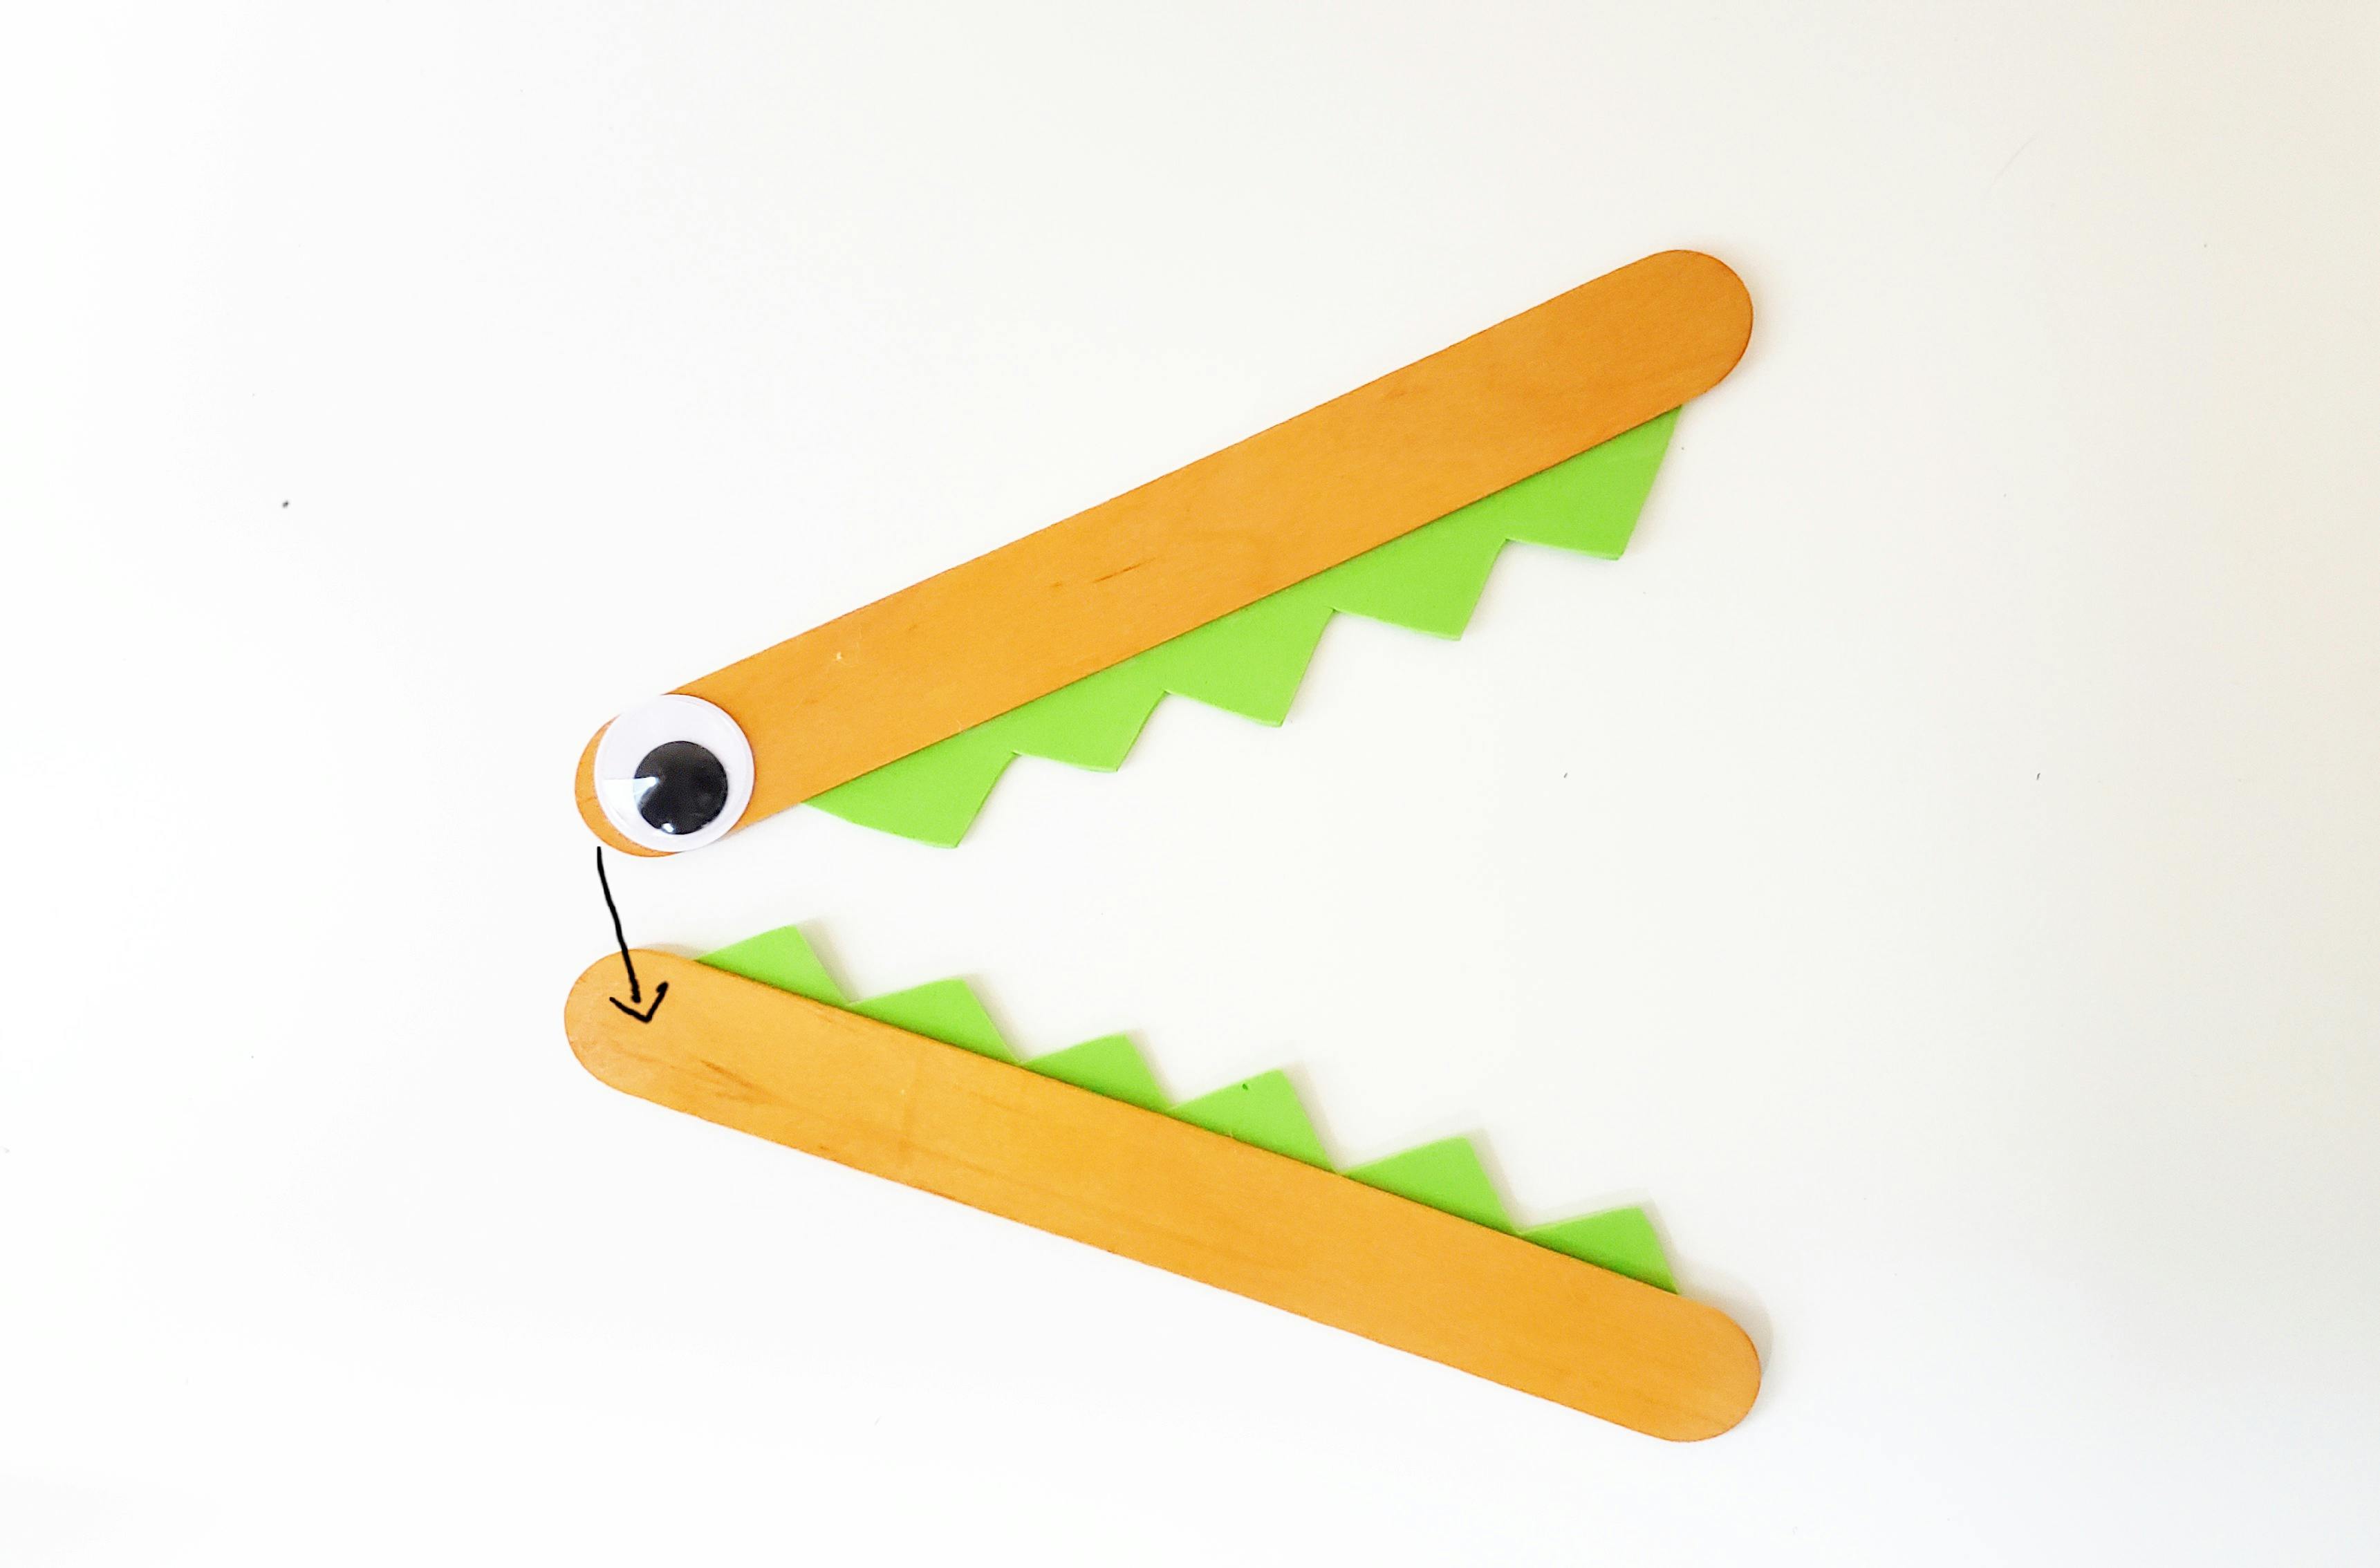
2. Add a googly eye to the left end of the stick with the top teeth and glue the two popsicle sticks together on the same side. The alligator’s open mouth faces the right, making a less than sign.
Greater Than Alligator
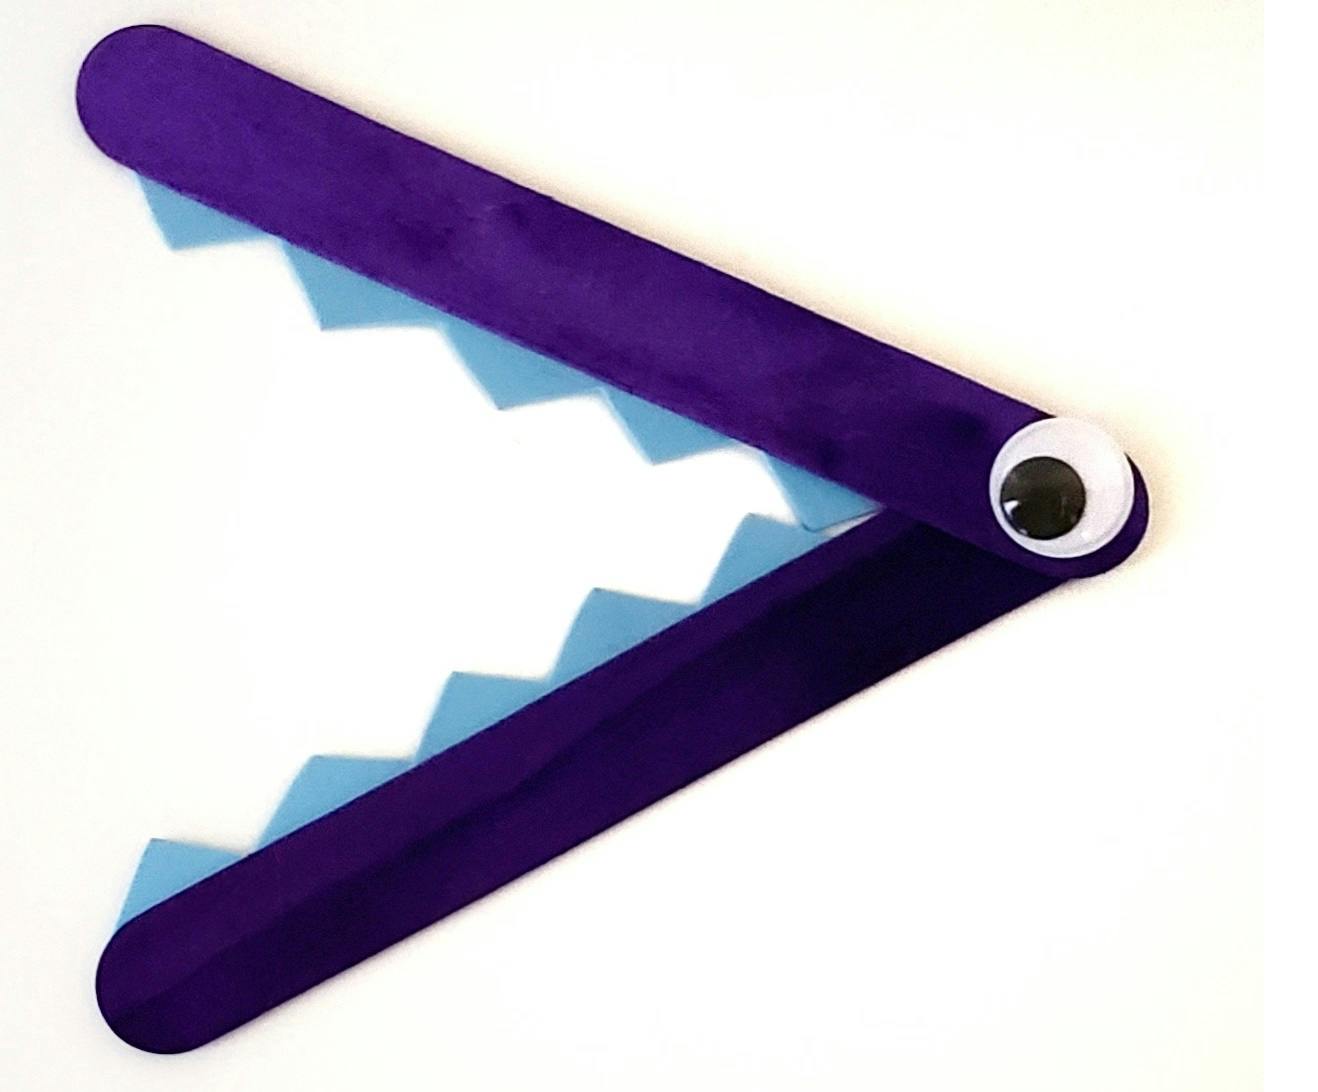
3. Repeat the steps above, but instead attach the sticks on the right and place the googly eye on that side. This alligator’s open mouth faces left, making a greater than sign.
Equal Alligator
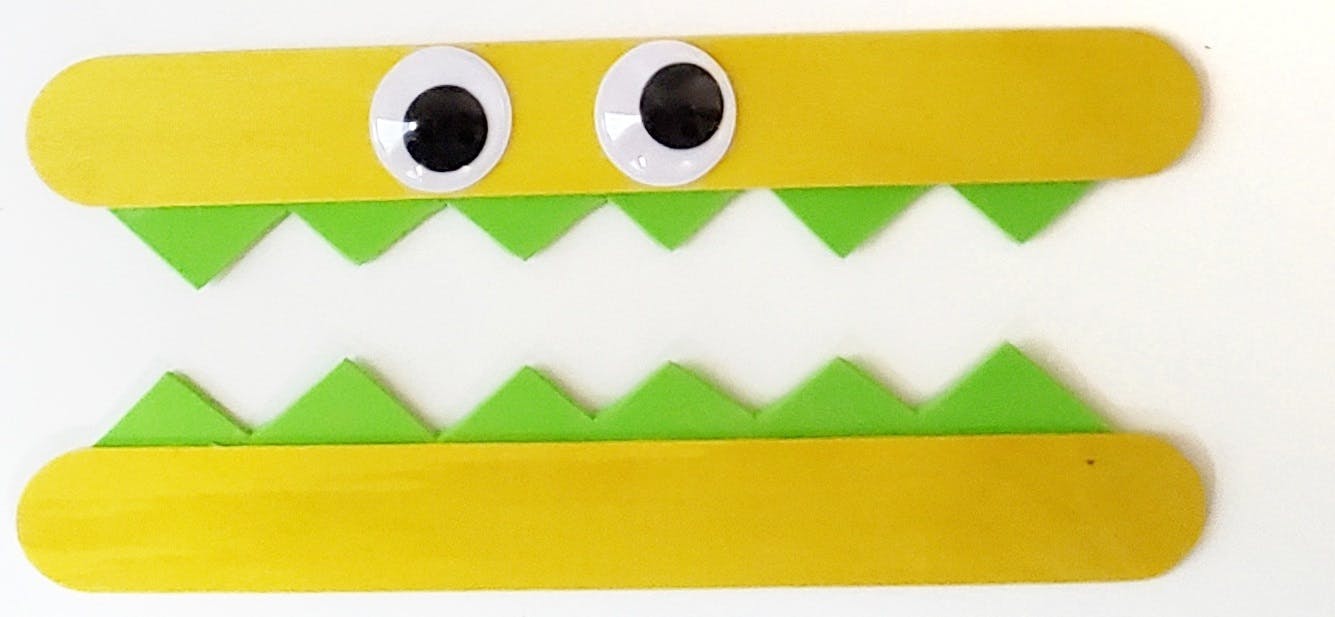
4. Repeat step 1 and then add two googly eyes to the center of the top popsicle stick. Do not glue these popsicle sticks together.
Do Math Equations
5. Complete equations using numbers, pompoms and the alligator signs. Use the optional template if you like.
6. Try equations using mini pompoms instead of numbers or equations without the pompoms and just the numbers.

Accessibility Considerations
- Provide large glue sticks, pre-cut teeth and medium- and large-sized pompoms
- Use large markers and card stock pages to make equations.
Book Suggestions
5-Minute Basketball Stories by Sarah Howden
Lucy Tries Basketball by Lisa Bowes
Download Links
Images and Templates
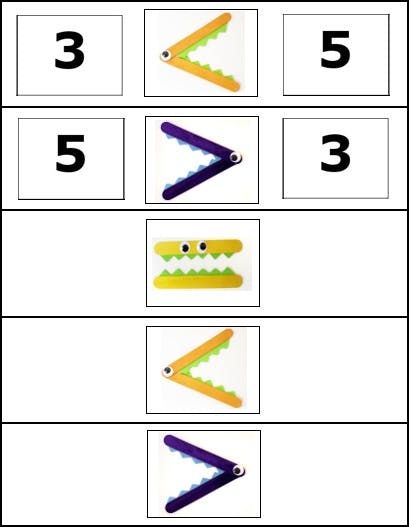
Download Greater Than Alligator Equation Templates, Numbers and Math Symbols
I Spy Colours
Ages 0-3
40 minutes
I Spy Colours
Description
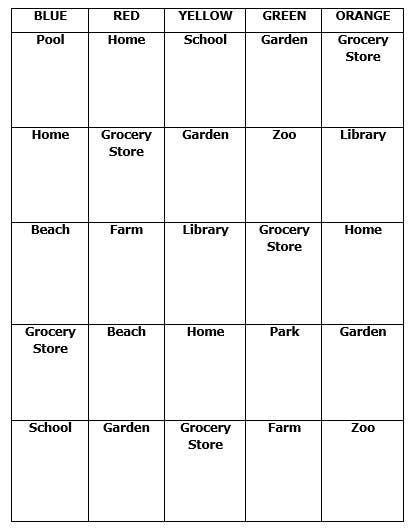
Find different colours in various places based on experience or knowledge! You can write the name of the item or draw it. Fill a line, several lines or a full card.
Number of Participants
For a minimum of 1 participant
Space Considerations
An indoor space with room for children and their caregivers to do a paper and pencil activity
Competencies
- Development of fine motor skills
- Sensory motor skills
- Memory
- Study of nature
- Understanding and appreciation of animals
Materials
- I Spy card
- Pen or pencil
- Playdough (optional)
- Staff Recommended Titles booklist (optional)
- Book display (optional)
- Computer or mobile device (optional)
Preparation
- Set up research tools (optional)
o Staff Recommended Titles booklist—create your own recommendation list
o Book display—Set up books featuring places on the I Spy card on a table or truck for participants to reference
o Electronic devices—set up computers or tablets with recommended websites
Implementation
- Library staff give each participant an I Spy card and instructs them to fill out a line, several lines or a full card.
- Parents and caregivers can work with the kids to “spy” items based on their memory or by using the books and reference resources provided by staff.
- The spied item can be written by caregivers or draw by kids in the corresponding box.
Accessibility Considerations
- Card can be printed on 8.5” x 14” paper with larger font
- Put playdough lines on the card to make it easier to find the boxes
- Choose or create images in advance and kids can place these on their game cards instead of writing or drawing spied items, making the activity more tactile
Book Suggestions
Gurple and Preen: A Broken Crayon Cosmic Adventure by Linda Sue Park
Hide-and-Seek: A First Book of Position Words by R.D. Ornot
David Jumps In by Alan Woo
Download Links
Images and Templates

I Spy and Count
Ages 0-3
5-10 minutes
I Spy and Count
Description
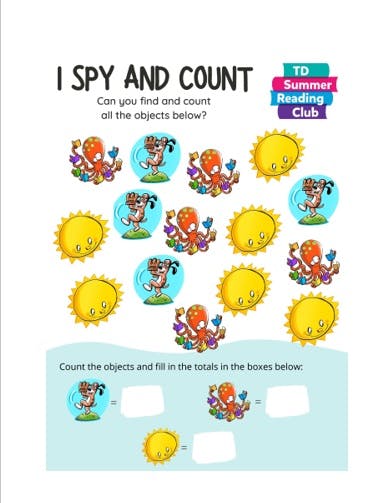
Printable I Spy and Count worksheets that incorporate Dave Whamond’s images
Space Considerations
Indoor space where participants can complete a worksheet
Competencies
- Classification skills
- Following directions
- Organization and planning
Materials
- Writing instrument (pencil preferred)
- Printouts of the I Spy and Count templates
o I Spy and Count: Easy Version
o I Spy and Count: Medium Version
o I Spy and Count: Difficult Version
Implementation
- Print out and distribute a version of the I Spy and Count worksheets, chosen based on the age group of your participants. Very young children can complete this worksheet with parent, caregiver or staff assistance as needed.
- Distribute writing instruments to all participants.
- Encourage participants to count each image and record the totals in the boxes at the bottom of the worksheet.
- You may consider printing the worksheets to have the sheets available for kids as a passive activity outside of a scheduled program.
Accessibility Considerations
- Consider running an alternative activity for kids with no or low vision: I Sort and Count:
- Pre-cut a series of shapes on card stock or purchase foam shapes from a local dollar or craft store.
- Hand out the shapes to participants in a zipper storage or paper bag.
- Participants can sort and then count each of the shapes with assistance from their parent, caregiver or staff as needed.
Book Suggestions
Hide-and-Seek: A First Book of Position Words by R.D. Ornot
Gurple and Preen: A Broken Crayon Cosmic Adventure by Linda Sue Park
Little Fox by Britta Teckentrup
Download Links
Images and Templates
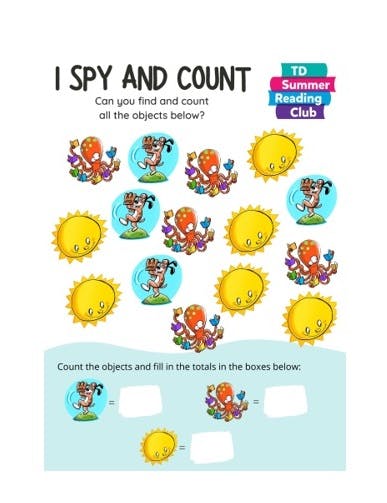
I Spy and Count: Medium Version
Make Your Own Board Game
Ages 9-12
30 minutes
Make Your Own Board Game
Description
Design and invent the rules for your very own board game in this flexible activity
Number of Participants
For a minimum of 1 participant
Space Considerations
Any type of space where kids can be seated to do a craft
Competencies
- Creative and imaginative thinking
- Organization and planning
- Problem solving
Materials
- Construction paper of various sizes and colour
- Paper in various colours
- Crayons, pencil crayons and markers
- Paper for printing dice template
- Rulers
- A wide variety of tactile and decorative items like pompoms, stickers, glitter, foam shapes, playdough, etc.
- Push-pins
- Various small objects or tokens
- Pencils and pens
- Safety scissors
- Glue
- Tape
Implementation
- This is a very flexible activity in which participants can use their imagination to design, create and draw their very own board game to play against other participants. Encourage participants to work individually, in pairs, or in small groups—let them decide how they are most comfortable.
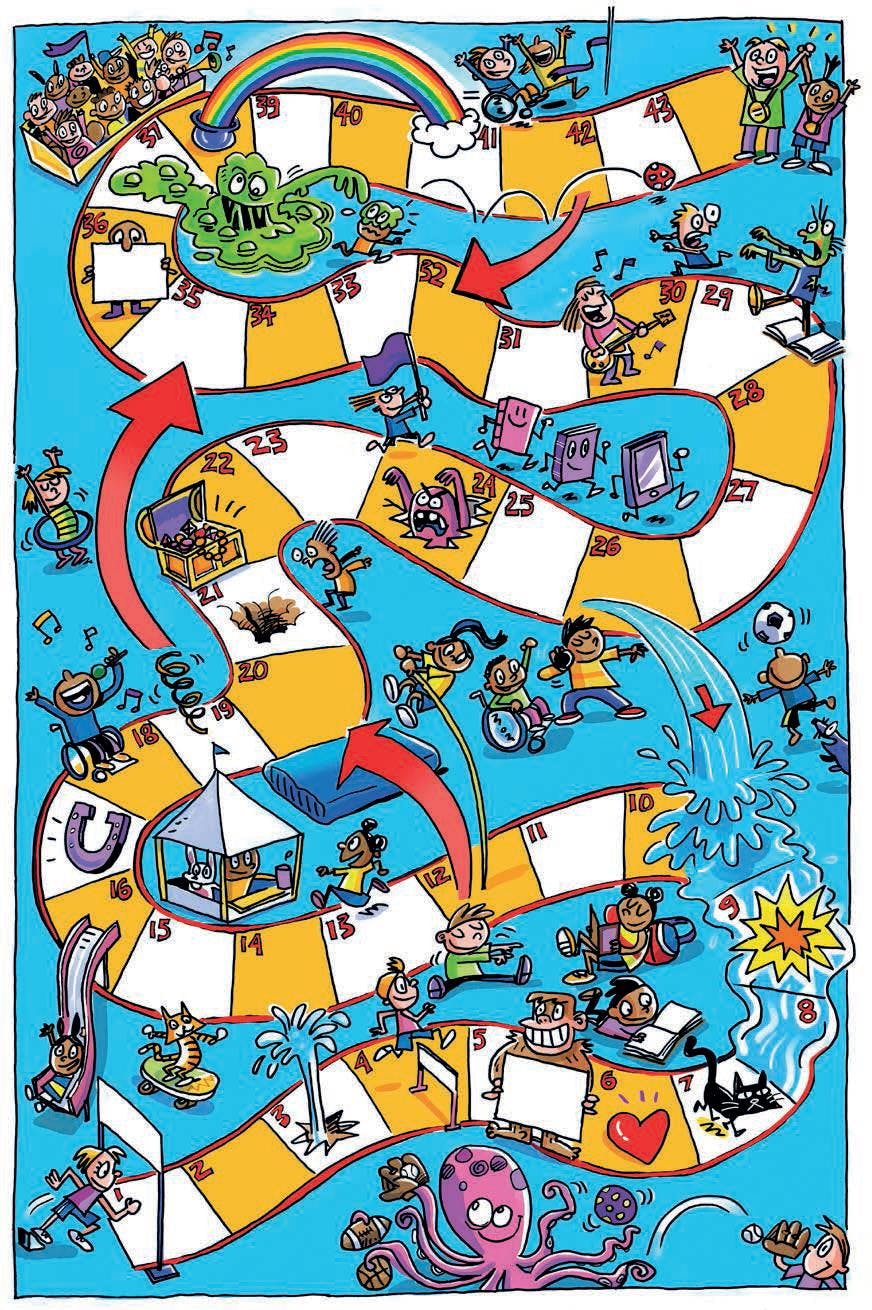
- As part of the activity, it may be a good idea to review with participants a few really simple board games, such as Snakes and Ladders or Trouble. This will provide them with a bit of guidance and maybe spark their creativity. You can also show participants the board game created by Dave Whamond—it’s at the center of the TD Summer Reading Club school-aged notebook (pictured below).
• Snakes and Ladders: A board game for two or more players. It is played on a game board with numbered, gridded squares. A number of "ladders" and "snakes" are pictured on the board, each connecting two specific board squares. The object of the game is to navigate one's game piece, according to die rolls, from the start (bottom square) to the finish (top square), helped by climbing ladders but hindered by falling down snakes.
• Trouble: A board game for 2 to 4 players, who compete to be the first to send four pieces all the way around a board. Players can send opponents' pieces back to the start by landing on them. Pieces are protected from capture after arriving in the final four slots. - Encourage participants to plan before designing their board game. Many simple board games incorporate game pieces and a method to move those pieces through a board from a starting to a finishing point. Participants do not have to follow this format for their own board games. But if they do, ask participants the following to get them on the right track:
a. Will there by game pieces/tokens? If so, what objects will you use?
b. How many players can play this game at one time? Is there a minimum and maximum number of players?
c. If there are game pieces, how will players move their game pieces? Is the object to get from a starting point to a finishing point? If so, participants can use the dice template to create a die (note: participants don’t have to use the standard 1 to 6 numbering), design a spinner, design a series of numbered cards that can be shuffled and placed face down, or come up with any other option they see fit for their game design. - Once participants have thought of a game, they can start designing and creating. It’s best to have a table dedicated to all of the material for this program, where kids can go and take what they need for their game.
- Provide paper for participants to jot down the official rules for their game.
- Once they’ve created their game, participants can test it out on others in a pilot run. This first game is important as it can serve as an opportunity for participants to think about any changes they can make to improve their game. If desired and as needed, they can write new rules or modify existing rules to make the game more engaging, or consider tweaking some physical elements on their board game that didn’t work out the way they wanted. For example, did the game take too long? Was it over too quickly? If timing was an issue, they may want to consider what they can tweak to solve the problem.
Accessibility Considerations
- Offer pre-cut options, assistance with cutting or easy-grip scissors
- Offer a wide variety of tactile items for kids to choose from and allow them to incorporate objects that are most suitable for them
- Offer tape and large glue sticks
- Allow participants to work individually, in pairs or in small groups, as desired
Book Suggestions
Do Not Eat the Game! by Matthew McElligott
Recycle and Remake by DK
Download Links
Images and Templates

Make Your Own Silly Story
Ages 6-8
15-30 minutes
Make Your Own Silly Story
Description
Learn how to make your very own silly story and try it out on your friends
Number of Participants
For a minimum of 2 participants
Space Considerations
An indoor space with tables and chairs
Competencies
- Creative and imaginative thinking
- Organization and planning
- Social interaction
- Written communication skills
Materials
- Masking or painter’s tape
- Scrap paper
- Card stock
- Pencils
- Erasers
- Pens or fine-tipped markers
- Safety scissors (optional, for cutting tape)
Implementation
1. Begin by demonstrating a few silly stories and how they work. There are a few options for running this:
a. If the TD Summer Reading Club Kids’ Site is live (starting June 14, 2021), there are 12 silly stories that you can access directly from the home page. You can display the stories using a laptop and projector. Prompt participants to provide words for you to type into the blanks. Then, click on Show Your Story and read it aloud to the group.
b. Try out the TD Summer Reading Club Silly Story as a group. This is available at any time—before, during and even after the summer!
c. Use our Silly Story printouts and have kids work in pairs to prompt one another for words for the story. Alternatively, you can prompt the entire group for words and then read the story aloud.
2. Discuss examples of word prompts that could work well in a story. Using parts of speech (noun, verb, adjective, adverb) may be difficult for some participants. Instead, use the word prompt template.
3. Distribute scrap paper and a writing instrument to each participant. Encourage them to think of a story idea. The story can be anything, including something they invent, something that happened to them in real life or a story spinoff based on one of their favourite books. This is a good time for participants to start thinking of potential word prompts and words they may want to exclude for others to fill in. The stories can be any length and contain any number of word prompts—a recommended number of prompts is between 4 and 12.
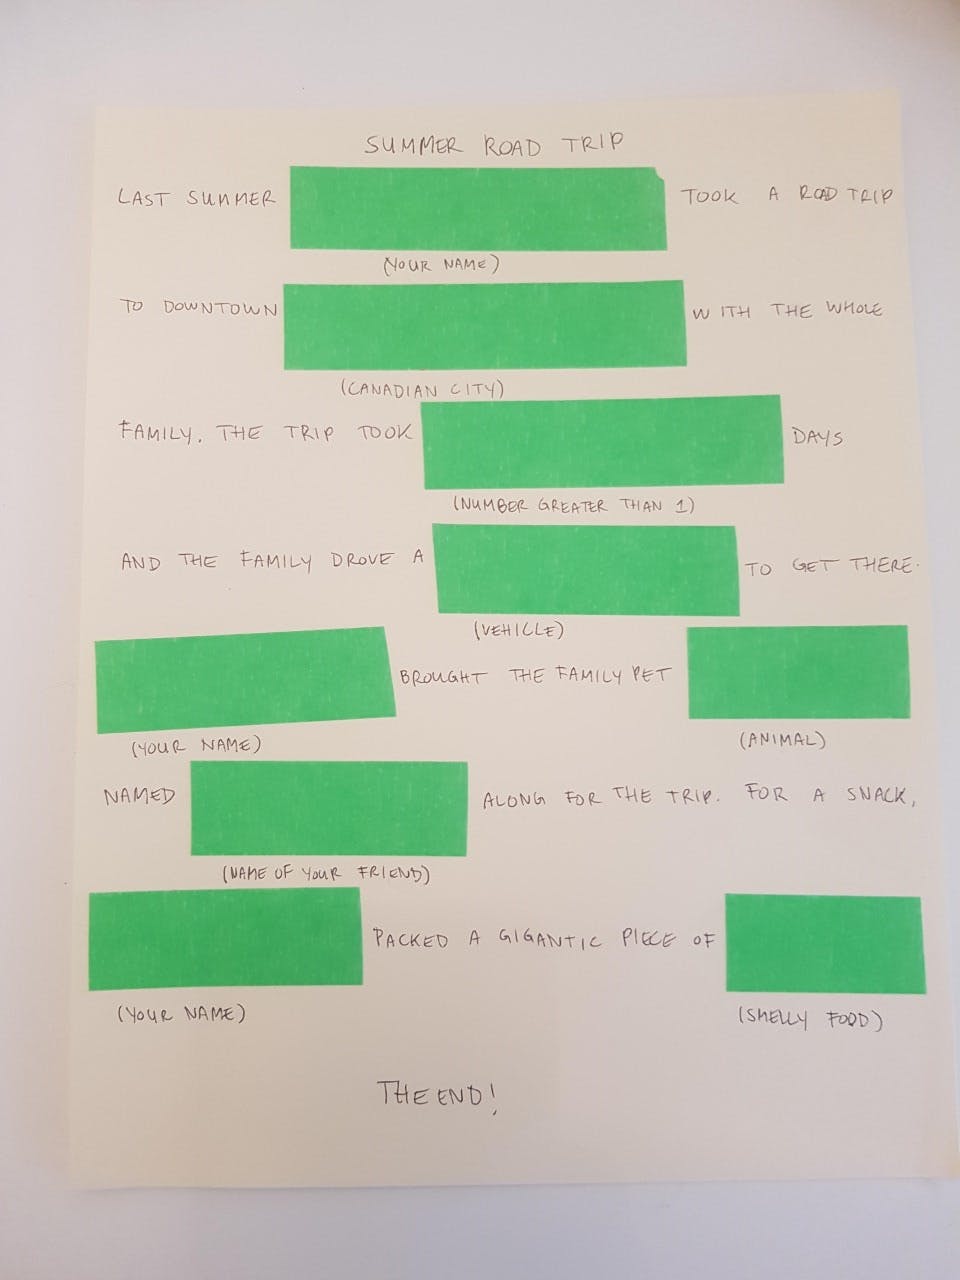
4. Distribute card stock paper to participants along with masking tape or green painter’s tape. Participants should write out their stories and use a piece of tape to mark each blank space for their word prompts (see sample image below).
5. Underneath or beside the tape, participants should indicate what the word prompt is (e.g. body part).
6. Participants can use as many sheets as desired to write their story.
7. After completing the story, participants can then be encouraged to test the story out on others by prompting them for the words. Without showing their story, the author should use a pen or fine-tipped marker to write the words they receive from others directly on each piece of tape.
8. Once all the word prompts are filled, participants can read the story out loud together.
9. Once complete, remove all the tape and add new tape, or place tape directly over the previous tape. The story is now ready for another participant (or parent or caregiver) to give it a try!
Accessibility Considerations
- Read and print the instructions for this activity
- Read completed stories aloud for all participants to hear (If necessary, use a microphone for larger crowds)
- Give participants the option to work on their stories in pairs or small groups
Book Suggestions
Do Not Eat the Game! by Matthew McElligott
It Seemed Like a Good Idea… Canadian Feats, Facts and Flubs by Ted Staunton and Will Staunton
Team Steve by Kelly Collier
Download Links
Images and Templates

Newspaper Tower
Ages 6-8
30 minutes
Newspaper Tower
Description
Using only masking tape and newspaper, design a tower that can support a basketball for 20 seconds or more.
Number of Participants
For a minimum of 1 participant
Space Considerations
A large indoor space where participants can safely work in groups
Competencies
- Creative and imaginative thinking
- Engineering
- Teamwork
- Problem solving
Materials
- Recycled newspaper (recommended: several full newspapers per group)
- Masking tape or painter’s tape (recommended: one roll per team)
- Safety scissors (optional; participants may be able to rip tape or newspaper by hand)
- Basketball
- Stopwatch or cell phone (to keep time)
- Pencils and scrap paper (to sketch designs)
Implementation
- Divide participants into teams of two to five participants.
- Provide each team with a significant amount of newspaper and one roll of masking tape. It’s a good idea to have a lot of extra material available should teams need more.
- Provide each team with pencils and scrap paper to sketch out their designs,
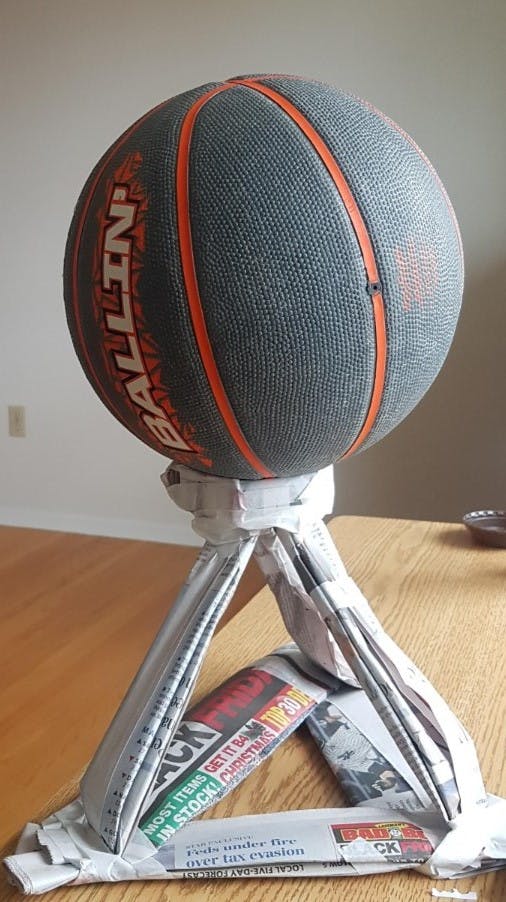
- The rules of this challenge are straightforward: teams have to create a tower that can support a basketball (or another similarly sized ball, like a soccer ball or volleyball) for at least 20 seconds. It is important that teams think about the top of their towers and where the basketball can be placed—encourage them to think about this. If the top of the tower ends in a point, the basketball likely won’t be supported. We’ve included a simple sample image below, but it may be best to allow teams to think about designs without the aid of any picture or template—you be the judge of this as it may depend on the group.
- The very important stipulation to this challenge for you to communicate to the teams: if there are multiple teams that have built towers that can successfully support a basketball for 20 seconds, the winning team is the one that has the tallest tower.
- It is recommended to put a time limit on this activity. This activity can work with anywhere from 10–30 minutes, plus the time needed to test each of the towers. Announce the remaining time regularly (10 minutes left, 5 minutes left, 1-minute left, etc.) or put the timer/clock in a visible location for all to see.
- At the end of the time limit, test each tower by placing the basketball on the top of each tower. Note which towers were able to support the basketball for 20 seconds. The winning team is the one that successfully meet this stipulation and has the tallest tower.
Accessibility Considerations
- Read and print out all the instructions for this activity
- Give participants the option to work alone if desired
- Encourage participants to contribute different elements to the team if desired (For example, some team members can build while the others instruct or contribute to the design process)
Book Suggestions
The Canadian Kids' Guide to Outdoor Fun by Helaine Becker
How to Solve a Problem: The Rise (and Falls) of a Rock-Climbing Champion by Ashima Shiraishi
Download Links
Images and Templates
Download Printable Instructions

Olympic Torch
Ages 0-3
15 minutes
Olympic Torch
Description
Create your very own Olympic torch to celebrate the Tokyo Olympics
Number of Participants
For a minimum of 1 participant
Space Considerations
Any type of space where kids can do a craft
Competencies
- Artistic expression
- Creative expression
- Development of fine motor skills
Materials
- Card stock, construction paper or regular paper for Olympic torch template
- Crayons, pencil crayons or markers
- Stickers, pompons, glitter and other decorative items (optional)
- Tissue paper: red and orange
- Clear tape
- Scissors (adult use only)
Preparation
Optional: Pre-cut the torch template for all participants, or allow parents/caregivers to do so
Implementation
Distribute the Olympic torch base (one to each participant) along with colouring and decorative items.
- Participants colour and decorate the Olympic torch base.
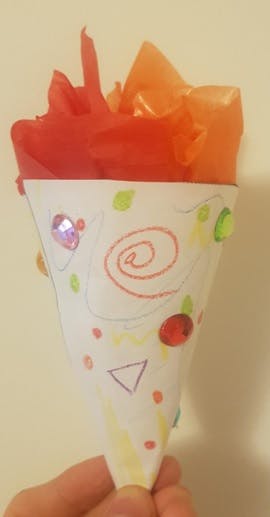
- With adult assistance, participants roll the torch into a cone shape, overlapping the paper by a few centimeters, and secure it with clear tape.
- Distribute the tissue paper.
- Participants stuff the tissue paper inside the torch, letting it stick out to create the appearance of flames.
Accessibility Considerations
- Offer a pre-cut torch base or easy-grip scissors for parents and caregivers
- Offer a variety of options for colouring the base of the torch—crayons, pencil crayons and markers
- Offer large glue sticks and different options for affixing base—tape, glue, stapler, etc. Adult assistance is likely required for this step
- Offer tactile items for kids to use to decorate the base
Book Suggestions
Camp Average: Double Foul by Craig Battle
Lucy Tries Basketball by Lisa Bowes
Peanut Goes for the Gold by Jonathan Van Ness
Download Links
Images and Templates

Olympic Trivia

Ages 9-12
15-20 minutes
Olympic Trivia
Description
A downloadable PowerPoint presentation with Olympic trivia
Number of Participants
For a minimum of 2 participants
Space Considerations
An indoor space where you can set up a laptop and projector
Competencies
- Working collaboratively
- Teamwork
Materials
- Laptop, tablet or computer with access to PowerPoint
- Projector
- Speakers
- Paper for printing answer cards
Preparation
- Download the Olympic Trivia PowerPoint presentation. If desired, you can remove slides for questions that you don’t want to include. You may also add trivia questions.
- Download and print the answer letter cards. (One set per team.)
Implementation
- Divide the participants into teams of 2 to 4.
- Distribute one set of answer letter cards (A, B, C, D) to each team.
- Play the PowerPoint presentation. There are 12 questions. All teams must hold up their answer card before you advance to the answer screen. Note: Each slide on the PowerPoint presentation contains audio, including the reading of all written questions and answers, for kids who may have trouble reading the screen. You may also read the questions out loud instead of playing the audio.
- If desired, you can keep score for this game.
Accessibility Considerations
- There are several audio clues for participants and each of the written clues includes a speaker that will play text to speech.
- Allow participants or teams to provide their answer in the way that is most suitable for them. For example, holding up the answer card or saying their answer verbally.
Book Suggestions
Breaking Through: Heroes in Canadian Women's Sport by Sue Irwin
Extreme Abilities: Amazing Human Feats and the Simple Science Behind Them by Galadriel Watson
It Seemed Like a Good Idea… Canadian Feats, Facts and Flubs by Ted Staunton and Will Staunton
Download Links
Images and Templates
Pencil Puzzles
Ages 9-12
20 minutes
Pencil Puzzles
Description
A package of pencil puzzles including a word search, a crossword puzzle, a silly story, secret messages and a braille alphabet decoder.
Number of Participants
For a minimum of 1 participant
Space Considerations
Any type of space where participants can be seated to do a worksheet
Competencies
- Creative and imaginative thinking
- Following directions
- Written communication skills
Materials
- Printouts of the pencil puzzle worksheets
- Pencils or pens
Implementation
These worksheets can be included as part of a scheduled program or be used as a passive activity in which you leave the printouts out for kids to complete at any time. You can also post these printable worksheets on your library’s social media platforms for parents and caregivers to download.
1. Print the desired number of pencil puzzle worksheets.
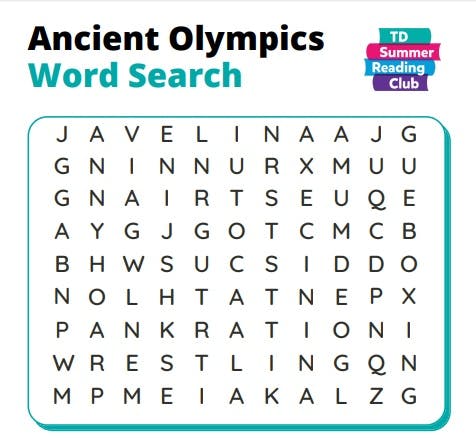
- Ancient Olympics Word Search
Instructions: Participants search for and circle the ancient Olympic sports in the jumble of letters. The words may appear horizontally, vertically, diagonally and backwards.
- Ball Sports Crossword Puzzle
Instructions: Participants read the numbered clues and write the answer in the spot marked by that number in the crossword puzzle. Clues are marked as either across or down.
Instructions: This worksheet should be printed double-sided. Participants fill in words based on the prompts on the first side of the sheet. Next, they flip the page over and write their word choices into the corresponding boxes and then they read the story.
Instructions: Participants write their own secret message by using the shapes and symbols in place of the corresponding letters. If desired, participants can hand the sheet over to another participant or a parent/caregiver to decode the message.
Instructions: Participants use the braille alphabet chart to decode the braille. Then, participants can try to braille their first name and last name.
Accessibility Considerations
- Our worksheets contain large font wherever possible.
- We’ve included a variety of worksheet options so staff and participants can pick whatever is most appealing and/or suitable for them.
- As always, kids can be encouraged to work in teams if desired. For example, while working on the crossword puzzle, it’s not necessary for all participants to write but everyone can contribute answers to the clues.
- Consider using tongue twisters as an alternative for children who may have difficulty with completing pencil-and-paper worksheets.
Book Suggestions
Camp Average: Double Foul by Craig Battle
The Puck Drops Here (Hockey Super Six) by Kevin Sylvester
Thea Stilton and the Race for the Gold by Thea Stilton
Download Links
Images and Templates
Download Pencil Puzzles - Ancient Olympics Word Search
Download Pencil Puzzles - Ball Sports Crossword Puzzle
Download Pencil Puzzles - Braille
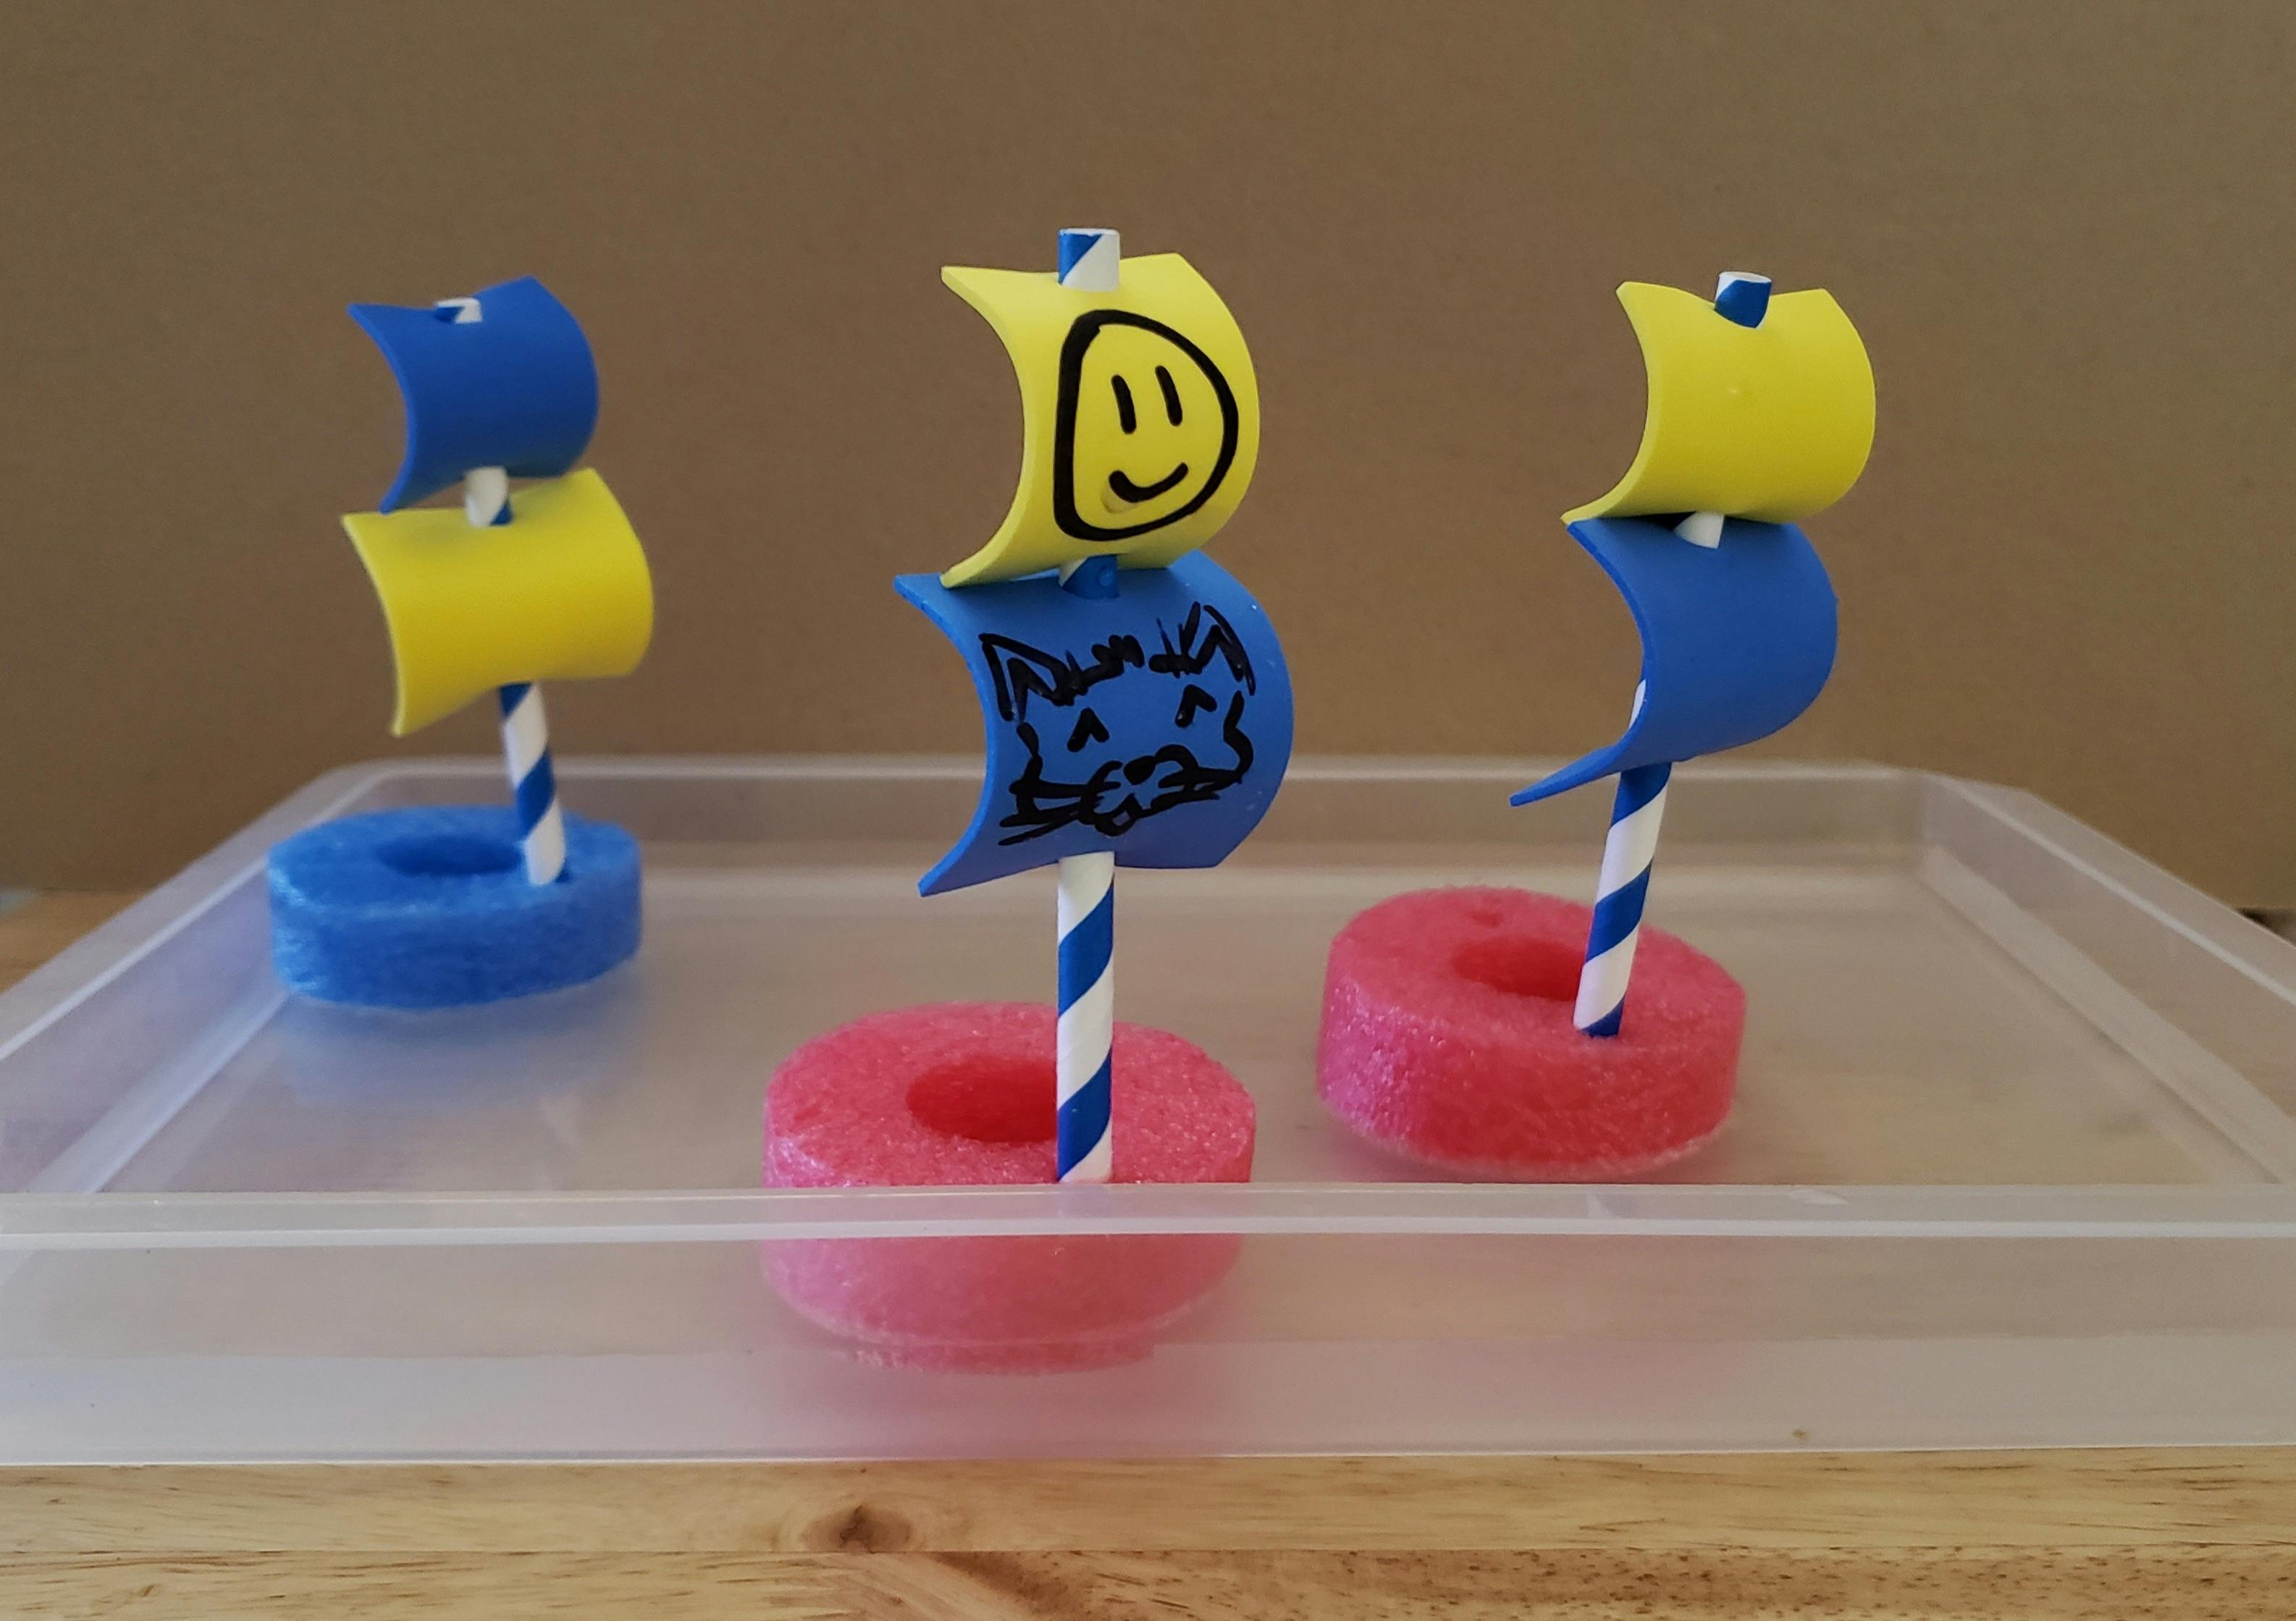
Pool Noodle Boats
Ages 0-3
15-30 minutes
Pool Noodle Boats
Description
Create your own giant paper popsicle!
Number of Participants
For a minimum of 1 participant
Space Considerations
Any type of space where kids can be seated to do a craft
Competencies
- Artistic expression
- Creative expression
- Development of fine motor skills
- Eye-hand coordination
Materials
- 1 serrated knife (adult use only)
- Scissors
- Single hole punch (optional, but recommended)
- Markers
- Rulers (optional)
- Pool noodle(s)
- Foam sheets
- Paper straws
- Small stickers (optional)
- Water-filled bin, sink or bathtub (optional)
Preparation
- An adult pre-cuts the pool noodle(s) width-wise into pieces that are 2 cm thick.
- Optional: If you don’t want to use rulers during the activity, pre-measure the flags and paper straws and mark where the kids need to cut them (4 x 5 cm and 3 x 5 cm rectangles for flags and 12 cm straws).
Implementation
1. Distribute the following tools to each group:
- Markers
- Scissors
2. Distribute the following material to each participant:
- Two foam sheets (preferably different colours)
- One paper straw
- Stickers (optional)
*Note: We recommend holding off on distributing the pool noodle bases until the flags have been completed.
Flag
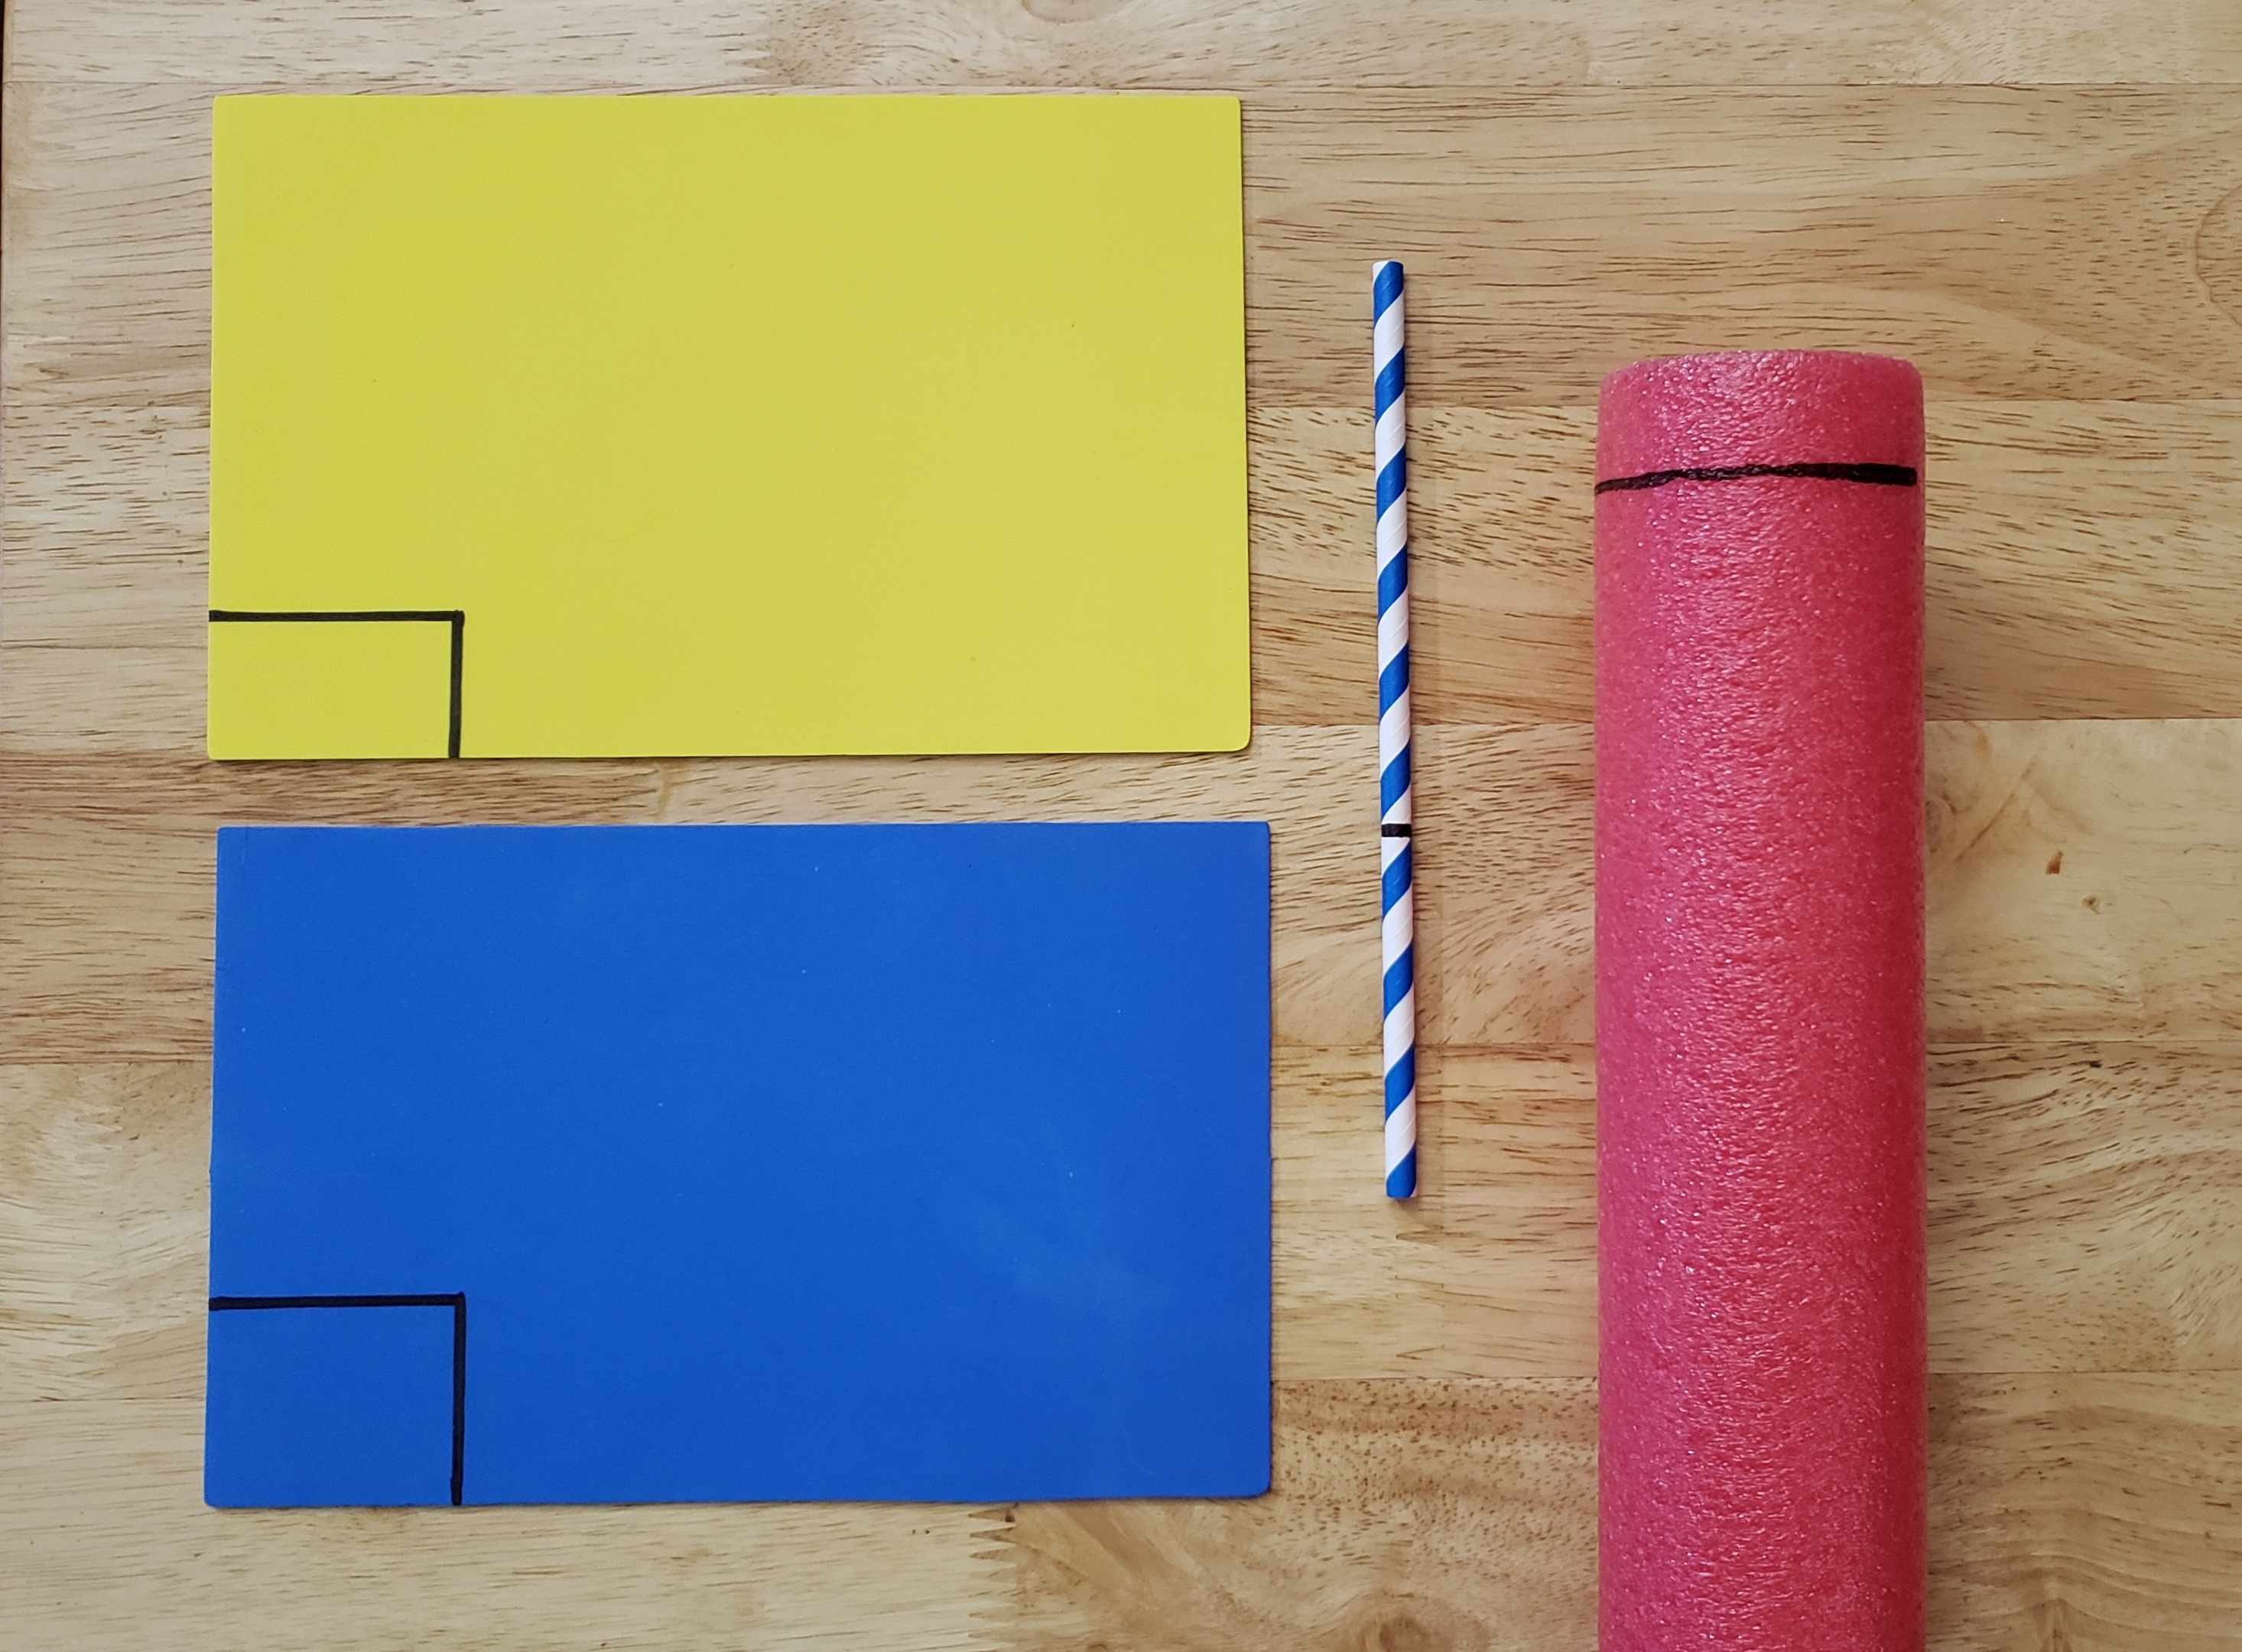
Diagram 1: Measured materials
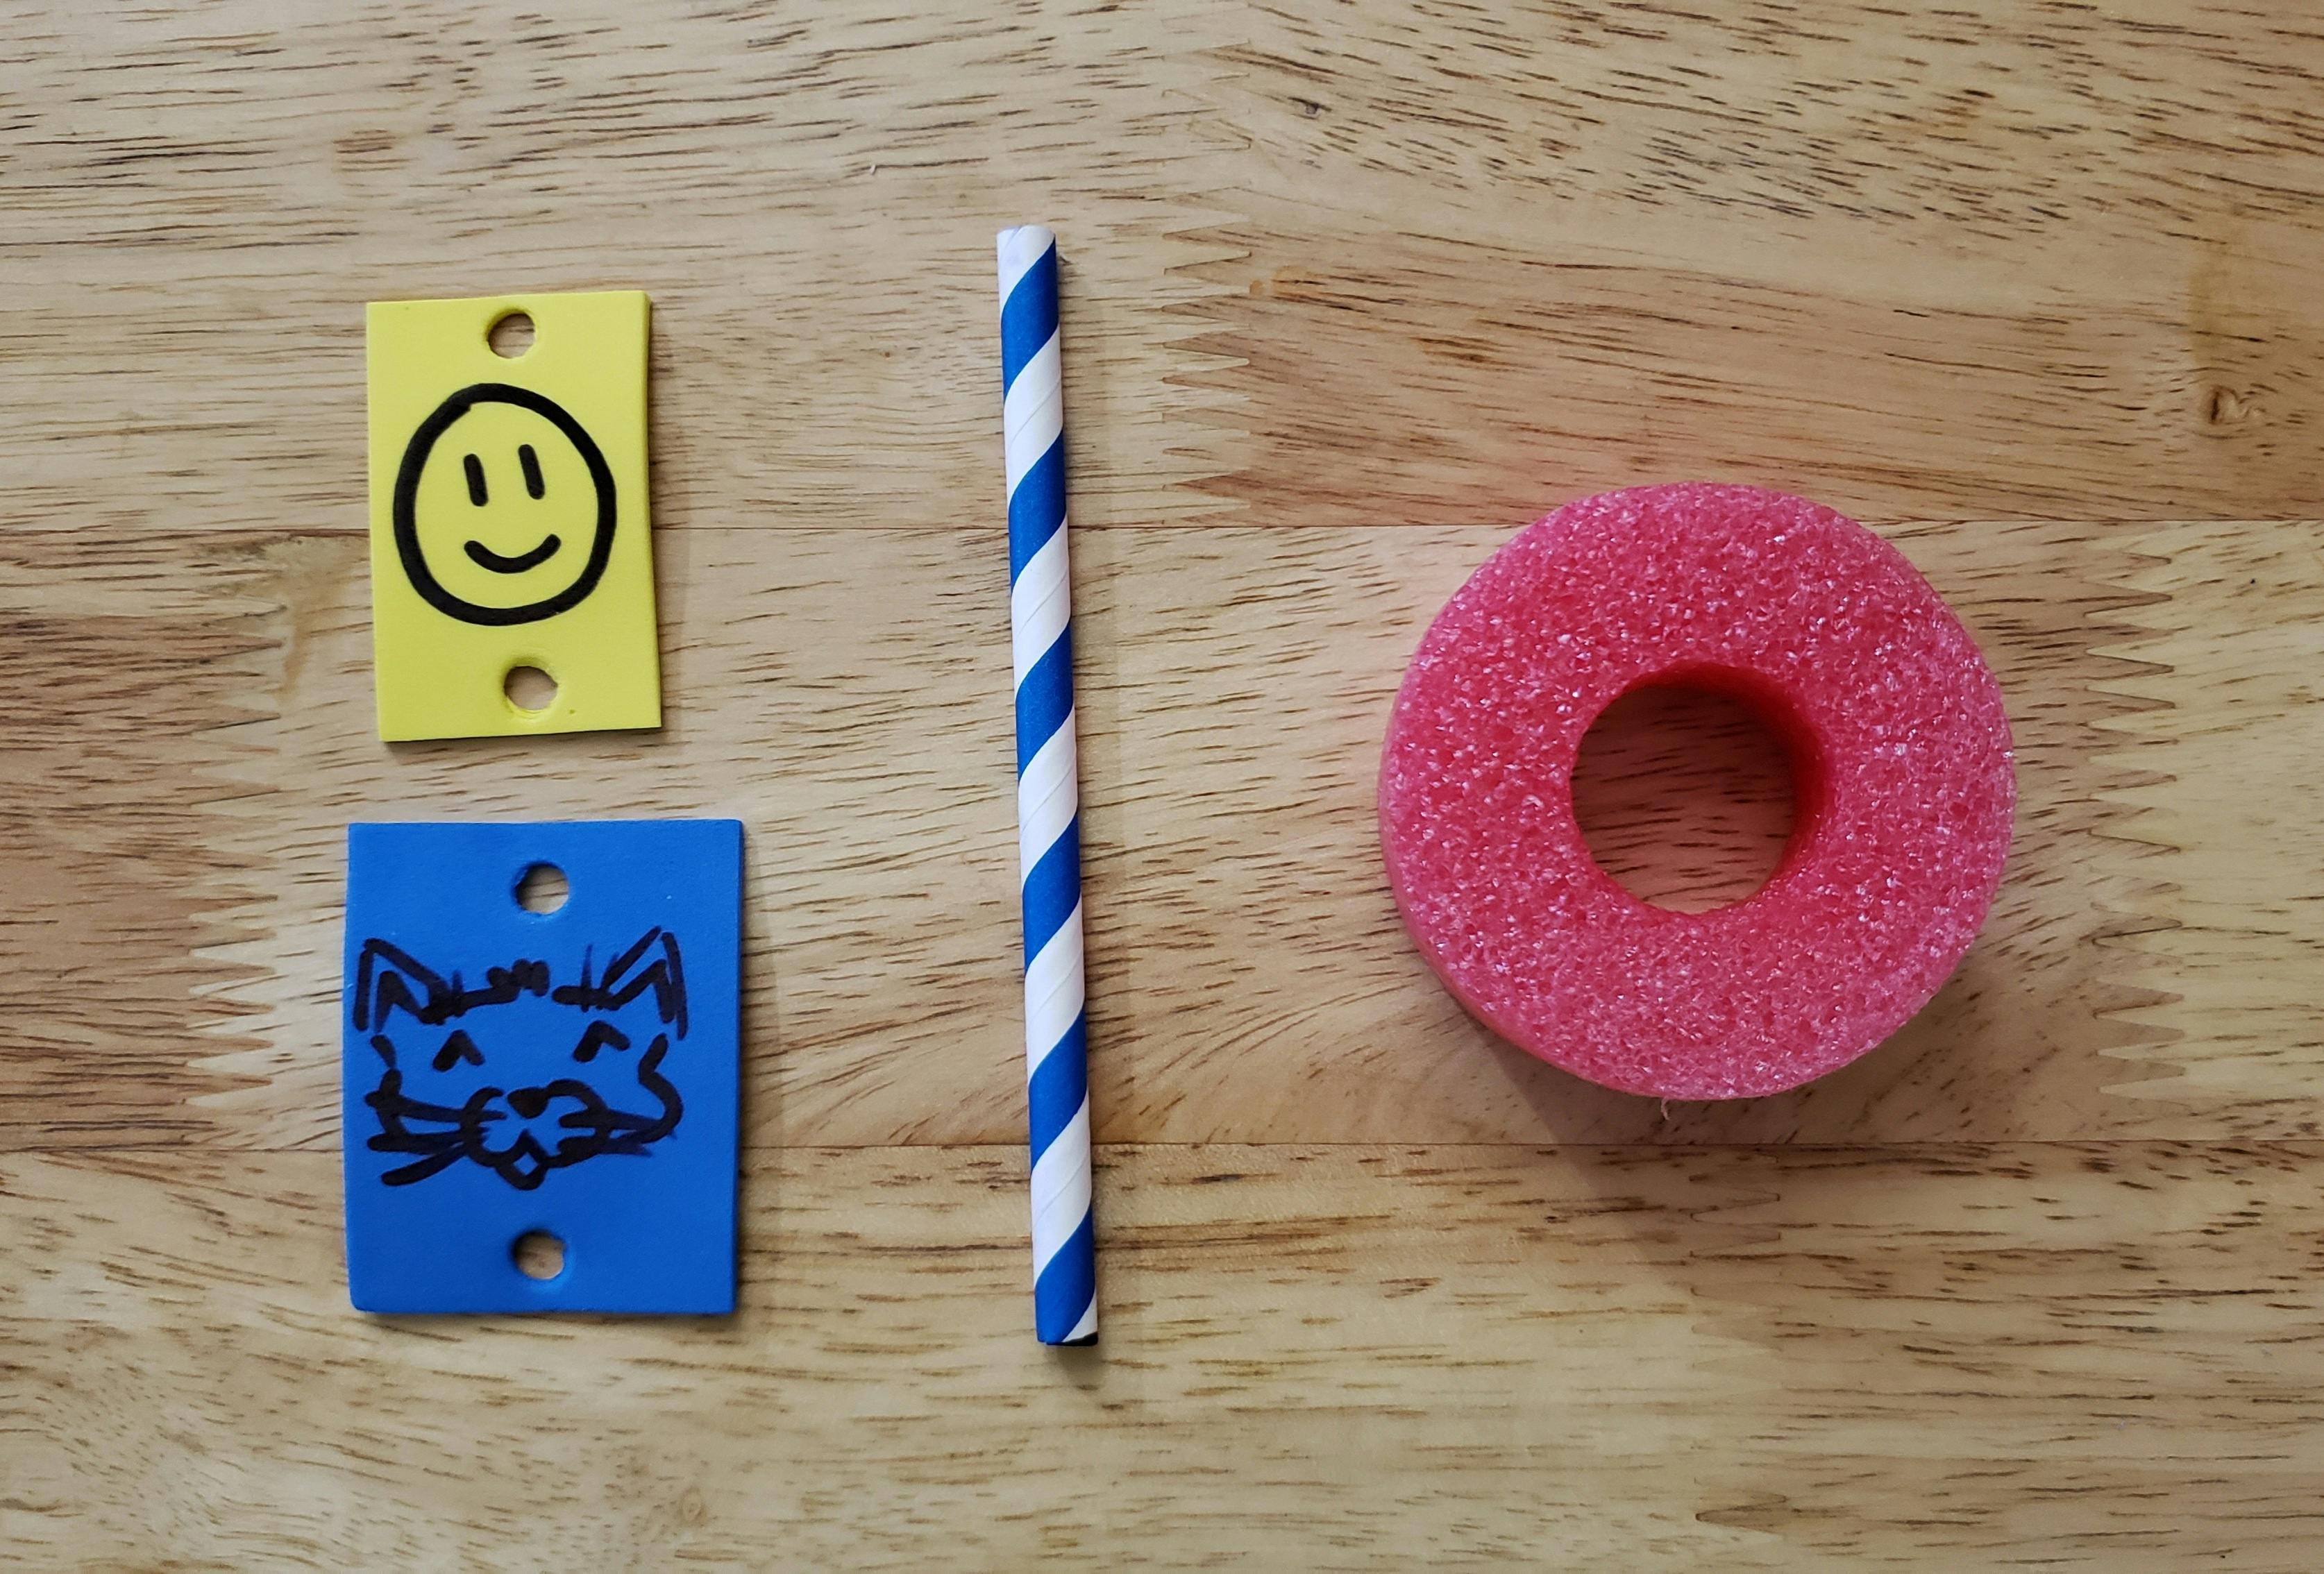
Diagram 2: Cut and decorated materials
3. Cut a 4 x 5 cm rectangle from one foam sheet.
4. Cut a 3 x 5 cm rectangle from a foam sheet of a different colour.
5 Hold the larger flag vertically (shorter side up). Leave a bit of space at the top and bottom and use scissors or a single hole punch to make a hole near the top and near the bottom.
6. Repeat step 5 for the smaller flag.
7. Decorate flags using markers and stickers (optional).
Mast
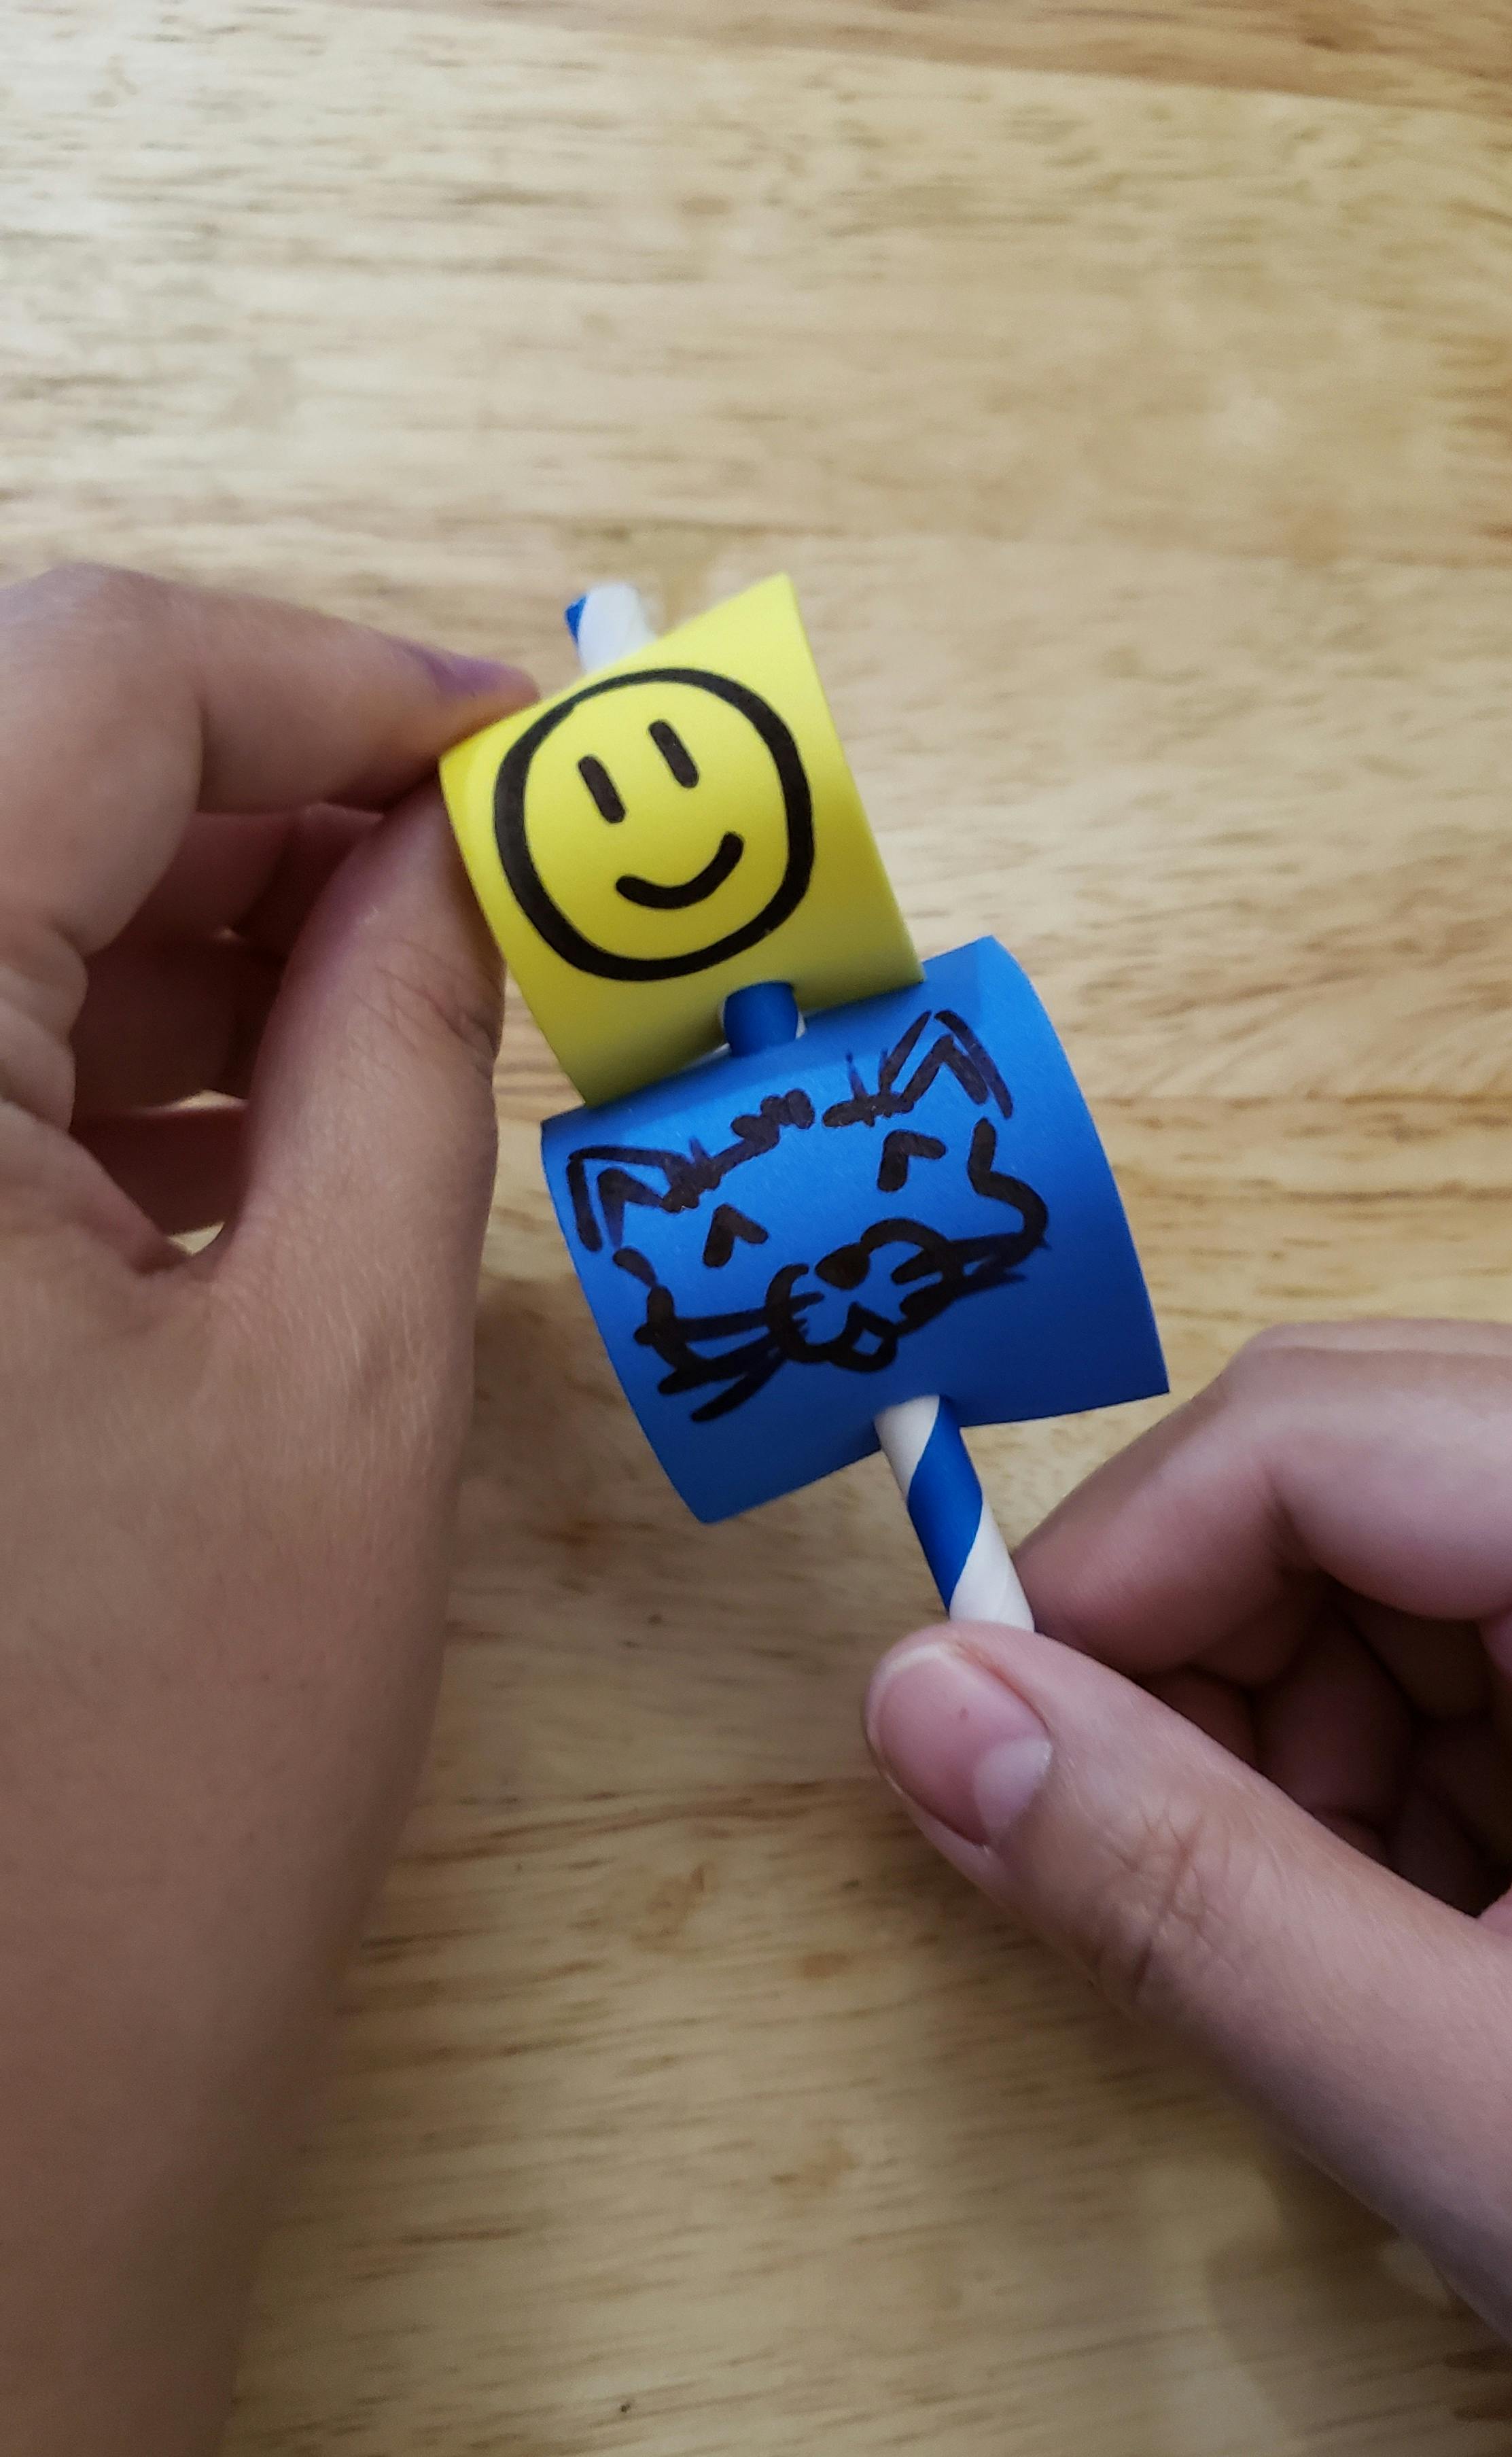
Diagram 3: Attaching flags to paper straw
8. Use scissors to cut the paper straw to 12 cm in length (slightly more than half the straw).
9. Slowly push the straw through the holes of the larger flag.
10. Add the smaller flag to the straw, above the larger one.
Boat
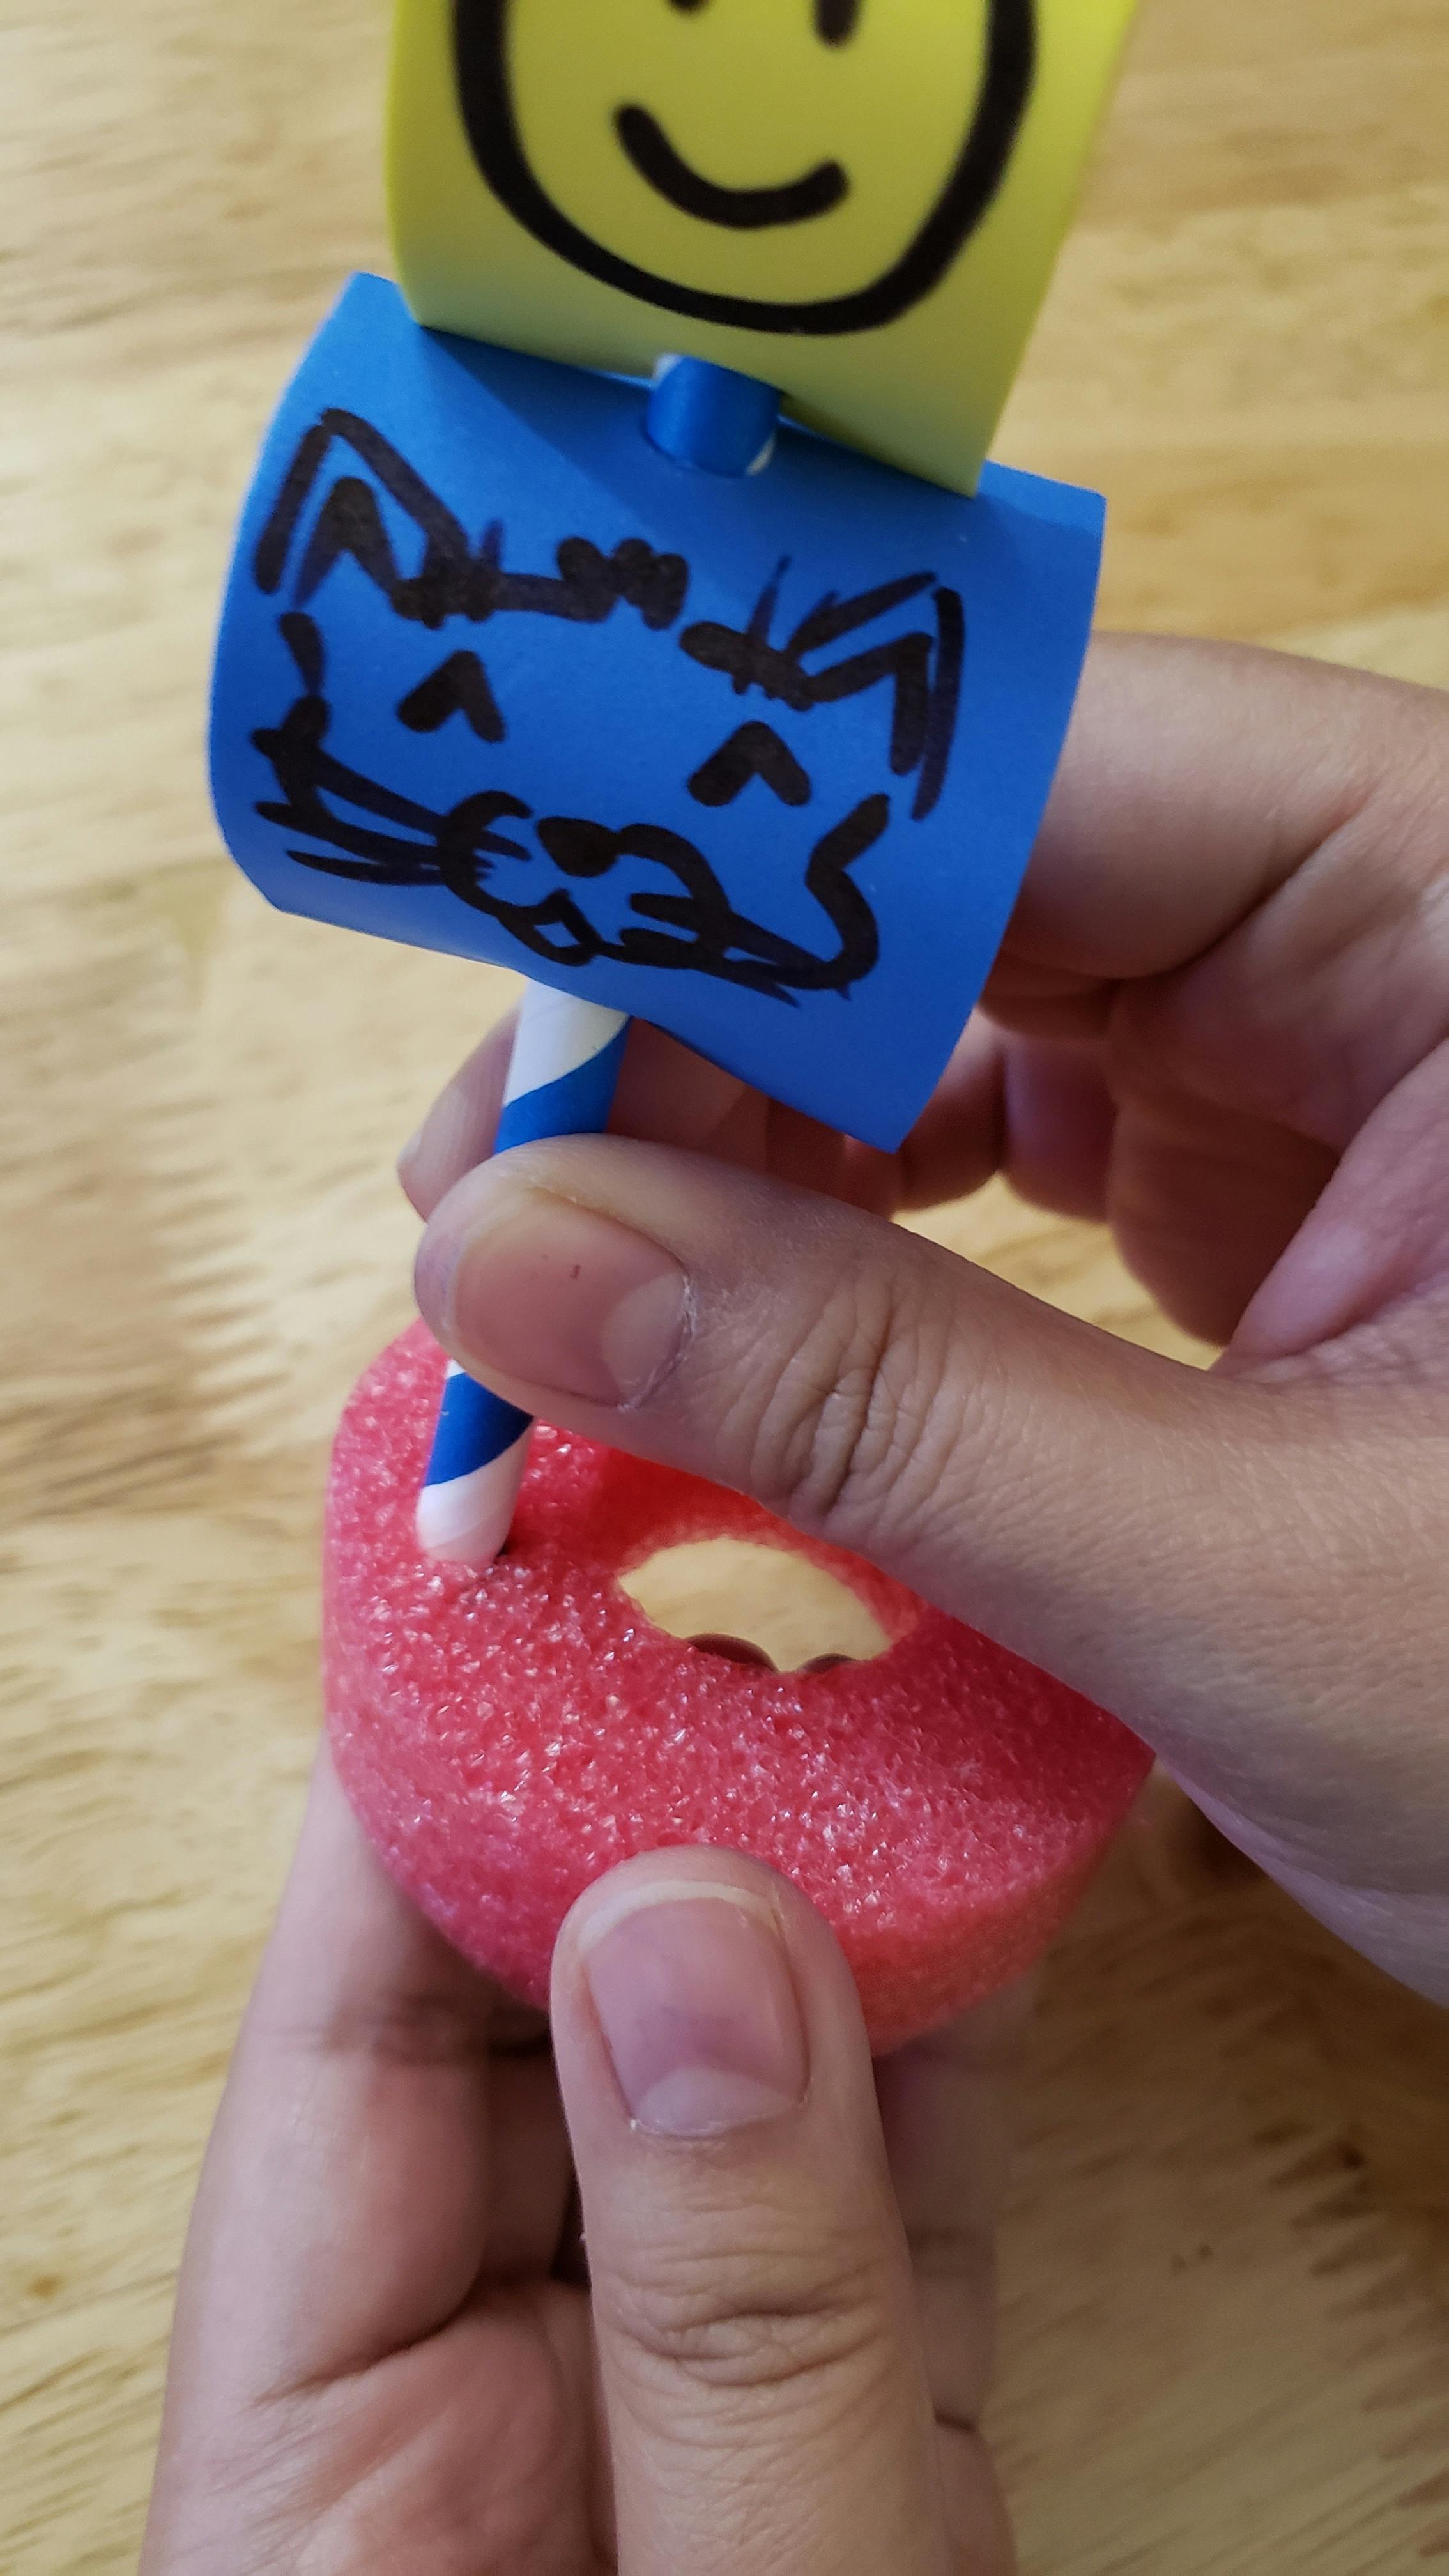
Diagram 4: Pushing mast into the top of the boat

Diagram 4: Pushing mast into the top of the boat
11. Hold pool noodle boat with one hand, placing your pointer finger underneath the area where you will push the straw into the boat.
12. Use your other hand to slowly push and twist the straw into the pool noodle. Do not push the straw all the way through.
13. Grab a bin, fill it with some water and watch your boats sail. Alternatively, you can float them in the sink or bathtub.
Accessibility Considerations
- Pre-measure the flags and mark the paper straw so kids only need to cut them
- Prepare some pre-cut materials for some participants to make your program more accessible
o Cut the two types of flags from the foam sheets
o Cut slits with scissors or punch holes at the top and bottom of each flag
o Cut paper straws for masts
Book Suggestions
Recycle and Remake by DK
Boxitects by Kim Smith
Soaked! by Abi Cushman
Download Links
Rock, Paper, Scissors Tournament
Ages 9-12
30-60 minutes
Rock, Paper, Scissors Tournament
Description
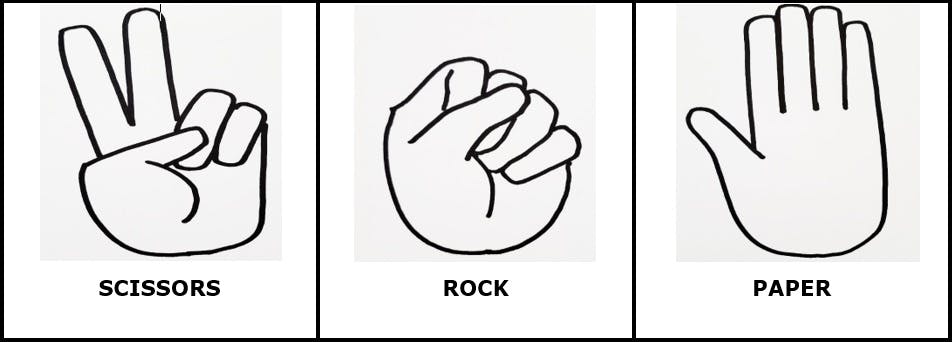
A Rock, Paper, Scissors tournament that is played with cards picturing each of the three actions.
Number of Participants
For a minimum of 2 participants
Space Considerations
Large open space
Competencies
- Eye-hand coordination
- Following directions
- Strategic thinking
Materials
- Rock Paper Scissors cards template
- Card stock
- Scissors
- Pen/pencil and scrap paper for scorekeeping (optional)
Preparation
- Print the Rock, Paper, Scissors cards template onto card stock
Cut out cards
Implementation
- Divide participants into groups of two or three. They will play two rounds of five games.
- Each player gets one rock, one scissors and one paper card. They can play the same card as often as they like.
- When the players are ready, they chant “Rock, paper, scissors.” On the word scissors, participants show which card they want to play.
- The winner of each game is based on the Tournament Rules.
- If there isn’t a single winner for a game, affected players do a tie-breaker to decide the winner. This is repeated as often as necessary until there is a winner for that game.
Example:
• Three players play all three cards—these cancel each other out, so all three players play again.
• Two players choose paper and it beats the third player’s rock—the two who chose paper continue in a tie-breaker until one of them wins. - In Round 1, the traditional Rock, Paper, Scissors rules apply (e.g. Paper beats Rock).
- In Round 2, the reverse rules apply (e.g. Rock beats Paper).
undefined - The original rules apply in this round (see Tournament Rules table).
Rules:

Accessibility Considerations
- Enlarge the Tournament Rules table before printing it on card stock
- Use the action images with the names printed underneath and print them to a larger scale
- For libraries with a braille labeller, write each action in braille and stick the labels on the cards
- Clip or punch the corners of cards with different shapes to give tactile cues to non-braille readers (e.g. round punch-out could indicate rock)
Alternative playing methods can be adopted, such as:
- Players hold the cards in their hands and play their desired card by putting it down on the table/floor
- Players have their cards face up and put their finger on the card they want to use
- Game can be played in teams—all team members decide on an action and one representative plays the card
Book Suggestions
Camp Average: Double Foul by Craig Battle
A Potato on a Bike by Elise Gravel
The Bad Guys in Dawn of the Underlord by Aaron Blabey
Download Links
Images and Templates
Shape Maze
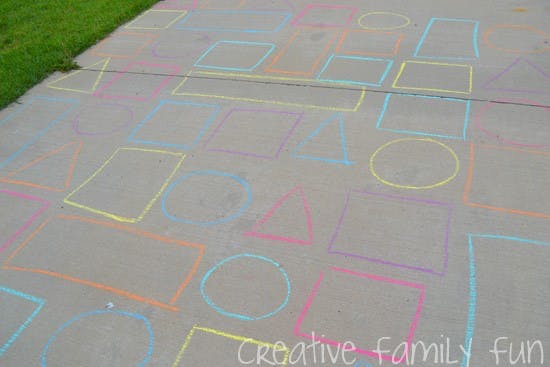
Ages 3-5
10-20 minutes
Shape Maze
Description
Participants attempt to make their way through a shape maze in this fun activity that can be played outdoors or indoors
Space Considerations
A large space where you can draw or tape 20+ large shapes for participants to step on
Competencies
- Body awareness
- Classification skills
- Following directions
- Understanding shapes
Materials
- Chalk (for outdoor game)
- Tape (for indoor game)
Preparation
For an outdoor activity:
o Use chalk to draw a variety of shapes in rows and columns. We recommend using four shapes for this age group: circle, square, triangle and heart. You may add more shapes or incorporate a variety of colours to make the game more challenging.
o Draw a shape in each row, mixing up their column locations. You can use as many rows as desired. We recommend between 6 and 20 rows.
For an indoor activity:
o Use tape (or any suitable alternative for your floor) to add shapes to the floor
Implementation
There are many ways to adapt this game to suit the age level of your participants. Here are a few.
Maze:
1. Ask participants to start at the beginning of the maze.
2. Announce the first shape.
3. One by one, participants should make their way through the maze by advancing one row at a time and stepping on the shape in each row. For example, the instruction would be, “Get to the end of the maze by stepping on the circle in each row.”
4. At the end of the maze, participants can move back to the starting position to repeat the activity with a new shape.
5. To add difficulty to this game, include more shapes in each row and consider varying the colours as well. For example, encourage participants to move through the maze by stepping on all the blue circles until they reach the end.
Find the Shape:
1. Instead of playing this as a maze, call out a shape and participants must find and move to one of those shapes. This means multiple participants can play at once. For example, the instruction would be, “Everyone move to a circle.”
2. Then, call the next shape, speeding up the commands if appropriate for the age group of your participants.
3. In this version, the shapes do not have to be in a grid with straight rows and columns.
Build Your Own Maze:
1. You can also allow participants to create their own miniature maze, using chalk or tape and working in teams or individually. Be sure to teach participants how to draw the shapes before starting!
Accessibility Considerations
- For participants who are deaf or hard of hearing: Print the commands in large font and hold up the commands for participants to follow. For example, the command could be “Get to the end by stepping on all the CIRCLES” or “Find a BLUE CIRCLE to move to.” For younger children who may not be reading yet, consider holding up a picture of the shape that the children should move to. You can demonstrate the action of moving to the shape so they can follow along until they grasp the concept.
- Participants in wheelchairs can participate in this game. Ensure the shapes are large enough for participants to move to in their wheelchairs.
Book Suggestions
Boxitects by Kim Smith
The Button Book by Sally Nicholls
Soaked by Abi Cushman
Rad by Anne Bustard
David Jumps In by Alan Woo
Download Links
Images and Templates

Image from Creative Family Fun (creativefamilyfun.net)
Soccer Finger Puppets
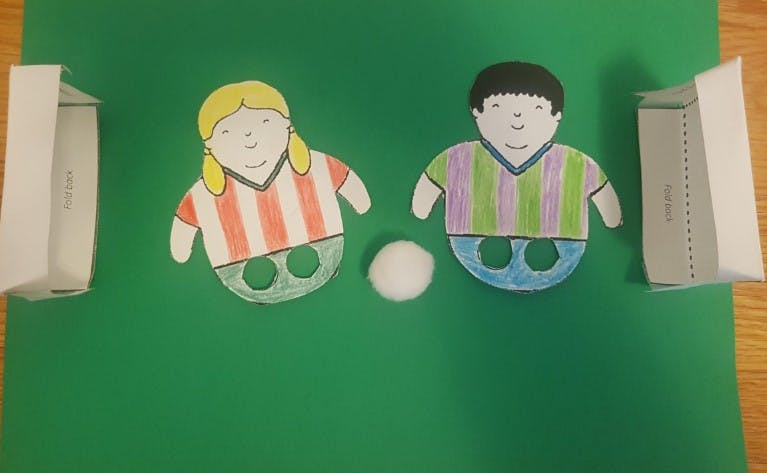
Ages 9-12
20 minutes
Soccer Finger Puppets
Description
Create your own soccer player finger puppet and then use your fingers to flick a ball towards a net
Number of Participants
For a minimum of 2 participants
Space Considerations
Any type of space where kids can be seated to do a craft
Competencies
- Development of fine motor skills
- Eye-hand coordination
Materials
- Paper for printing soccer net template
- Card stock or cardboard for finger puppet template
- Pompoms, ping pong balls or small bouncy balls
- Crayons, pencil crayons or markers
- Stickers, glitter and other decorative items (optional)
- Scissors (adult use only)
- Pen (optional, for tracing finger puppet)
- One-hole punch (optional)
Preparation
- Print the finger puppets on cardstock paper (or trace the finger puppets onto cardboard) and pre-cut the puppets for participants
- To cut the two holes for the fingers, a one-hold punch may be useful for getting the holes started
- You may consider allowing parents/caregivers to cut out the finger puppet for each participant
- Print and cut out the soccer net templates (card stock preferred)
Implementation
- Distribute the pre-cut finger puppets, one per participant. (You may consider providing a parent/caregiver with their own finger puppet so they can play with the child.)
- Encourage participants to colour and decorate their finger puppet as desired, both front and back.
- Distribute the soccer net templates and have participants fold their nets.
- Once fully decorated, participants stick their index and middle fingers through the holes on their finger puppets, to serve as the puppet’s legs.
- Participants use their fingers to kick the ball (pompom, ping pong ball, small bouncy ball or other similar object).
- If desired, participants can pair up and play against another participant, or against their parent/caregiver.
- The object of the game is to use your finger to “kick” the ball (or pompom) into the other player’s net!
Accessibility Considerations
- Participants with limited finger dexterity can be provided with glue or tape to affix popsicle sticks to the finger puppet, and instead use the popsicle sticks to “kick” the ball
- Offer pre-cut options for the finger puppets and the soccer nets, and assist with the folding of the nets as needed
- Offer easy-grip scissors
Book Suggestions
Karate Kakapo by Loredana Cunti
The Day Dad Joined My Soccer Team by Maureen Fergus
Teamwork by Robert Munsch
Download Links
Images and Templates

Tabletop Pinball
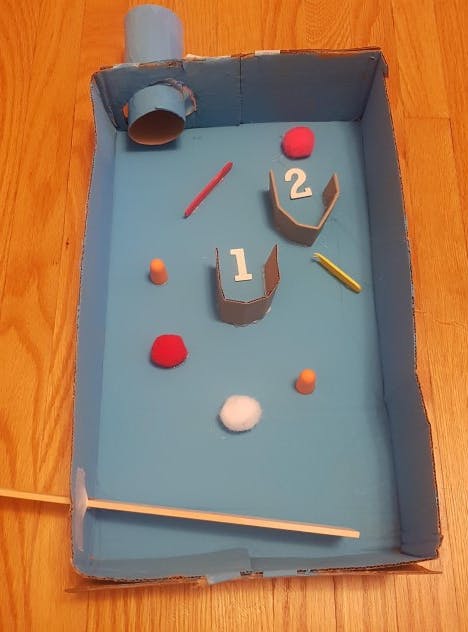
Ages 9-12
40 minutes
Tabletop Pinball
Description
Create a miniature pinball machine using a box lid in this introduction to inclined planes
Number of Participants
For a minimum of 1 participant
Space Considerations
Any type of space where kids can be seated to do a craft
Competencies
- Engineering
- Eye-hand coordination
- Problem solving
Materials
- Shallow cardboard box or box lid (e.g. a shoebox or the lid from an office paper box)
- Acrylic paint (optional)
- Paintbrushes (optional)
- Glue gun (preferred) or glue sticks
- Tape
- Bottle caps
- Ruler
- Ping-Pong balls
- Scissors
- Paint stir sticks
- Other tactile items—pompoms, cotton balls, foam shapes, toilet paper tubes, cardboard to cut, earplugs, etc. (Optional)
Preparation
- Prepare the box:
a. Cut down the sides of your box so they are 7–12 cm high.
b. Place the box in front of you with the short ends at the top and bottom, and the sides facing up.
c. Cut an opening on the top left side that is big enough for a Ping-Pong ball to fit through. This will be the ball launch point. You can insert and secure a toilet paper tube to this hole if desired.
d. Optional: Paint the box lid and let it dry. As you prepare the other pieces, they can also be painted if desired.
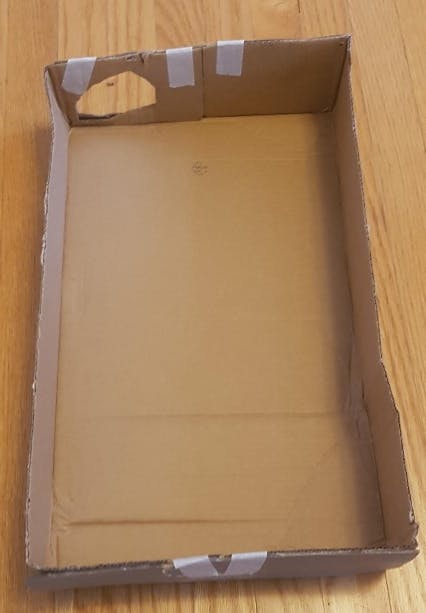
2. Make the playing field (depending on the size of your box, you may have to adjust measurements in these instructions).
a. Put glue on top of two bottle caps and place them under the top two corners of the box lid. This will raise the slant of the playing field from the table or floor so that the Ping-Pong ball will move down with gravity.
b. Using scissors, make a vertical slit in the lower left side of the box, about 5 cm from the bottom. The slit should be just large enough for the paint stir stick to fit through
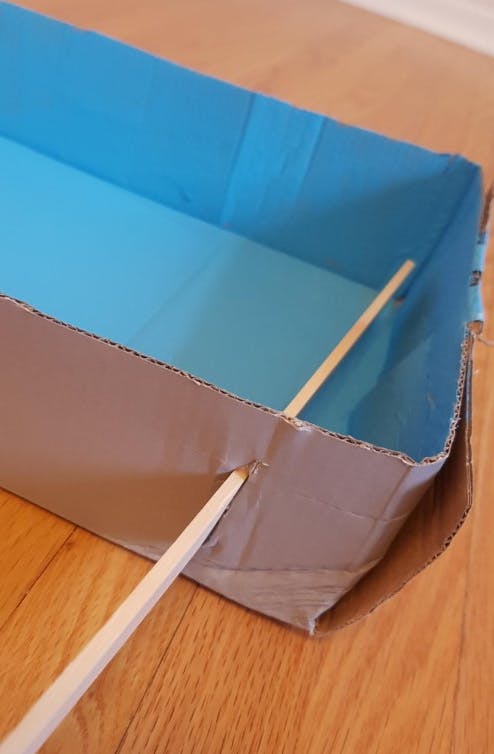
c. Push the stir stick through the slit and leave a 5 cm space between the end of the stir stick and the right wall. The other end of the stick will be outside the box. This is called the flipper.
d. Plan the rest of your playing field. Incorporate a variety of tactile items such as bottle caps, foam shapes, earplugs, etc. You may also consider bending strips of cardboard or using cut toilet paper rolls to serve as score cups. You must leave enough space in your board for the ball to pass through, so plan the spacing accordingly and then glue all items into place.

3. Play the game!
a. Drop the Ping-Pong ball down from the top of the box, in the opening you created.
b. When the ball moves down the board towards the flipper, use your hand to flick the flipper and hit the ball, aiming towards the various score cups you have in place.
c. A turn can be considered over once you score the ball into a cup, or the ball goes down below the flipper.
d. Encourage participants to compete against friends. They could take a certain number of turns and add up their scores, or they could see who can keep the ball in play the longest.
Accessibility Considerations
- Offer pre-cut options or help with cutting, making holes and gluing as needed
- Offer a variety of tactile items for kids to choose from and allow them to incorporate the objects that are most suitable for them
- Offer tape and large glue sticks as alternatives to using the glue gun
- Use a small, circular bell as the ball so kids can hear it moving around
Book Suggestions
The Boy Who Thought Outside the Box: The Story of Video Game
Inventor Ralph Baer by Marcie Wessels
Recycle and Remake: Creative Projects for Eco Kids by DK
Download Links
Images and Templates
Velcro Popsicle Sticks
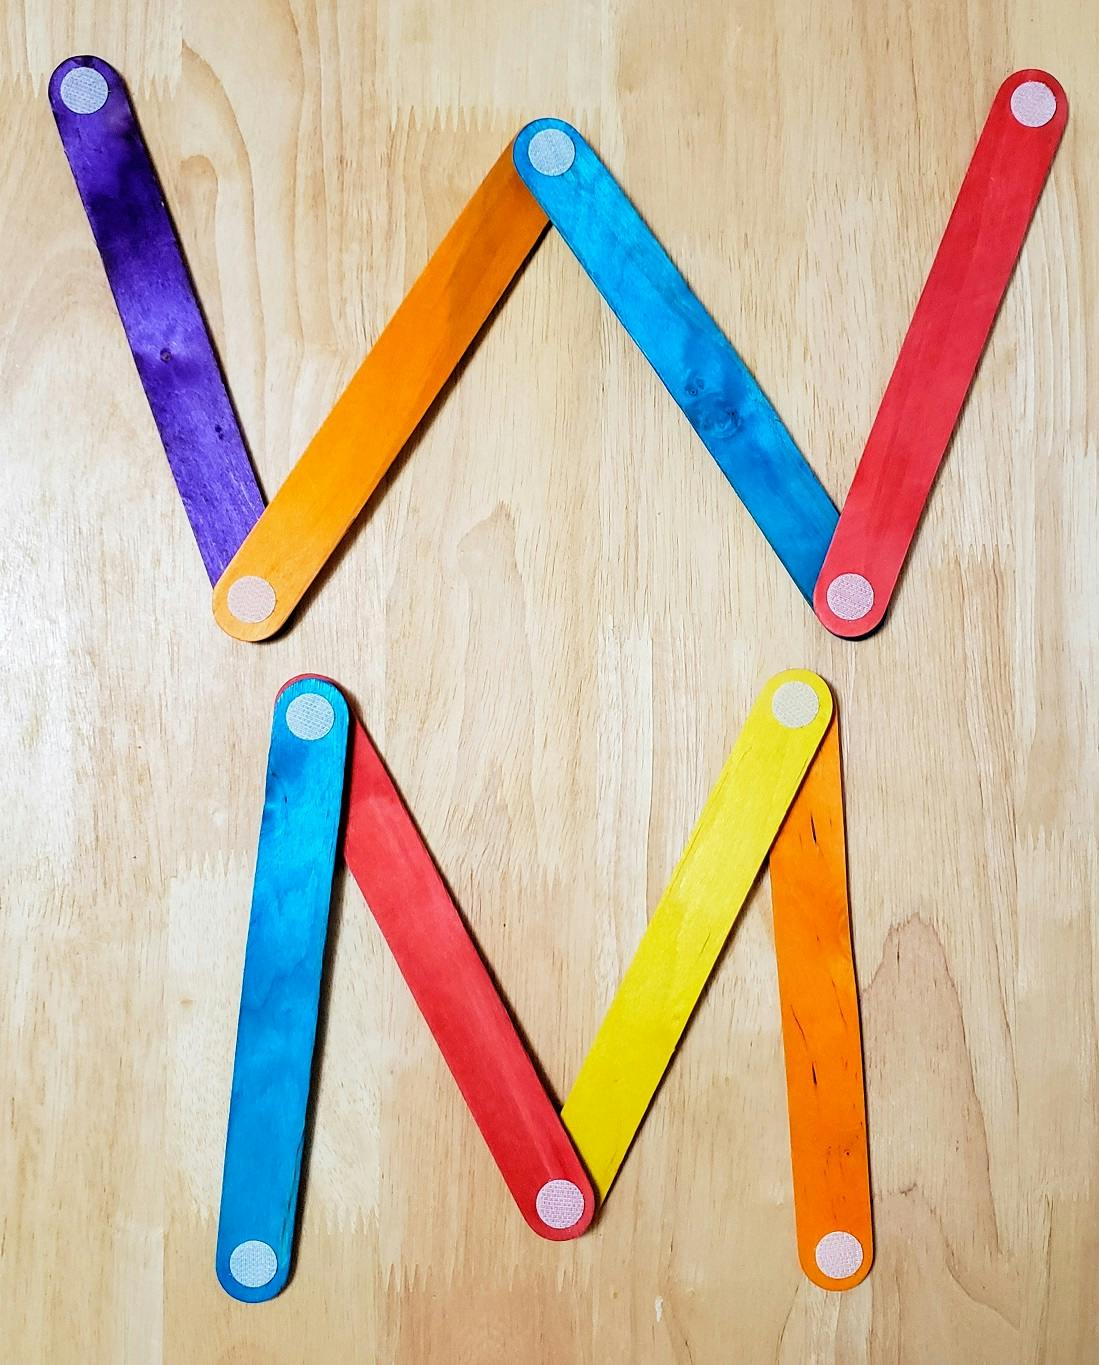
Ages 3-5
30-60 minutes
Velcro Popsicle Sticks
Description
This STEM program encourages kids to build by connecting craft/popsicle sticks with Velcro.
Number of Participants
For a minimum of 1 participant
Space Considerations
An indoor or outdoor activity on the ground or with tables and chairs for all participants
Competencies
- Development of fine motor skills
- Engineering
- Spatial relationships
- Understanding shapes
- Understanding cause and effect relationships
- Working collaboratively
Materials
- Craft, popsicle or bigger sticks (preferably coloured)
- Velcro dot stickers—smaller dots can be purchased at craft stores or online
- Design template
- Paper
- Pencils
Preparation
- Put paper and pencils in a designated area for everyone to access
- Check sticks for potential wood slivers
- Apply velcro to sticks (You can choose to make this part of the activity, instead of part of preparation)
Implementation
1. Give each participant a set amount of sticks.
- We recommend 8–10 sticks per participant if possible or you can distribute based on the number of participants.
2. Participants apply velcro stickers to the craft sticks (optional—you can prepare these in advance).
- Option 1: Prepare equal amounts of these two types of sticks
o Two rough (hook) stickers on each end of one side
o Two smooth (loop) stickers on each end of one side - Option 2: One rough (hook) sticker on one end and one smooth (loop) sticker on the other end
- Option 3: Two smooth (loop) stickers on each end of one side and two rough (hook) stickers on each end of the other side
3. Have the participants try one of the examples in the design template.
4. Explain that participants are free to work solo and the advantage of working in a group (more sticks).
5. Give participants the rest of the time to create whatever they like.
Accessibility Considerations
- Use large craft sticks or bigger sticks, as well as larger Velcro stickers. (Ensure that the Velcro stickers and sticks match in size.)
- Give kids the option to do the activity on their own or in teams, as desired.
Book Suggestions
Boxitects by Kim Smith
Gurple and Preen: A Broken Crayon Cosmic Adventure by Linda Sue Park
Follow Your Breath! A First Book of Mindfulness by Scot Ritchie
Download Links
Images and Templates
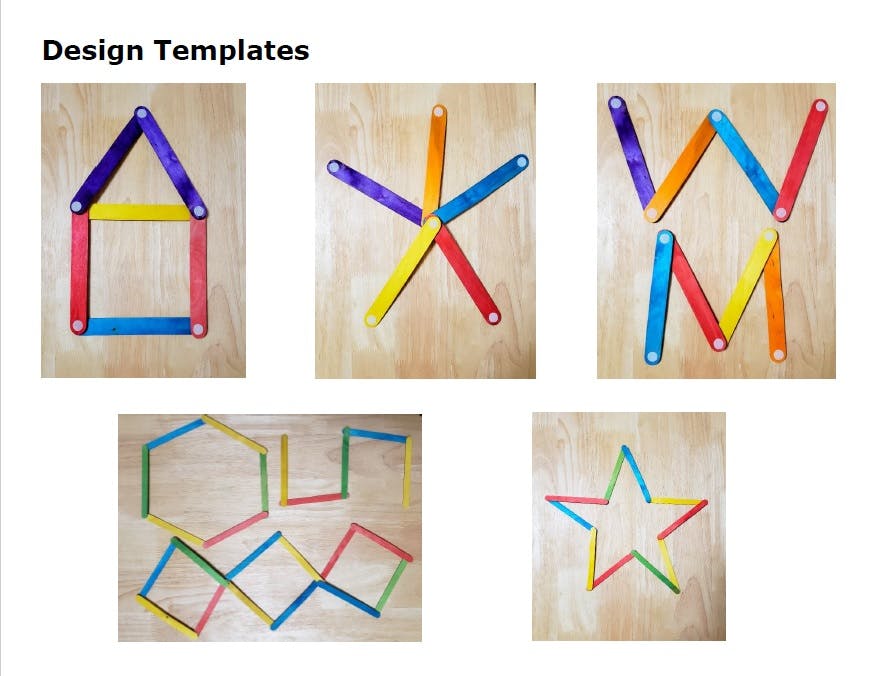
Download Velcro Popsicle Sticks - types of sticks and velcro placement
YES NO Barrier Game
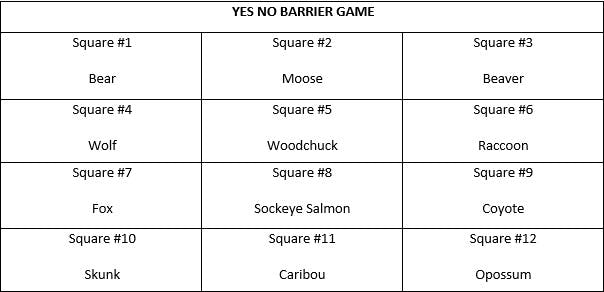
Ages 9-12
30-60 minutes
YES NO Barrier Game
Description
A game for two adapted from Battleship, in which each player takes a turn guessing where their opponent placed words on their game board.
Number of Participants
For a minimum of 2 participants
Space Considerations
Any space where participants may be seated for an activity
Competencies
- Eye-hand coordination
- Following directions
- Oral communication skills
- Spatial relationships
- Strategic thinking
Materials
- Game boards printed on card stock (one per participant)
- Word slips printed on card stock (one set of 12 words per participant)
- Barrier such as a board game lid (one per pair of participants)
- Paper
- Pencils or pens
Preparation
- Print out game boards
- Print and cut out word slips from the chosen language templates
- Print copies of the translation table for reference
Implementation
1. Distribute materials:
- one game board and a a set of animal word slips for each player
- paper and a pencil or pen for each player, to take notes if needed
- a barrier to place between the two players so that they cannot see each other’s game board
2. Players set up for part one of the game.
- Player 1 places an animal word slip in each square on their game board
- Player 2 leaves their game board empty for the first part of the game
3. When the players are ready, Player 2 will ask three questions about each animal’s position. For example:
- Is the bear on the left?
- Is the bear near the center?
- Is the bear in a corner?
- Is the bear beside the coyote?
- Is the bear in the first row?
- Is the bear in the first column?
4. Player 1 can only answer Player 2’s questions with “Yes” or “No.”
5. Player 2 may write notes as they begin to narrow down the position of each animal on the board.
6. This part of the game ends after 12 rounds of questions (3 questions per animal).
7. Player 2 tells Player 1 where they think each animal word slip is located.
8. Player 1 removes the barrier and reveals how many locations Player 2 guessed correctly.
9. The players then replace the barrier and switch roles. Player 2 places word slips on their game board and Player 1 must figure out where each animal is located.
10. The player who correctly identifies the most animal positions wins.
Accessibility Considerations
- Pre-cut word slips from the templates provided
- Make the game board boxes easier to locate by adding tactile features to the borders of the game board, such as:
o Playdough
o Wikki Stix
o 3D markers
o Craft glue (once dried will become tactile)
Book Suggestions
It’s a Mitig by Bridget George
Kudo Kids: Mystery of the Masked Medalist by Maia Shibutani, Alex Shibutani and Michelle Schusterman
Nibi is Water / Nibi Aawon Nbiish by Joanne Robertson
Siha Tookskin Knows: The Love of the Dance by Charlene Bearhead and Wilson Bearhead
Super Agent Jon Le Bon! A Virtual Adventure Season 2, Volume 1 by Alex A.
Download Links
Images and Templates

Download YES NO Barrier Game Cards
Download YES NO Barrier Game Translation Card
Download YES NO Barrier Game Word Slips - English
Download YES NO Barrier Game Word Slips - French
Download YES NO Barrier Game Word Slips - Inuktitut
Zoomba
Ages 0-3
10 minutes
Zoomba
Description
Play music as kids and their caregivers try to mimic animals in motion
Space Considerations
Indoor or outdoor space where you can play music and participants have enough space to move around
Competencies
- Body awareness
- Following directions
- Rhythm and music appreciation
- Sensory motor skills
- Understanding and appreciation of animals
Materials
- Any device to play music
- Any dance music of your choosing, or you can download our MP3 which is 10 minutes of copyright-free dance music
Implementation
- Introduce the activity by telling parents and caregivers that they will be dancing with their children. Babies can be held and swayed along to the music, and kids who are able to can dance on their own.
- Tell participants that you will call out different “Zoomba” dances as the music is playing. Participants may decide what that action looks like as they dance around the room. Staff can also demonstrate these actions as well as describing them (e.g. “hold your hands on top of your head like bunny ears while you take little tiny hops!”). Here is a sample list of actions that you can call out, with example actions (remember: you can encourage participants to decide on actions themselves for added creativity):
· Bunny hop: Gently hop around the room with your hands on top of your head like bunny ears
· Penguin shuffle: Short, quick, waddling steps with hands by your side
· Elephant stomp: Heavy and large steps
· Seal clap: Side-to-side shuffling movements and clapping hands
· Gorilla thump: Making yourself large and thumping your chest with your hands while you lean forward
· Alligator chomp: Clapping your extended hands up and down as you slowly move
· Swimming shark: Place a hand on top of your head to act as a fin and stealthy move around the room - It is recommended to alternate the actions you call out every 10 seconds to 1 minute, and you can repeat certain actions as many times as desired.
- For an added challenge, alternate slow and fast music and participants can attempt to match the speed of their actions with the music.
- You may also consider adding a freeze element, where you pause the music every so often and shout out the command “Freeze!”—participants will have to freeze in whatever position they are in until you resume the music. This may give them a much needed rest!
Accessibility Considerations
- Call out actions or demonstrate modifications to actions that are wheelchair-friendly—for example, seal clapping, gorilla thumping and alligator chomping can all be done seated. Gently moving side-to-side or slapping your hands onto a surface instead of your feet can also be used as modifications.
- Instead of dancing, encourage kids to make the relevant animal sounds that you call out along with the beat of the music—for example, bark like a dog, meow like a cat, etc.
Book Suggestions
Hide-and-Seek: A First Book of Position Words by R.D. Ornot
I Will Dance by Nancy Bo Flood
A Potato on a Bike by Elise Gravel
Rad by Anne Bustard
Yoga Baby by Amy Hovey
Download Links
Images and Templates


